10 Things to do at Honeymoon Island State Park
Honeymoon Island State Park should be on the top of your list to visit if you're in the Tampa/Clearwater area. The beaches are beautiful, the crowds aren't nearly as bad as the main Clearwater beaches, and there is plenty to do. Probably the best $8 per carload you can spend (or $120 if you want the one year Florida State Park pass).
https://youtu.be/V60BIKWoAjE
We have spent a lot of time at this park, so without further ado, here is our:
10 Things to do at Honeymoon Island State Park
Sit on the Honeymoon Island State Park Beach
Clearwater beaches are known for their beauty, and Honeymoon Island delivers. You will love the white fine sand and the deep blue waters. Although not the biggest beach, and some parts are a bit rocky (depending on the tide and how bad the storms have beat it up), it is still a pleasure for chilling on.
Of course, like most Florida beaches, the crowds are very dependent on the weather and the time of year. For most of the winter, we enjoyed a lot of quiet time on the beach - very few people come to the state park, especially during the week. But once the weather warms up, it can get VERY crowded and a bit crazy. We went on a Sunday at the end of February (first day in the low 80's) and the park was absolutely packed. I guarantee that the main Clearwater beach was even worse!
Walk the Trails
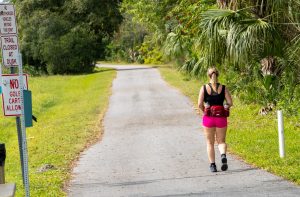
The trails at Honeymoon Island State Park aren't particularly long, but you are rewarded with a tropical environment that is pretty unique. Hitting all the trails on the north side of the island gets you about 3 miles of hiking. One has a loop and goes through the center of the island. The other runs closer to the beach. At the northernmost point of the trail they both dump onto the north side of the beach. The terrain is very flat, and is mostly dirt or sand. It can get pretty muddy if it has been raining, and some areas are tough to pass on a mountain bike due to deep sand.
One thing to absolutely bring is mosquito repellent. We ran into certain areas that were absolutely infested - our legs were covered with more mosquitoes than we ever had seen in our lives!
Eat at the Restaurant
There are actually two small restaurants at Honeymoon Island - pretty basic grills with burgers, hot dogs and chicken fingers. Expect to pay above average prices for this luxury! We would always pack our lunch. Both healthier, and easier on the wallet!
Take the Ferry to Caladesi Island State Park
The only way to Caladesi Island is via the ferry crossing at Honeymoon (unless you have a boat or jet ski!). Check out our article on Caladesi or our video!
Ride a Bike on Honeymoon Island State Park
The park isn't huge, but it has a surprisingly nice paved bike trail throughout. Smooth, wide and well-marked. And if you have a mountain bike, the 3 miles of trails are also accessible by bike. We would rate it as an easy mountain bike trail, with the only challenge being some sandy sections that you might have to walk unless you have fat tires. The trail is smooth enough for rollerblades or roller skates - they did a good job on building it out!
Rent a Kayak
Although not available directly in the state park on the south side of the Island. Also, just outside of the park is a Kayak rental store called Sail Honeymoon. for about $60 per day you can explore the island from the water!
Explore the Visitor/Nature Center
The visitor center has a lot of interesting information and is worth the visit. Make sure you go out back and take in the view of the gulf! They maintain a garden of native plants just outside the visitor center, which is a quick informative tour.
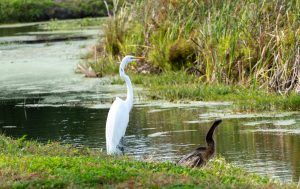
Enjoy the Wildlife
A variety of wildlife exists on the island - plan to see a ton of turtles, armadillos, birds and the occasional rattlesnake. Schools of dolphins are often playing right next to the beach.
Bring Your Pet on the Beach
The first section of the beach actually allows pets, which is great for dog lovers!
Watch the Sunset at Honeymoon Island State Park
Almost the entire beach is west-facing, offering some of the best sunsets in Florida! The best ones are when the sky is partly cloudy. The clouds just really make for an amazing show. In our opinion, one of the best places to hang out for the sunset is actually just outside of Honeymoon Island - you can park on the causeway beach right next to the water and put your chair out. Makes it a lot easier to get out of traffic once the sun sets!
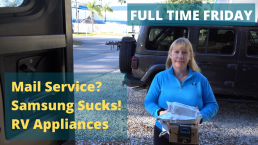
Mail Service, Samsung Sucks! #FTF #FULLTIMEFRIDAY
Episode 2 of FTF! Samsung sucks, do you agree? And we talk about mail service!
Welcome to full time Friday or FTF! What is FTF you ask? Well, it’s our chance to talk about whatever is on our minds - often RV related, but could be about anything! This is our chance to connect with our audience, even more than our normal how-to and travel videos. So make sure you comment if you have any questions you want us to address in a future FTF!
This week we cover:
- Mail service - easy peasy or PITA? Comment below!
- If Amazon delivers every day, where does all of it go??
- Vloggers everywhere!
- This is the way!
- Why Full Time Friday?
- Samsung SUCKS!
- Samsung SUCKS 2!
- Top Pop! Popcorn popper
#FTF #FULLTIMEFRIDAY #RV #RVLIFE
https://youtu.be/Us9zFACJMVM

Top 5 Accessories For Your RV
These are the top 5 accessories for your RV that can make your travels easier. Because sometimes it just takes a few accessories to make your life either. During our travels we have found a few must-haves to make our travels easier.
Top 5 Accessories For Your RV
Shark Genius Hard Floor Cleaning System
We wanted to find something that would clean our floors without having to get on our hands and knees and do a great job. After some research, we bought the Genius Steam Pocket Mop.

This steamer isn't the cheapest, but it's pretty reasonable around $120. It came with 2 mops which is really nice, and it's easy to buy more if you need them, like this six-pack for $30. What we love about this steamer is you can just throw the pad in with your wash once it gets dirty, keeping cleanup to a minimum. It also has 3 levels of steam, depending on how bad your floor is. If you have some really bad spots on your floor, just flip the mop and hit it with steam directly. Pretty cool!

Water Pressure Regulator
We thought a water pressure regulator was kind of a nice-to-have, but we took ours off for a few days to test an issue with our icemaker. What a mistake! The PEX connection in our master bath started leaking, causing water to get all over the floor (and even worse, under the tiles). The cold hard truth is you NEVER know what kind of pressure you are going to get at a RV park, and your RV is not equipped to handle high pressures (even worse than a house for sure). You can get a decent one here. Check out our in-depth article for more information!


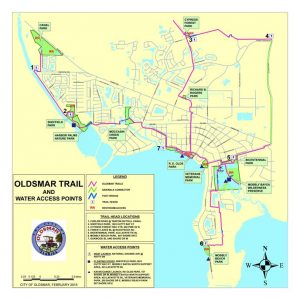
Oldsmar Trail Hiking
We have spent most of the Winter of 2021 in Tampa, close to the city of Oldsmar. And one thing we discovered is that Oldsmar trail hiking is far more interesting than you would expect. Even though it is very urban in this area, they have done a decent job of making a set of hiking trails, connected by mostly residential streets. They claim there is 11 miles of trails, and that sounds about right!
Oldsmar Trail Hiking
What we ended up doing is starting at the center of the Oldsmar parks (which has the most parking lots) and then breaking our hikes into three distinct sections, each with unique quirks and features - each hike allowing us to get easily up to 8 miles round trip on a bike or a hike.
Our Oldsmar Trail Hiking Starting Point
We always start our adventure at the same spot - one of the many parking lots at R.E. Olds Park or the parking lot at Veterans Memorial Park. We could start Sheffield park (they also have free parking) or xxx. Mobely park is another option, but that is paid parking so unless you want to start at that one because of the beach (not that great of a beach) then don't bother.
We found it easiest to go down Lafyette road (off Tampa rd/580 and opposite Race Track Rd) to get to these parks.
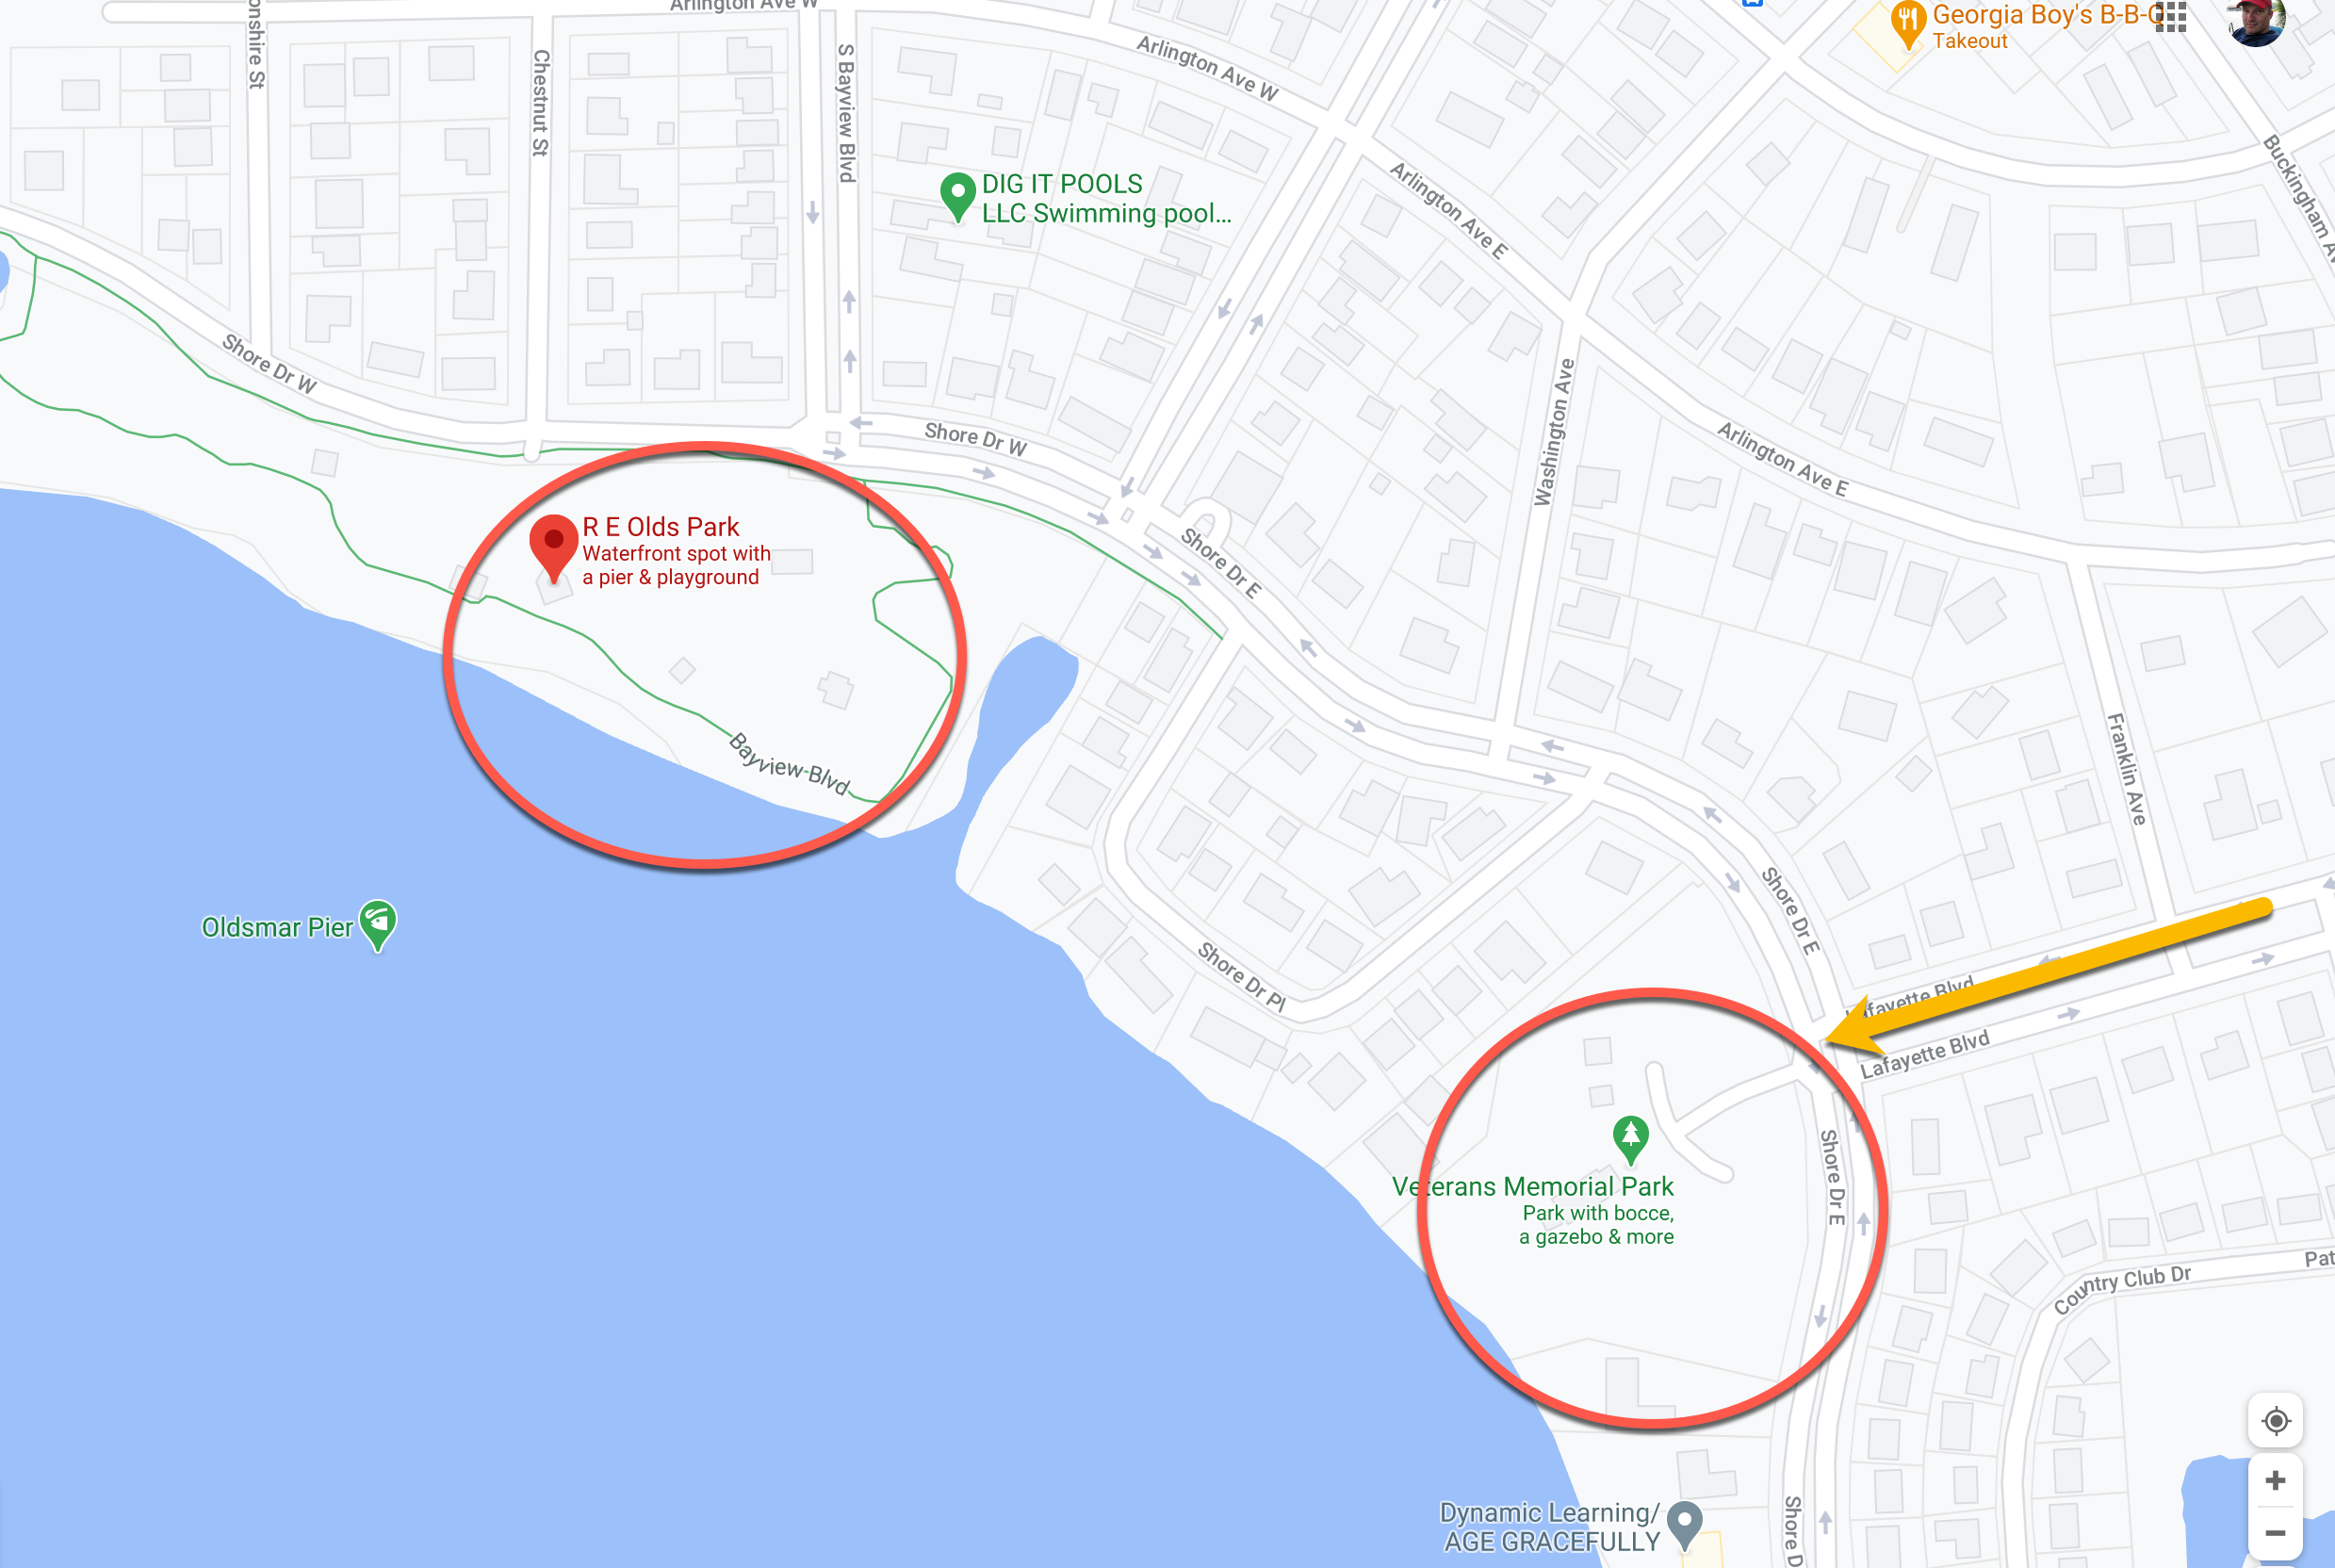
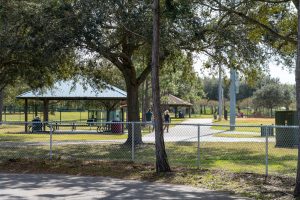
The parks themselves have plenty to offer - a lot of playgrounds for the kids, restrooms, pavilions and decent access to the water. The parking has always been safe, and the crowds have been pretty decent (although this is winter during a pandemic, so your mileage may vary). Once we park, we then have 3 major loops we can take depending on our mood. Each require some surface street walking, but will reward you with some very pleasant trails and access to even more parks and beaches!
Lake Tarpon Canal Route
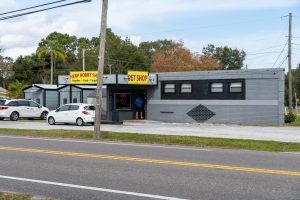
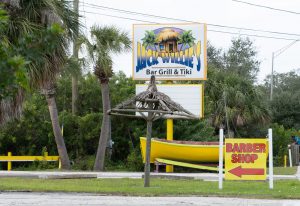
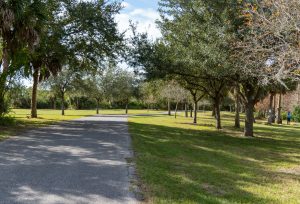
Our first route and probably favorite goes to the Lake Tarpon Canal and ultimately to the Oldsmar Sports complex/BMX park (shown as Canal Park on the map above). If you start at R.E. Olds Park, once you get through the park (which is a nice walk itself) you will then be on surface streets. Not too bad (you will pass the Herp shop, which sells reptiles), and Jack Willie's bar. Once you pass Jack Willies you have to cross 580 - be careful! The drivers here are crazy! Once you have crossed 580, go past the railroad track and look to your left - you will see the trailhead entrance.
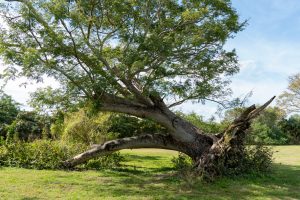
Some of the sights along the way!
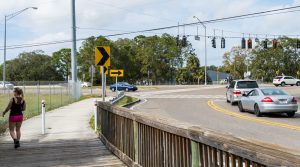
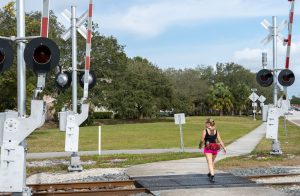
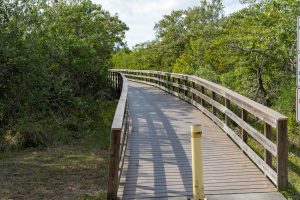
Once you're on the trail it's really nice! This takes you through Moccasin park which has a few dirt trails that you can explore. The main trail through here is paved and has well-maintained wooden bridges. After you walk this part of the trail, you will enter a residential street (3rd photo).
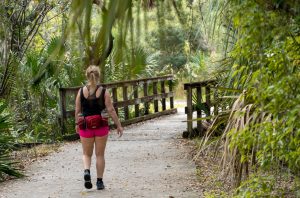

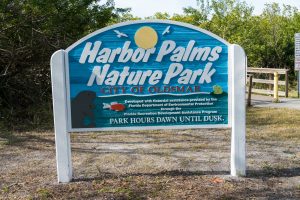
Walk down this street for about 10 minutes and you will make it to the Harbor Palms Nature Park trailhead.
This is the map to Sheffield park (click to expand):
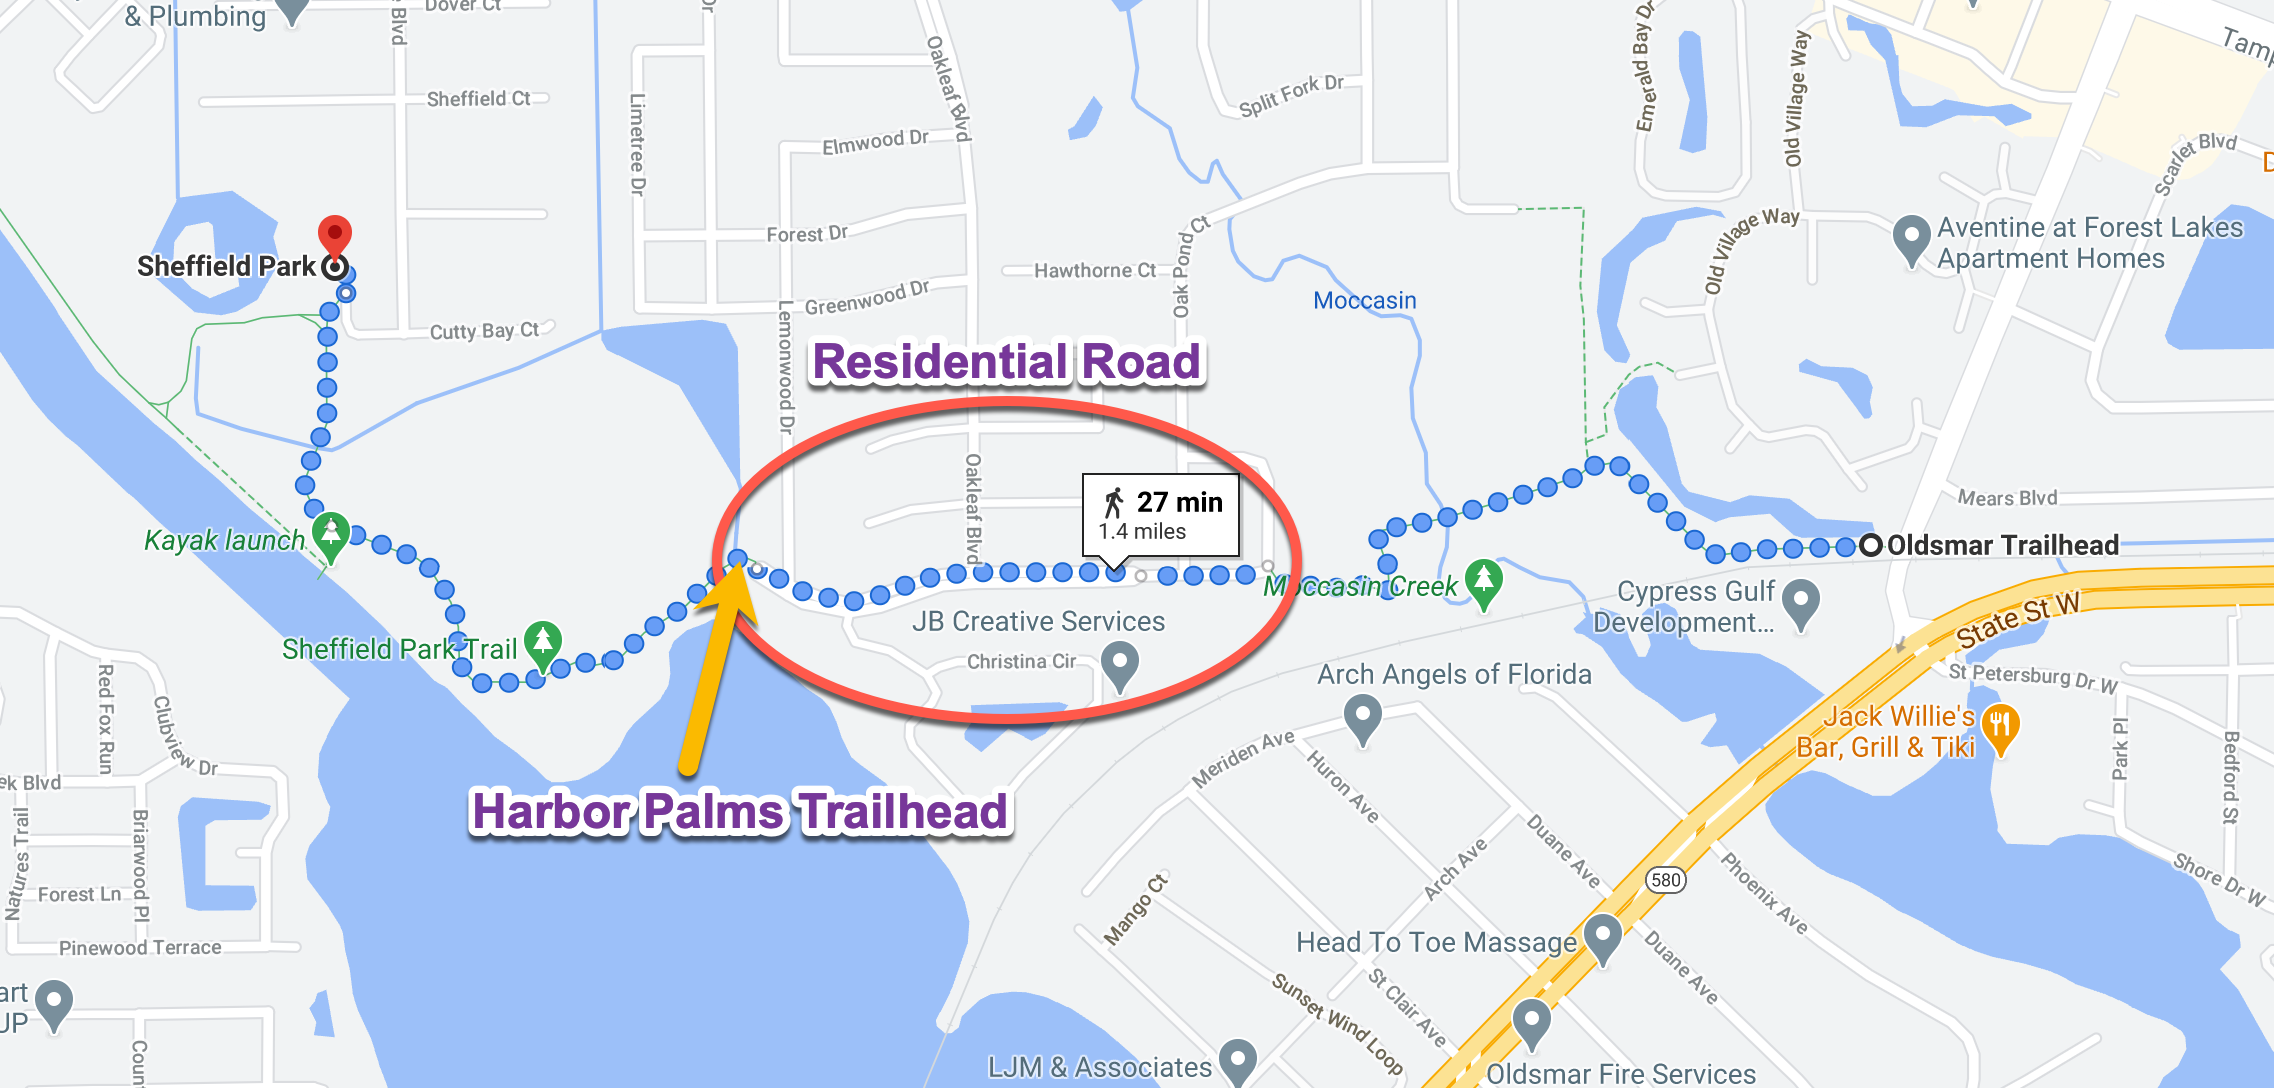
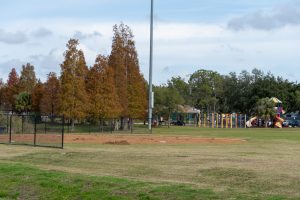
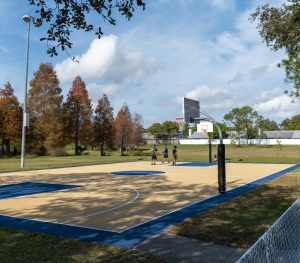
At the end of this section is Sheffield Park. The park has ball fields, basketball court, playground and a nice pavilion. Most importantly it has bathrooms! You are roughly at the 2.5 mile point if you start at R.E. Olds Park. So plan on at least a 5 mile hike if you make it to these bathrooms! There is also free parking available if you want to start from this park.
Mobely Beach Route
Cypress Park Route


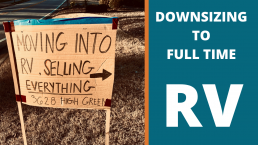
Downsizing our House - Full Time RV
We started downsizing our house on January 2020 - this was shot in February 2020 at the beginning of our downsize journey. Our goal was to go full time in a motorhome in 4-6 months, which turned out to be 10 months! Christy and Garrett talk about the apps they use to sell stuff, and the fact that the write-off for charity is no longer as good tax-wise as it used to be. In the middle of downsizing we also managed to replace both our Jeep bumpers!
Our Full Time RV Story
People have many reasons why they go full time in their RV. This is our story!
https://www.youtube.com/watch?v=Z-YjlILQtAA
Our Full Time RV Story
Dreaming of Full Time RV
Many years ago, we somehow stumbled upon RV videos on Youtube (thanks Google!) - and quickly discovered Gone with the Wynns, Technomadia, the RV Geeks, Nomadic Fanatic way back in the day (like 2015!). Over the years we found RV Love, You me and the RV, Changing Lanes and KYD (and many others!). We dreamed of doing this ourselves - the thought of downsizing, simplifying, and enjoying experiences instead of "things" really appealed to us.
Full Time RV Becomes a Reality
For many years this was just a dream for us. But in 2019 this all changed. Christy had been at UPS for 30 years, but could not retire until 55 (which was still 5 years away). But UPS unexpectedly decided to outsource her entire customer service department to Guatemala. They laid off her entire department, which was horrible for the junior people, but turned out to be a blessing for Christy and our dreams of living a full time RV life!
She came upset with this news, and I told her "do you realize we can go full time in an RV now, right? Since she got a good severance package, she could actually retire at 50 if we managed our expenses well. I was still working, but I knew if I could work another year or so I would be in the same position. So at the beginning of 2019 we decided that in one year we would start the downsize process and hit the road!
We spent most of 2019 planning our adventure, and starting to seriously think about what type of RV we would get. Our thoughts wandered all over the place - one week we figured a motorhome made the most sense, then the next week it would be a 5th wheel. And sometimes we think we need to REALLY downsize and thought we could live in a 25 foot travel trailer or airstream. I spent a huge amount of time researching and we came up with a list of nice-to-haves:
- King bed - Knowing the beds are already smaller in an RV, this seemed a must
- TV layout - We wanted the TV to be across from the couch (not on the other side of the kitchen table or above the windshield)
- Aquahot - the advantages of having infinite hot water and a relatively quiet furnace seemed very worth it!
- 10K towing - Towing our Jeep
- Bath and a half - Having a small bathroom would allow us to have a compost toilet
- Induction cooking
- Dishwasher
- Washer/dryer - We didn't really want to be hitting laundromats every 2 weeks.
- All-electric - Having one less fuel on board would make things more simple
- Side radiator - Everything we read made us feel a side radiator coach would be superior
All of these definitely started pushing us toward a motorhome. Additionally, we wanted to not have to get ANY paid-for storage for our stuff. So we needed to downsize a 2800 square foot house into our new RV!
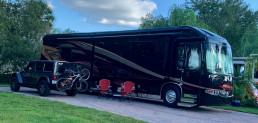
The summer of 2019 we found a 2015 Entegra Cornerstone for sale up in Ohio - the price was just too good to ignore. We flew up to see it, and ended up buying it! I had to get back to work so we drove all the way back to Atlanta almost 800 miles in 24 hours. We had never driven a motorhome before, and now we were driving a 45 foot, 50,000lb beast. Talk about some serious stress. Now we were committed!
Full Time RV Solar - Going Big
Even though we had never done it, we knew we liked the thought of boondocking and having a RV that was somewhat independent of being hooked up in a campground. So we started making plans for a solar build on our new-to-us motorhome - This turned into quite the major project, and $15K in expense (before the solar tax credit). The cool thing is we can now power ANYTHING in our coach off our our new battery system and solar. We added 2680 watts of solar panels, and a 14KW lithium battery bank.
Full Time RV - Downsizing Here we Come!
2019 ended a little differently than we thought it would - Garrett's company laid him off unexpectedly in December, which allowed us to focus even more on the downsize (he had planned to quit in a few months anyway, so it wasn't the end of the world). We started 2020 focused on getting rid of everything and prepping the house for sale. Little did we know this would be a full-time job for 10 months! Add in a quarantine in the middle of everything, and it was a crazy year. We went through house renovation, 3 contracts, and hundreds of Craigslist/Marketplace/Letgo sales to get to the finish line.
Full Time RV - Finally!
We finally hit the road in October 2020. After a few few Passport America campgrounds along the way, we are now in Tampa, Florida. We had planned on making it to Quartzsite this year, but thanks to the pandemic we hunkered down at Bay Bayou RV resort in Tampa. We are looking forward to heading to Savannah in April and finding out what awaits on the big road adventure ahead!

Top 5 Kitchen Gadgets for RV Living
Our kitchen gadgets for RV living aren't too much different than the ones we had in our house. But there are some nuances - the smaller kitchen means that we have less of everything. Gadgets that can do multiple tasks are high on the list. Big bulky appliances are a harder sell - if they don't make the cut they get quickly dispatched (We're looking at you, air fryer). Here are a few of the things we just love in our RV!
Top 5 Kitchen Gadgets for RV Living
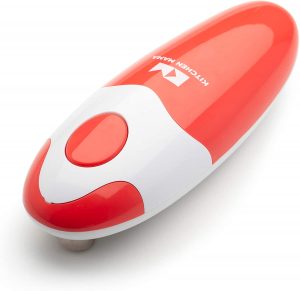
Kitchen Mama Electric Can Opener Kitchen Gadget
We just recently bought this hands-free can opener and really loved it! You can open your cans with a simple push of a button. No more sharp edges and it's battery operated. When finished, it removes the top for easy disposal with no mess! When you have 7 cans to open for our Instant Pot chili, this device is killer!
Instant Pot Duo 7-in-1 Electric Pressure Cooker
For us, we just LOVE our instant pot to make some of our favorite meals. There are so many things you can cook in an instant pot. Garrett makes the best Instant Pot chili and I like to cook our oatmeal groats for breakfast. You can also boil the perfect eggs and steam veggies very quickly. Perfect tiny living appliance.

The Original Hotpop Microwave Popcorn Popper
You would not believe how good the popcorn is from something so simple. This Hotpop Microwave Popcorn Popper is simply a silicone bowl with a silicone lid. And we find it super easy to use. Here's the steps we do:
- Add popcorn - We usuallyput anywhere between 1/3 cup to 1/2 cup of kernels in the bottom. We really like Orville Redenbacher popcorn in the 8 pound container. It is cheap and tasty!
- Add Oil - We usually spray a little bit of no-calorie olive oil, or pour in some real olive oil (adds calories, but the corn is even juicier!)
- Add salt - Grind some salt on top of the kernels
- Shake the Kernels up!
- Microwave on High - We found that 2:30 was the sweet spot in our old house microwave, but it takes 5 full minutes in our crappy Samsung microwave in the RV. It also wastes almost half the kernels for us in the Samsun (that did not happen with the Whirlpool we used to have). Still tasty either way!
- Add more salt - We throw in a bowl then put a bit more salt on the top. We like salt!

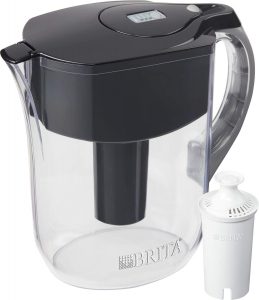
Brita Water Pitcher with 1 Filter, Large 10 Cup
We decided to buy this Brita Water Pitcher with filter for an extra water filtration system even though we have water filters in our coach. This BPA-free Grand water pitcher with filter holds 10 cups of water. Love my Brita!!
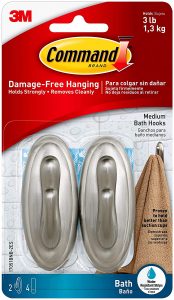
Command Traditional Plastic Hooks
We bought these command hooks to hang our kitchen towels so they would be out of the way. They are easy to install and are damage free hanging on the wall. They come in a variety of different sizes and colors. We purchased the brass nickel one.

6 Tips for RV Grocery Shopping
RV Grocery shopping can really be a challenge! When we lived in a house, life was much easier. We went to Kroger and Aldi every week, used coupons, and earned points for really cheap gasoline. Once we hit the road full time, we quickly had to change our strategy.
Of course, everyone has different eating habits, so these tips may or may not work for you. Here is how we would define our eating habits:
- We tend to eat relatively simple meals and whole foods with an emphasis on protein (see our fitness article to find out why)
- We eat a relatively repetitive diet - we would like to try other things but it makes tracking calories harder and we are pretty lazy!
- Our shopping trips tend to be larger and less frequent if possible (who likes shopping!)
Hopefully some of these tips will help you!

6 Tips for RV Grocery Shopping
We find this tips to be a good balance of saving money and getting quality food, which is very important!
Break Down Your Must-haves for RV Grocery Shopping
Everyone has food habits - items that are gotten every week and make the foundation of your eating.
Map Out Your Shopping Options
RV grocery shopping is very dependent on how long you are staying in an area - if you are just passing through, your options may be limited and/or you're too tired to bother. But if you're staying for a week or more, its worth a bit of time to find your shopping options. We try to keep it under 15 minutes from our campground if possible, because gas isn't free and we have better things to do than drive all over! Once we have mapped these out, we try to work in shopping with other errands or trips to the gym. This minimizes our driving and saves time.
- Identify shopping options - ideally you can get everything from one place, but that might not be practical.
- Optimize your shopping list - decide the best place to buy each item. Make substitutes if your favorite items aren't available or too expensive (Walmart Mio vs real Mio for example)
- Set a rhythm for grocery shopping - Be flexible, but having a schedule can help keep the fridge full and food fresh. We typically go to two different stores twice a week for the bulk of our shopping. But we have to make a quick run-in to Target or Publix to get our favorite frozen pizza - Newman's own!
Get to Know the Chains
Some chains are regional, and others are national. But the stores within a chain are typically very similar in layout and their sales strategies. Here are what we found for each chain we are familiar with:
- Kroger - Prices are generally lower than Publix, but higher than Walmart. They often have good "red tag" or "blue tag" sales if you buy in bulk. They have the best reward points program - if you shop there a lot you can also save substantial money on gas at their fuel centers (up to $1.00 per gallon).
- Publix - Generally better quality stuff, and often at a substantially higher price. A bushel of kale was twice the price of others! Best strategy here is to take advantage of their weekly 2-for-1 deals!
- Aldi - One of our favorites. Small, but great for stocking up on good quality food. We bulk-buy here alot! Their house brands are solid.
- Steaks (yum - and sirloin is cheap)
- Yogurt
- Cottage Cheese
- Almond Milk
- Bottled water
- Walmart - Cheapest and huge selection (and not just food). See next tip.
- Target - Surprisingly large selection of food and decent prices. Certainly works well in a pinch.
Don't be Afraid of Walmart
We will admit it, a little piece of us dies every time we step into a Walmart. There is just something about the big crowds and chaos that hurts your soul here. But if you want the lowest prices of any chain with the biggest selection, this has to be on your list. And they are in pretty much EVERY town in America. In our experience, they don't really have many killer sales, but every item seems priced consistently lower than any other major grocery chain. For example, we buy 5 dozen of eggs for under $4.00 - that's insane!
Buy in Bulk if You Can Afford the Space
Certainly it is a challenge to store large quantities of items in most RV's - and ours is no exception. But when we do our grocery shopping, we try to buy bulk to save costs. This can be a challenge for items such as paper towels, soda, toilet paper and other bulky stuff.
Don't Be Afraid of Mom and Pop Stores for RV Grocery Shopping
It is definitely worth knowing the chains when you are RV grocery shopping - when you are in a new area, the familiarity of a chain makes shopping quicker and typically cheaper. But you can often find unique items and get much better customer service at smaller grocers, especially in smaller towns.
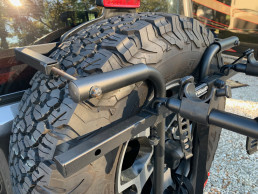
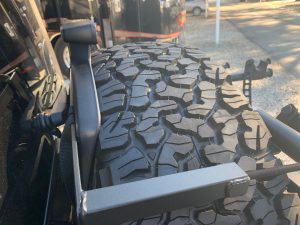
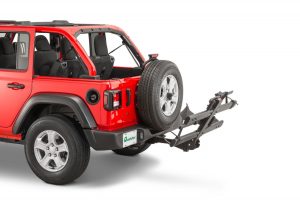
Jeep Wrangler JL Bike Transport - 5 Best Options
Jeep Wrangler JL bike transport options can be tricky - you definitely have a couple challenges when you want to transport a bike or two.
The main disadvantage compared to older jeeps is the placement of the backup camera - it sits right in the middle of the spare tire! Older jeeps didn't have the camera, so bike racks could screw onto the spare tire bolt pretty easily.
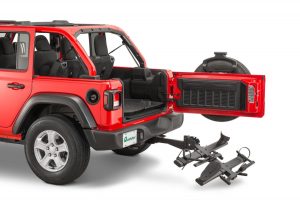
The other challenge with a jeep is the tail gate - because it swings outward, any sort of rack that uses the hitch will make it impossible to open the back, which is super inconvenient. There are only a couple options that can swing away and avoid this problem.
So in our quest for our Wrangler rack, we put together a simple list of requirements:
- Handle two mountain bikes
- Allow the gate to be easily used with the bikes on or off
- The backup camera should be still useable when the bikes aren't mounted
- Not stick super far beyond the back of the Jeep
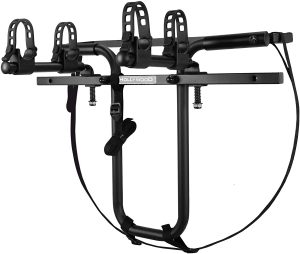
What We Chose
For us, it came down to the Hollywood Racks SR1 spare tire rack. This Jeep bike rack ended up being a pretty inexpensive solution and working out really well. We wish it could have been a bolt-on solution, but the straps turned out fine (although a bit messy, we could probably clean that up).
After two months of use, we just leave the rack attached to our Jeep and throw the bikes on the back anytime we want to take them to the beach. If we are going somewhere we can't watch the bikes, we throw on our Vulcan 9 foot chain with Viro lock on the bikes. Ironically, the lock cost even more than the rack itself - but it's a serious lock.
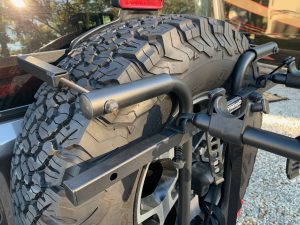
There is a little bit of rust on the bolts after a couple months, but nothing too serious. Honestly, we can't beat this for the price. If we wanted to move to E-bikes, we will also have to get a new rack, as the Hollywood Rack (like any other tire rack) just isn't strong enough to handle the weight.
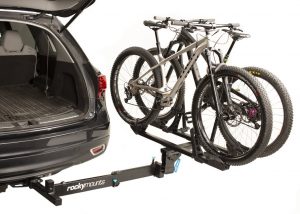
Don't Want a Spare Tire Rack - Use a Hitch Rack
Hitch racks are more pricey, because they require more parts and have to be stronger since they stick further out the back of your jeep. It is definitely a downside to have the bikes stick further back - when we are set up to tow the Jeep with our 45 foot motorhome, any added length is not welcome! The . Obviously, you need to have a hitch on your Jeep for these to work. Most are adaptable to either 1.25" or 2" hitches.
The big challenge on the Wrangler is that spare tire. You have 3 options here:
- Get rid of your spare
- Use a hitch extender
- Use a swing-away
Getting Rid of Your Spare
This is certainly an option, and many Wranglers with 37's or bigger don't run with a spare anyway. But you need to have a way to deal with flats - fix a flat or some other option. And you will still need a swing-away or swing-down if you want to be able to
Hitch Extender
A hitch extender lets your bike rack sit further back on the back of your Wrangler. Make sure it has the weight capacity rating to handle both your rack and bikes.
Swing-aways
A swing-away also extends your bike rack out from the back of your Wrangler, and has the added benefit of allowing the rack to swing away from the back of the Jeep, allowing you to open the back fully.
RackAttach
The RackAttach from 1up is a solid option for a swing-away. It is pricey - the cost was $400 with tax and shipping to our location.

Hitch Racks
Hitch racks are a better option for heavier bikes. They are typically built far sturdier because they are hanging off the back of your hitch. The downsides pretty big also:
- Cost - usually much higher, some even approaching $1,000 or more by the time you are fully set up.
- Length - they put your bikes much further behind your jeep, especially with an extension or swingaway.
- Weight - Because they need to be more sturdy, the hitch itself weights much more than a spare-mount rack. If you have to remove it often, better hit the gym!
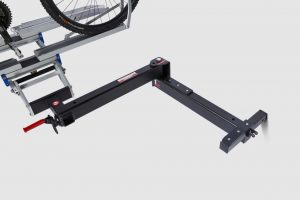
Rockymount Backstage
The Rockymount Backstage has a built-in 180 degree swingaway. Pretty heavy duty, and can handle up to 120lbs. This is enough to handle all but the largest e-bikes. They sell an 8" hitch extension will probably be necessary to clear your spare tire. One cool feature is it can swing down or swing away.

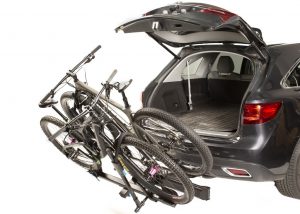
Quadratec 2-bike Platform Rack
The Quadratec 2-bike rack can be used on a stock Wrangler JL without an extender or a swingaway. It lets the back gate open by swinging down. If you have a bike in the inner position, it will seriously limit the amount you can open your gate.
Thule
Thule is pretty much the king of bike racks. They are also some of the most expensive racks made. They have a ton of different, models and the Thule Pro XT2 is a great choice for a Wrangler. It also drops down, but if you want it to move out of the way of your gate (especially loaded), you will need a swingaway.

Kuat
Kuat makes very nice a very nice swingaway rack in the NV 2.0. It does come in pretty expensive at $789, but it already has the swing-away built in which is really nice.

Wrangler Bumper Tow - Is It Safe?
When we started researching how to pull our Jeep, we immediately realized that a lot of decisions had to be made. It turns out there is plenty of options for tow bars, braking systems, and related components.
A little background on what we have and our goals. Over a year ago we bought a brand new 2019 Wrangler Rubicon Unlimited (the 4-door model). While we are not hard-core jeepers, we do have a background in motocross/dirtbikes, and definitely plan to do fun things with the Jeep too! While we don't want to go crazy with 37" tires and a lift kit (yet), we wanted to make sure our upgrades and our ability to tow the jeep with our motorhome didn't get in the way of our goals.
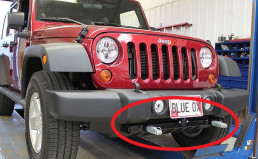
To that end, one thing we were concerned with was the use of a traditional base plate on our Wrangler. They stick out of the bottom of the front bumper, which reduces ground clearance. They also don't look that great!

Pulling from the Wrangler JL Bumper
The solution is to pull from the bumper D-ring mounts. Unfortunately the stock bumpers of our Jeep doesn't even have D-ring mounts, so it was time to go bumper shopping.
The market is now saturated with JL bumpers! But a year ago, that was not the case. At the time, we looked at the following bumpers:
Rockhard Aluminum Patriot Series
Smittybilt XRC Gen2 Front Bumper
We liked all three of these - the Rockhard was especially interesting because it was aluminum, which cut the weight substantially. The Smittybilt was the cheapest of the bunch, which we also liked. But in the end, we went with the LOD bumper, both front (Signature) and rear (Destroyer). Why did we go with LOD? Lets go through a little story about the Wrangler JL.
Tale of the Wrangler JL
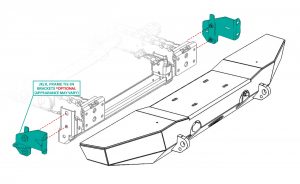
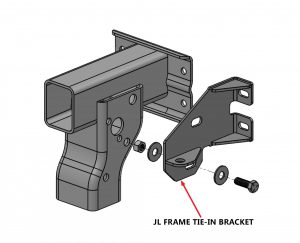
It turns out that Jeep changed how the bumper is attached to the frame with only two bolts on each side. Many people have questioned the strength of this setup if you tried to pull your 5,000lb jeep around by the bumper. It is actually quite the lively controversy on Jeep forums. Many people do it and don't seem to have a problem, but Jeep doesn't appear to support it. The base plate shown above gets around this by attaching directly to the frame of the JL. So we were worried about this - the last thing we wanted was our bumper ripping off while we were heading down the highway at 65 miles an hour. Nothing would ruin your day like a detached 50K Jeep playing bumper cars!
So how do we pull with our bumper and feel good about it? Turns out that LOD had an answer for this:
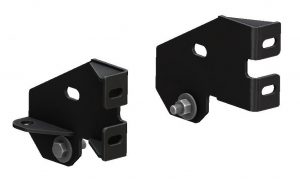
These brackets slide between your bumper and the frame, and then have a third bolt that then locks onto the frame. We felt that was a great solution for us. And