
10 RV Organization Hacks You Need for a Clutter-Free Adventure
Living the RV life is all about embracing minimalism and downsizing your possessions - time for RV organization hacks! When you're constantly on the move, keeping your tiny home on wheels organized can be a real challenge. Fear not, fellow RVers! We've scoured the internet to bring you the top 10 RV organization hacks that will transform your cluttered space into a tidy haven. From clever storage solutions to nifty gadgets, these products will help you make the most of your limited space and keep everything in its place.
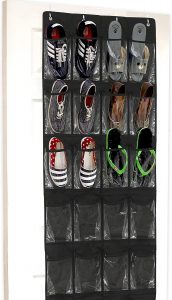
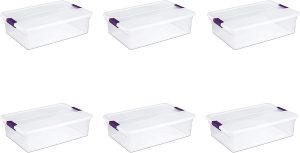
- Over-the-Door Shoe Organizer - This shoe organizer is a versatile and inexpensive option for storing items such as shoes, toiletries, and cleaning supplies. It easily hangs over the door and is a great space-saver.
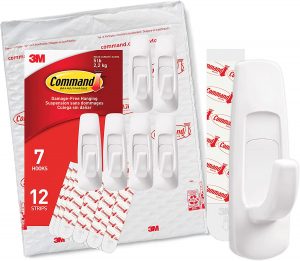
- Command Hooks - Command hooks are a must-have for RV organization. They can be used to hang towels, jackets, hats, and more without damaging the walls. Plus, they come in a variety of sizes and strengths to fit any need.
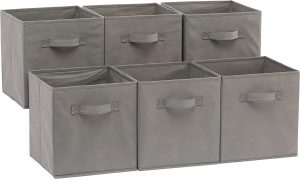
- Collapsible Storage Bins - These collapsible storage bins are perfect for organizing clothes, toys, and other items. When not in use, they can be easily folded and stored away.
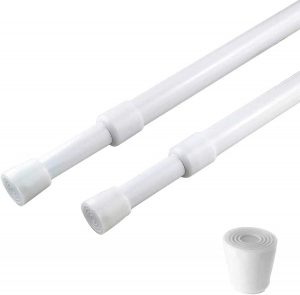
- Tension Rods - Tension rods are a great way to add extra storage to your RV. They can be used to create hanging storage space in small closets or to divide a larger closet into sections.
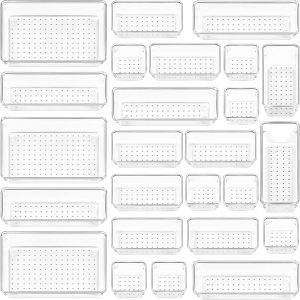
- Drawer Organizers - Drawer organizers are essential for keeping your RV drawers neat and tidy. They come in a variety of sizes and can be used for everything from kitchen utensils to socks and underwear.
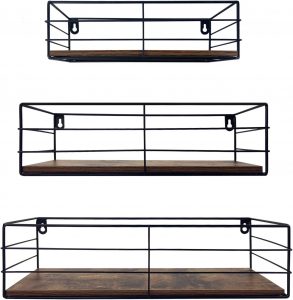
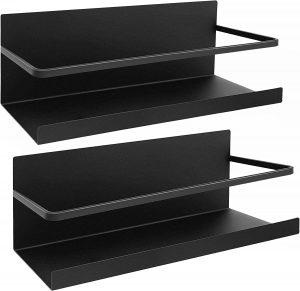
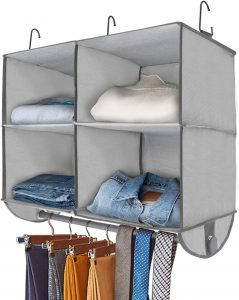
- Hanging Shelves - Hanging shelves are a great way to create extra storage space in your RV. They can be hung in closets or from the ceiling and can be used to store clothes, towels, or other items.
- Magnetic Spice Rack - A magnetic spice rack is a space-saving solution for storing spices in your RV kitchen. It can be easily mounted on the wall or refrigerator, freeing up counter space.
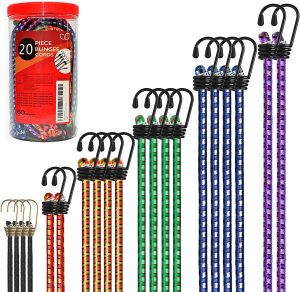
- Bungee Cords - Bungee cords are a versatile and inexpensive tool for RV organization. They can be used to secure items during travel, create additional storage space, or hang items such as coats or towels.
- Under-Bed Storage Containers - Under-bed storage containers are a great way to utilize the space under your RV bed. They come in a variety of sizes and can be used to store anything from linens to clothing.
- Hanging Closet Rod - A hanging closet rod is a simple and effective way to double your closet space. It can be easily installed and used to hang clothes, towels, or other items.
With these RV organization hacks and product recommendations, you'll be able to maximize your space and keep your tiny home on wheels tidy and clutter-free. Say goodbye to frustration and hello to a stress-free RV lifestyle. Happy organizing!
RV Entertainment: 10 Products to Keep You Entertained on the Road
Ahoy there, fellow adventurers of the RV world! Lets talk RV entertainment! Tired of driving through seemingly endless desolate landscapes or being parked in a picturesque campground without any entertainment? Fear not, for we have the perfect solution to keep you entertained on your next RV trip! We have compiled a list of 10 amazing products that are guaranteed to keep you entertained on the road, no matter what your interests are. From classic outdoor games that bring out your competitive side to high-tech gadgets that will make you feel like a sci-fi hero, we have it all. So buckle up, get ready for some serious RV entertainment, and let's dive into the list!
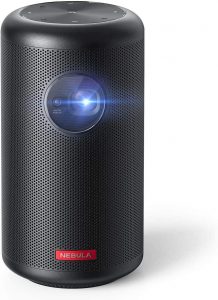
- Anker Nebula Capsule Max - Are you tired of huddling around a tiny screen on your phone or laptop to watch movies or shows? Say goodbye to that nonsense with the Anker Nebula Capsule Max. This tiny but mighty portable projector will transform any blank wall or ceiling into your own personal movie theater. And with a long battery life, you can have movie nights every night of your trip. Just be prepared for all the other RVers to be jealous of your awesome setup.
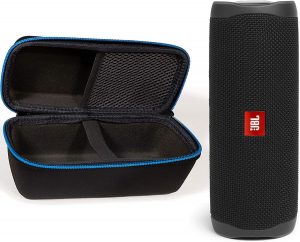
- JBL Flip 5 Waterproof Portable Bluetooth Speaker - What's a camping trip without some good tunes? The JBL Flip 5 Waterproof Portable Bluetooth Speaker has got you covered. This durable and waterproof speaker can handle everything from light rain to accidental drops. And with its powerful sound and long battery life, you can dance the night away (or until quiet hours start, whichever comes first). Just be warned, your camping neighbors may start requesting song dedications.
- Kindle Paperwhite - Are you an avid reader but tired of lugging around a suitcase full of books? The Kindle Paperwhite is here to save the day (and your back). With its glare-free display and long battery life, you can read all your favorite books without ever having to worry about charging or squinting. And if you're feeling adventurous, you can even download some new books while on the road. Just be prepared for some serious book envy from your camping buddies.

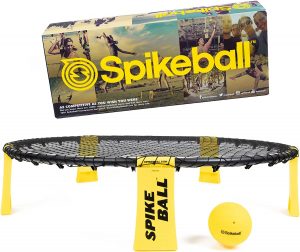
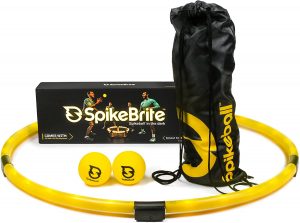
- Spikeball Game Set - Are you looking for a fun and unique game to play outdoors? Look no further than the Spikeball Game Set. This fast-paced and energetic game is perfect for camping trips, beach days, or even backyard barbecues. And with its easy setup and portability, you can take it anywhere your RV adventures take you. Just be prepared for some intense competition (and maybe a few sore muscles the next day).
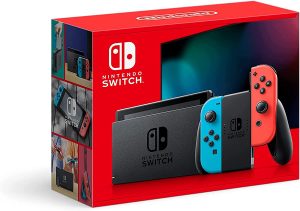
- Nintendo Switch - Are you a gamer who can't bear to be separated from your favorite console? The Nintendo Switch is here to make sure you never have to be. With its portable design and extensive game library, you can take your gaming on the road with ease. And with the ability to detach the controllers for multiplayer games, you can even get your camping buddies in on the fun. Just be prepared for some friendly (or not so friendly) competition.
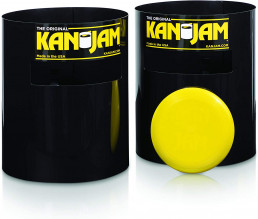
- KanJam Ultimate Disc Game - Take your frisbee game to the next level with KanJam Ultimate Disc Game. This outdoor game is easy to set up and perfect for all ages. With its durable and lightweight design, you can take it with you on all your camping adventures. Just be prepared for some intense competition, and maybe some sore arms the next day.

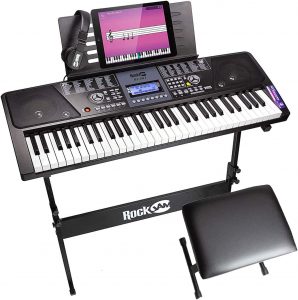
- RockJam 61-Key Electronic Keyboard SuperKit - If you're looking to unleash your inner musician, the RockJam 61-Key Electronic Keyboard SuperKit is a great option. This kit comes with everything you need to start playing, including a keyboard, stand, bench, headphones, and even a microphone. And with its lightweight and portable design, you can take your musical talents on the road. Just be prepared for some serenading under the stars (and maybe some not-so-pleasant sounds while you're still learning).
- Spikeball Game Set - Want to take your spikeball game to the next level? Spikeball glow in the dark is the answer. This fast-paced and competitive game is perfect for a day at the campground or the beach. With its compact and portable design, you can take it with you anywhere. Just be prepared for some serious sweat (and maybe a few epic dives).
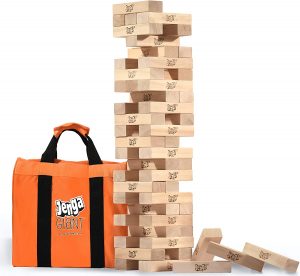
- Giant Jenga - Who says Jenga is just for kids? This oversized version of the classic game is perfect for a lazy afternoon with your camping crew. With its durable and easy-to-stack blocks, you can build your tower as high as you dare. Just be prepared for some serious suspense (and maybe some collateral damage if it all comes crashing down).
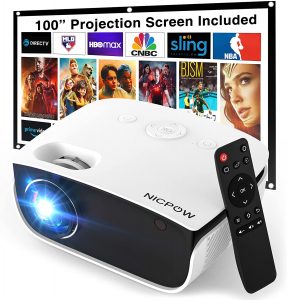
- Outdoor Projector - Why limit your movie nights to the indoors when you can take them outside? An outdoor projector is the perfect addition to your RV entertainment setup. With its portable design and high-quality projection, you can turn any campsite into a movie theater. Just don't forget the popcorn.
Whether you're on a solo adventure or traveling with your family and friends, these 11 RV entertainment products will make your camping experience even more enjoyable. From classic board games and outdoor sports to music and movies, there's something for everyone. So pack up your RV, grab your favorite snacks, and get ready to have some serious fun on the road!
RV Maintenance Checklist: Top 10 Tasks to Keep Your RV Rolling (and Not Stalling)
No one likes RV maintenance - but are you tired of being stranded on the side of the road with a broken-down RV? It's time to take your maintenance game to the next level with these 10 essential tasks. From checking your tires to inspecting your roof, we've got you covered with the products you need to keep your RV rolling (and not stalling) on your next adventure.
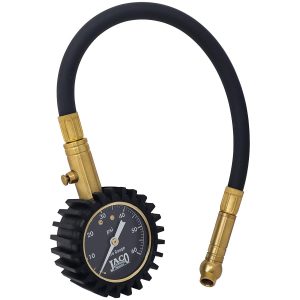
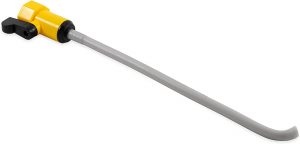
- Check Your Tire Pressure with the JACO ElitePro Tire Pressure Gauge Don't be a flat tire on your next camping trip. Keep your RV's tires properly inflated with the JACO ElitePro Tire Pressure Gauge. And hey, if you need a little extra air, maybe you can borrow it from your camping neighbor's bicycle pump.
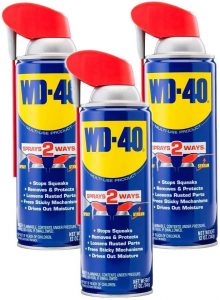
- Lubricate Your RV's Moving Parts with WD-40 Multi-Use Product Your RV's moving parts need a little love too. Keep them in tip-top shape with WD-40 Multi-Use Product. And if you're feeling adventurous, maybe you can use it to lube up the rusty door hinges in your home too.
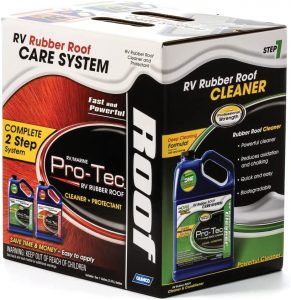
- Inspect Your RV's Roof with the Camco Rubber Roof Cleaner Don't let a leaky roof rain on your parade. Keep your RV's roof in good condition with the Camco Rubber Roof Cleaner. And while you're up there, maybe you can do a little dance to entertain your camping neighbors.
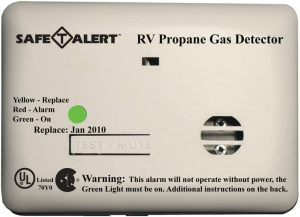
- Test Your Propane System with the MTI Industries LP Gas Detector You don't want to be the guy with the exploding RV. Test your propane system regularly with the MTI Industries LP Gas Detector. And hey, while you're at it, maybe you can impress your camping neighbors with your mad fire-starting skills.
- Flush Your RV's Water System with the Camco Water Tank Flusher Nobody wants to drink dirty water. Keep your RV's water system clean with the Camco Water Tank Flusher. And who knows, maybe you can also use it to powerwash your camping neighbor's deck.
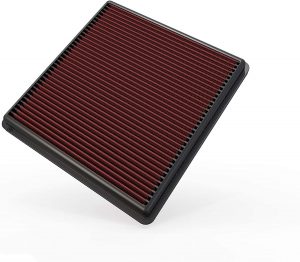
- Change Your RV's Air Filter with the K&N Engine Air Filter Your RV's engine needs clean air to run smoothly. Replace your air filter with the K&N Engine Air Filter for better performance and fuel efficiency. And if you're feeling particularly adventurous, maybe you can use it to make a makeshift frisbee for your camping dog.
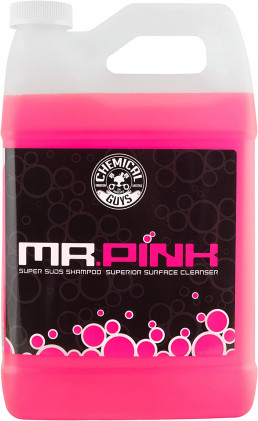
- Clean Your RV's Exterior with the Chemical Guys Mr. Pink Super Suds Car Wash Soap A clean RV is a happy RV. Keep your RV's exterior looking spick and span with the Chemical Guys Mr. Pink Super Suds Car Wash Soap. And if you're feeling particularly ambitious, maybe you can use it to wash your camping neighbor's car too.

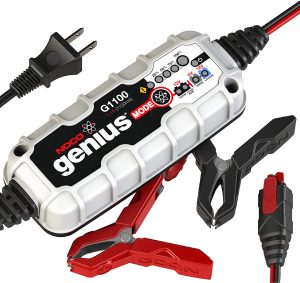
- Inspect Your RV's Batteries with the NOCO Genius G1100 Smart Battery Charger Keep your RV's batteries in good condition with the NOCO Genius G1100 Smart Battery Charger. It's a smart charger that can detect battery condition and adjust the charging rate accordingly, helping to prolong the life of your batteries. And if you're feeling particularly generous, maybe you can use it to charge your camping neighbor's dead car battery too.
- Check Your RV's Brakes with the Tekonsha Prodigy P2 Electronic Brake Control Your RV's brakes are essential for safe driving on the road. Make sure they're working properly with the Tekonsha Prodigy P2 Electronic Brake Control. It's easy to install and provides proportional braking, ensuring that your RV comes to a smooth stop. And if you're feeling particularly daring, maybe you can use it to play a game of "who can stop the fastest" with your camping neighbors.

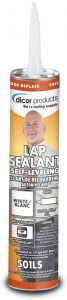
- Seal Your RV's Windows with the Dicor 501LSW-1 Self-Leveling Lap Sealant A leaky window can put a damper on any camping trip. Keep your RV dry with the Dicor 501LSW-1 Self-Leveling Lap Sealant. It's easy to apply and provides a long-lasting seal against water and air leaks. And who knows, maybe you can use it to seal your camping neighbor's leaky tent too.
There you have it, folks - our top 10 RV maintenance tasks to keep your RV in tip-top shape. With the right tools and products, these tasks can be completed quickly and easily, leaving you more time to enjoy the great outdoors. And with the convenience of online shopping, you can have all of these products delivered right to your doorstep, so you can start maintaining your RV today. Happy camping, and safe travels!

Keeping Your RV Safe and Secure: The Best Security Systems and Locks
You don't want to think of the best security systems when you're planning a trip - you have endless roads, beautiful landscapes, and the occasional raccoon trying to break into your rig. While furry bandits may not be the biggest concern, safeguarding your RV from thieves and other security threats is no laughing matter. Lucky for you, we've compiled a list of the best security systems and locks to keep your home-on-wheels as secure as Fort Knox. So buckle up, and let's dive into the realm of RV safety with a side of humor!
- SimpliSafe Wireless Home Security System - This comprehensive security system is as easy to install as its name suggests. It offers 24/7 professional monitoring, and its wireless design means no drilling or complicated wiring. Plus, it can detect the difference between an intruder and your overly curious cat, preventing false alarms.

- Ring Stick Up Cam - Keep an eye on your RV with the Ring Stick Up Cam. This battery-powered security camera features motion detection, two-way audio, and night vision. You can even speak to the squirrel trying to make a home in your RV's undercarriage, although we can't guarantee it'll listen.

- Tuffy Security Products RV Storage Lockbox - Safeguard your valuables in the Tuffy Security RV Storage Lockbox. This heavy-duty lockbox is designed to withstand break-in attempts, ensuring your prized possessions remain untouched. It's perfect for storing everything from electronics to your secret stash of marshmallows.
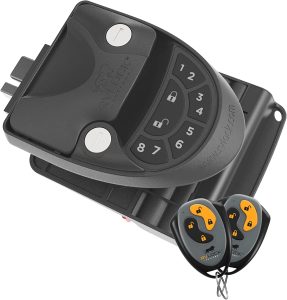
- RVLock Keyless Entry Handle - Forget fumbling with keys—upgrade to the RVLock Keyless Entry Handle. This convenient system allows you to lock and unlock your RV door with a keypad or remote control. It's like giving your RV the security of a high-tech bank vault, minus the pile of gold bars.
- Trimax Universal Wheel Chock Lock - Keep your RV from wandering off with the Trimax Universal Wheel Chock Lock. This heavy-duty lock immobilizes your wheel, making it nearly impossible for would-be thieves to tow your RV away. With this lock in place, you'll have the most well-behaved RV in the park.

- Camco 44393 Thumb Operated Cam Lock - Secure your RV's storage compartments with the Camco Thumb Operated Cam Lock. These sturdy locks provide an added layer of protection for your belongings and can be easily installed, ensuring no one but you can access your secret cookie stash.

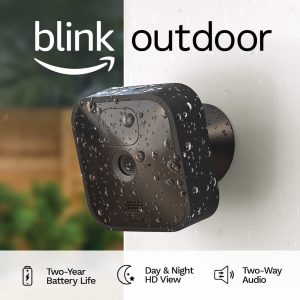
- Blink Outdoor Security Camera - The Blink Outdoor Security Camera offers wireless, weather-resistant protection for your RV. With customizable motion detection, night vision, and two-way audio, you can keep an eye on your rig from anywhere, as long as you have internet access. It's like having your very own security guard, but without the mustache.
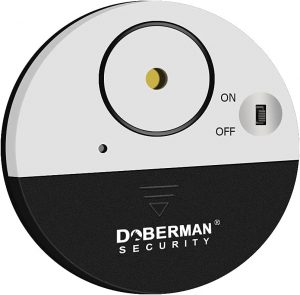
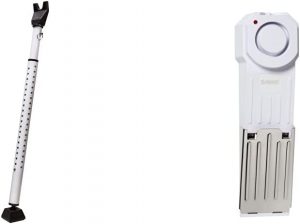
- Doberman Security Door & Window Alarm - Don't let the compact size of the Doberman Security Door & Window Alarm fool you. This tiny device packs a powerful punch, emitting a loud alarm when your RV door or window is opened. It's the perfect way to deter intruders and ensure that your RV remains secure.
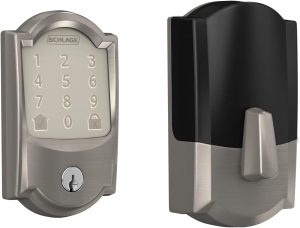
- Schlage Encode Smart WiFi Deadbolt - Upgrade your RV security with the Schlage Encode Smart WiFi Deadbolt. This high-tech deadbolt allows you to lock and unlock your door using your smartphone, eliminating the need for keys altogether. Plus, with its built-in WiFi, you can monitor and control your lock from anywhere. It's like having a personal doorman for your RV!
- SABRE HS-DSA Wedge Door Stop Security Alarm - Protect your RV from unwanted intruders with the SABRE HS-DSA Wedge Door Stop Security Alarm. This clever device functions as both a doorstop and an alarm, emitting a loud siren when triggered. It's perfect for deterring intruders and surprising any raccoons bold enough to venture inside.
By investing in top-notch security systems and locks, you can ensure that your RV remains a safe haven on wheels. With these ten fantastic products, you'll be well-equipped to fend off burglars, pesky critters, and even the occasional overcooked meal. So go ahead and enjoy the RV life with peace of mind, knowing that your rolling fortress is protected by the best in the business. After all, even the stealthiest raccoon is no match for your newfound RV security prowess.
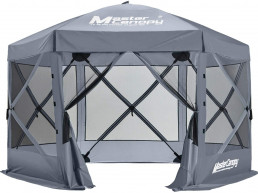
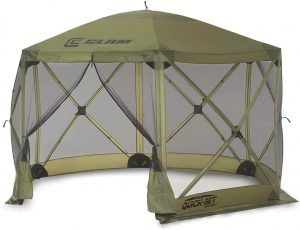
Do You Need a Screen Shelter?
We saw a lot of people with screen shelters, and we immediately knew we needed one! There are several options listed below. We bought the MASTERCANOPY and we love it!
A canopy shelter is an essential piece of gear for any outdoor enthusiast. Whether you're camping, hosting a backyard barbecue, or simply enjoying a day at the beach, a canopy shelter provides much-needed protection from the sun, wind, and rain. With its durable construction and easy-to-use design, a canopy shelter is the perfect way to create a comfortable and welcoming outdoor space for you and your guests. Plus, with a variety of sizes and styles available, there's a canopy shelter to suit every need and budget. So why not invest in a canopy shelter today and start enjoying the great outdoors in comfort and style?
MASTERCANOPY Escape Shelter, 6-Sided Canopy Portable Pop up Canopy Durable Screen Tent Bug and Rain Protection (7-9 Persons), (140''x140'', Blue)
Looking for the ultimate escape from those pesky bugs and raindrops? Look no further than the MASTERCANOPY Escape Shelter! With room for up to 9 people (or 27 if you're feeling particularly cozy), this portable pop-up canopy is perfect for outdoor gatherings, family picnics, or just a quiet afternoon of bug-free reading. Plus, with its 6-sided design and durable construction, you'll be protected from even the most determined of mosquitoes and the heaviest of downpours. Just don't be surprised if your camping neighbors start lining up to join in on the bug-free fun.
- Easy set up only takes 45 seconds - No assembly required.
- Room for 7-9 people
- UV & Water-Resistant roof (Not applicable with heavy rains)
- Package includes 1 shelter pop up tent, 8 deluxe tent stakes, tie down ropes and a carry bag.
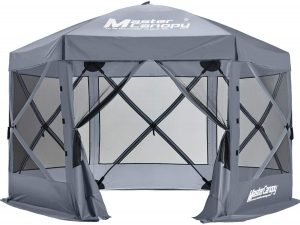
Gazelle Tents 21500 G6 Pop-Up Portable 6-Sided Hub Gazebo/Screen Tent, Easy Instant Set Up in 60 Seconds
Whoever said setting up a gazebo had to be a hassle clearly hasn't tried the Gazelle Tents 21500 G6 Pop-Up Portable 6-Sided Hub Gazebo/Screen Tent. With its easy instant set up in just 60 seconds, this gazebo/screen tent is perfect for those who want to spend less time setting up and more time enjoying the great outdoors. Plus, with its spacious 6-sided design and durable construction, you'll have plenty of room to spread out and relax without having to worry about those pesky bugs crashing the party. Just don't be surprised if your camping neighbors start asking to borrow your speedy set-up skills.
- Quick and easy set up in just 60 seconds
- Spacious 6-sided design for plenty of room to relax and enjoy the outdoors
- Durable construction for long-lasting use
- Provides protection from bugs and insects while still allowing for fresh air flow
- Portable and easy to transport to any outdoor location
- Can be used for a variety of outdoor activities such as camping, picnics, and backyard gatherings

Quick-Set Escape 12x12 ft. Portable Camping Outdoor Gazebo Canopy Shelter with Carrying Bag, Green
The Quick-Set Escape 12x12 ft. Portable Camping Outdoor Gazebo Canopy Shelter with Carrying Bag is the perfect addition to any camping trip or outdoor gathering. With its easy-to-use design, this gazebo canopy shelter can be set up in just minutes, providing quick and reliable protection from the elements. The durable construction and waterproof material make it perfect for use in any weather conditions, while the spacious 12x12 ft. design provides plenty of room for guests and gear. The carrying bag makes it easy to transport and store when not in use, making it a versatile and practical choice for any outdoor adventure.
- Quick and easy set up in just minutes
- Spacious 12x12 ft. design for ample room to relax and enjoy the outdoors
- Durable construction and waterproof material for reliable protection from the elements
- Portable and easy to transport with included carrying bag
- Versatile and practical for a variety of outdoor activities such as camping, picnics, and backyard gatherings
In conclusion, a canopy shelter is an excellent investment for anyone who loves spending time outdoors. From providing shade and shelter from the elements to creating a comfortable and welcoming outdoor space, a canopy shelter is a versatile and practical addition to any outdoor adventure. With so many sizes, styles, and features to choose from, there's sure to be a canopy shelter that meets your needs and fits your budget. So whether you're planning a camping trip, hosting a backyard barbecue, or simply enjoying a day at the beach, be sure to pack a canopy shelter and enjoy the great outdoors in comfort and style.
10 Must-Have RV Accessories for a Better Camping Experience!
Are you tired of feeling like you're roughing it when you go camping in your RV? With these 10 must-have RV accessories, you'll be able to transform your RV into a luxurious home on wheels. From comfortable chairs to high-quality grills, we've got everything you need to make your next camping trip the envy of all your fellow RVers.
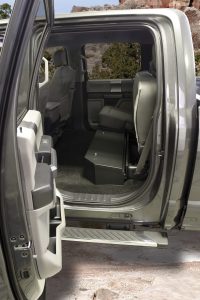
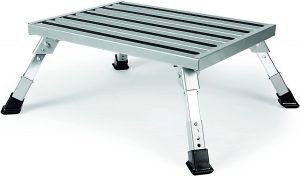
- Camco Adjustable Height Aluminum Platform Step If you're anything like me, you're not exactly a gazelle when it comes to jumping in and out of your RV. The Camco Adjustable Height Aluminum Platform Step is the perfect solution to this problem, as it allows you to step up and into your RV with ease. And if you need a break from all that camping, it doubles as a great place to sit and rest your feet.
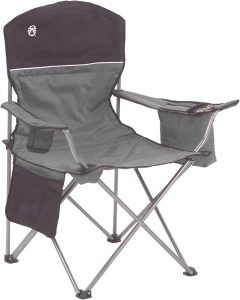
- Coleman Portable Camping Quad Chair with 4-Can Cooler Who says you can't have a comfortable place to sit when you're camping? The Coleman Portable Camping Quad Chair with 4-Can Cooler is not only a comfortable place to sit, it also has a built-in cooler to keep your drinks cold. And if you're really feeling adventurous, you can try fitting four cans of beer in there at once.
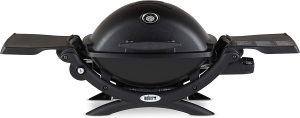
- Weber Q1200 Liquid Propane Grill If you're serious about cooking when you're camping, the Weber Q1200 Liquid Propane Grill is an absolute must-have. With its compact design and high-quality materials, this grill is perfect for cooking up a feast no matter where you are. And with its porcelain-enameled cast iron grates, you'll get that perfect sear on your burgers and steaks every time.
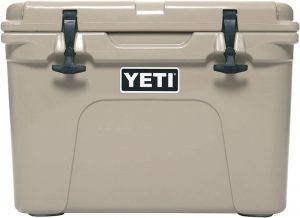
- Yeti Tundra 45 Cooler Sure, you could just buy a cheap cooler from the grocery store, but why settle for mediocre when you could have the Yeti Tundra 45 Cooler? This thing is built like a tank and can keep your food and drinks cold for days on end. Plus, its bearfoot non-slip feet ensure that it won't go sliding around your RV when you hit a bump in the road.
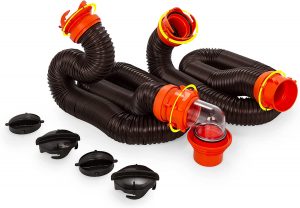
- Camco RhinoFLEX 20ft RV Sewer Hose Kit I know, I know, no one likes to think about emptying their RV's holding tanks. But with the Camco RhinoFLEX 20ft RV Sewer Hose Kit, at least you can make the process a little less gross. This durable and easy-to-use kit includes everything you need to get the job done, and its bright orange color will ensure that you never accidentally leave it behind at the campsite.
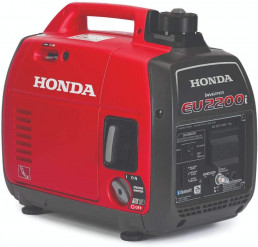
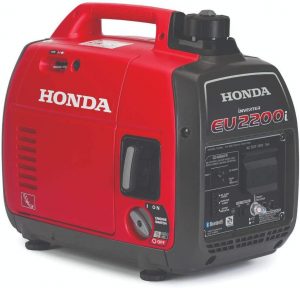
- Honda EU2200i Portable Inverter Generator -The Honda EU2200i Portable Inverter Generator is the perfect companion for any RV camper looking for a reliable source of power on the road. This ultra-quiet and fuel-efficient generator is designed to power your RV's appliances and electronics without disturbing the peace and quiet of your campsite. Its advanced inverter technology ensures that your devices are protected from voltage spikes, while its eco-throttle system adjusts the engine speed to match the load, maximizing fuel efficiency. And with its compact and lightweight design, the Honda EU2200i is easy to transport and store when you're on the move.
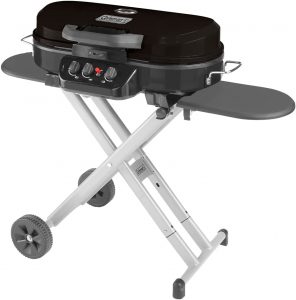
- Coleman RoadTrip 285 Portable Stand-Up Propane Grill The Coleman RoadTrip 285 Portable Stand-Up Propane Grill is perfect for campers who are always on the move. Its collapsible design and durable wheels make it easy to transport, and its powerful burners ensure that you'll be able to cook up a storm no matter where you are. Plus, its stand-up design means you won't have to crouch down to grill your food.
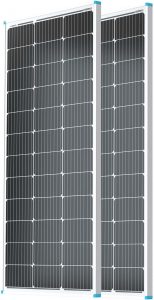
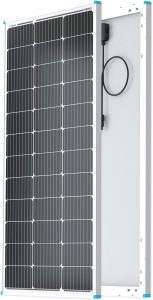
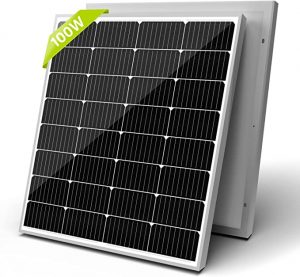
- Renogy 100 Watts 12 Volts Monocrystalline Solar Panel If you're looking for a way to generate power without relying on a generator, a solar panel is the way to go. The Renogy 100 Watts 12 Volts Monocrystalline Solar Panel is a high-quality option that's easy to install and provides a reliable source of power. And with its compact size, you can easily pack it away when you're on the move.
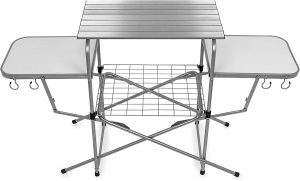
- Camco Deluxe Folding Grill Table If you're tired of balancing your grill on a wobbly picnic table, the Camco Deluxe Folding Grill Table is the solution you've been looking for. This sturdy and durable table is designed specifically for outdoor grilling, and it even includes a built-in paper towel holder and hooks for your grilling tools.
- LuminAID Solar Inflatable Lanterns Lighting is an essential part of any camping trip, but traditional lanterns can be bulky and take up valuable storage space in your RV. That's where LuminAID Solar Inflatable Lanterns come in. These lightweight and inflatable lanterns are powered by the sun, making them a convenient and eco-friendly option. Plus, their compact size means you can easily pack them away when you're on the move.

In conclusion, these 10 must-have RV accessories are sure to make your next camping trip even more enjoyable. From comfortable chairs to high-quality grills and reliable power sources, these accessories will help you create a home away from home no matter where you are. And with the convenience of online shopping, you can have them all delivered right to your doorstep in time for your next adventure. Happy camping!

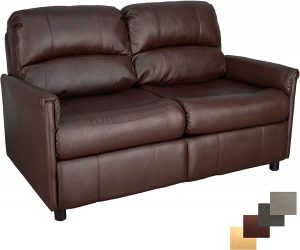
RV Upgrades: Top 8 Products to Make Your RV More Comfortable
If you're an RV owner - you love RV upgrades! Because you know that life on the road can be both exciting and challenging. While RVs offer a unique way to explore the world, they can also be cramped and uncomfortable at times. Luckily, there are plenty of products on the market that can help you upgrade your RV and make it feel more like home. In this article, we've compiled a list of the top 5 products that can make your RV more comfortable and enjoyable.
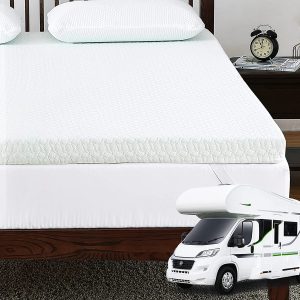
- Memory Foam Mattress Topper - One of the easiest ways to make your RV more comfortable is by investing in a high-quality memory foam mattress topper. RV mattresses can be notoriously uncomfortable, but a good topper can make all the difference. Memory foam conforms to your body, providing support and comfort where you need it most. Plus, it's easy to store when you're on the move.
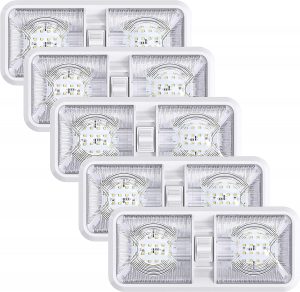
- LED Lighting - Upgrading your RV's lighting can make a big difference in its overall comfort level. LED lighting is energy-efficient, long-lasting, and provides a warm and inviting glow. Plus, it's easy to install and can be customized to fit your specific needs. Whether you're looking for overhead lighting or task lighting, LED bulbs are a great choice.
- Compact Appliances RV kitchens can be small and cramped, but compact appliances can help you make the most of your space. Mini-fridges, small microwaves, and portable stovetops are all great options for RV owners who want to cook and eat comfortably. These appliances are designed to be compact and lightweight, making them easy to store and transport.
- Window Coverings - Window coverings can help you control the amount of light and heat that enters your RV, making it more comfortable year-round. Blackout curtains can keep your RV cool and dark during the hot summer months, while thermal curtains can help keep it warm during the winter. Window shades and blinds are also great options for RV owners who want to customize their space.

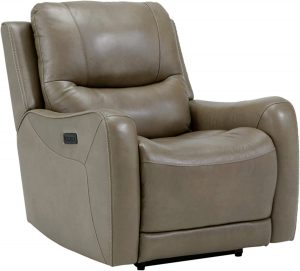
- Wall Hugger Recliner - A wall hugger recliner is a great addition to any RV living room. These chairs are designed to recline fully without taking up too much space, making them perfect for RVs. They're also comfortable and supportive, with features like padded armrests and lumbar support. Whether you're reading a book or watching TV, a wall hugger recliner is the perfect place to relax and unwind.
- Portable Air Conditioner - Staying cool in the summertime can be a challenge in an RV, but a portable air conditioner can make all the difference. These units are designed to be compact and easy to install, and they can keep your RV comfortable even on the hottest days. Plus, they're easy to store when you're on the move.

- RV Door Window Shade - If you want to add a little extra privacy to your RV, a door window shade can do the trick. These shades are designed to fit over the window in your RV door, providing privacy and shade. They're easy to install and can be customized to fit your specific needs. Plus, they're a great way to add a little extra style to your RV's interior.
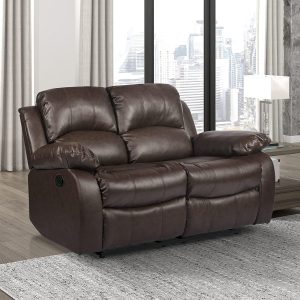
- RV Reclining Loveseat - If you have a little extra space in your RV living room, a reclining loveseat is a great addition. These chairs are designed to be comfortable and supportive, with features like padded armrests and lumbar support. Plus, they're a great place to relax and unwind after a long day on the road.
Upgrading your RV can be a fun and rewarding experience, and these products can help make it more comfortable and enjoyable. Whether you're looking for a better night's sleep or a more inviting living space, these products are a great place to start. So why wait? Start upgrading your RV today and make your home on the road even more comfortable!
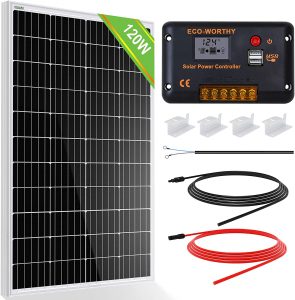
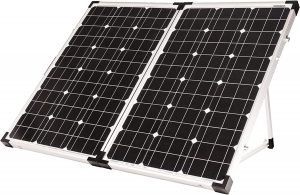
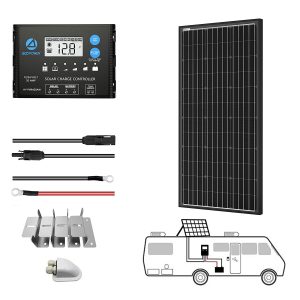
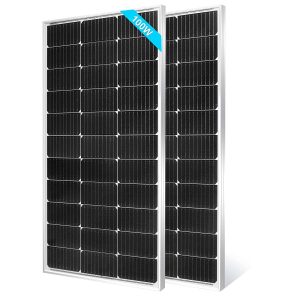
Top 10 RV Solar Panels to Keep You Powered Up on the Road
RV solar panels have become an increasingly popular option for people who want to power their vehicles using renewable energy sources. By using RV solar panels, you can harness the power of the sun to keep your batteries charged and your lights on, all while minimizing your carbon footprint. In this article, we've compiled a list of the top 10 RV solar panels available on Amazon to help you choose the best one for your needs.
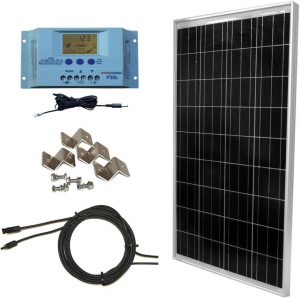
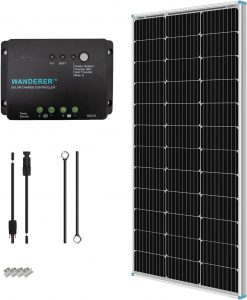
- Renogy 100 Watt 12 Volt Monocrystalline Solar Panel - The Renogy 100 Watt Monocrystalline Solar Panel is a reliable and efficient option for RV owners who want to take advantage of solar power. With its high-quality monocrystalline solar cell, this panel can generate up to 100 watts of electricity, making it perfect for off-grid living and boondocking. The panel is easy to install and comes with a 25-year warranty, giving you peace of mind for years to come.
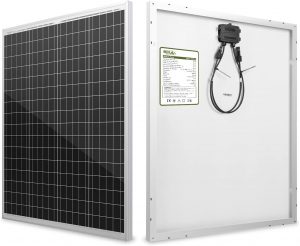
- HQST 100 Watt 12 Volt Polycrystalline Solar Panel - The HQST 100 Watt Polycrystalline Solar Panel is a great option for RV owners who want a panel that can absorb sunlight from multiple angles. Its multi-faceted design makes it more efficient than other panels, and it's easy to install and can withstand harsh weather conditions. With its high-quality materials and reliable performance, this panel is a great investment for anyone looking to take advantage of solar power.
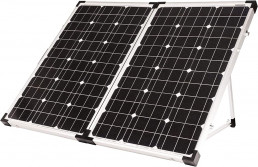
- WindyNation 100 Watt Solar Panel Kit for RV If you want a comprehensive solar panel kit that includes everything you need to get started, the WindyNation 100 Watt Solar Panel Kit for RV is a great option. This kit includes a 100 watt solar panel, a 30 amp charge controller, mounting hardware, and even a 40-foot cable. The panel is built to withstand winds up to 120 mph, making it perfect for RVs that spend a lot of time on the road. With this kit, you'll have everything you need to get up and running with solar power.
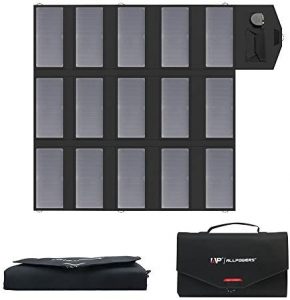
- ALLPOWERS 100 Watt 18V Solar Panel Charger - The ALLPOWERS 100 Watt Solar Panel Charger is a portable and lightweight option that's perfect for RV owners who like to go off-grid. It features a built-in charge controller that regulates the amount of power being sent to your battery, ensuring that it stays safe and fully charged. This panel is easy to set up and use, and it's a great way to stay powered up on your next camping trip.
- Newpowa 100 Watt Monocrystalline Solar Panel - The Newpowa 100 Watt Monocrystalline Solar Panel is a budget-friendly option that still offers high-quality performance. It features a durable aluminum frame and can generate up to 100 watts of electricity, making it perfect for RV owners who want to save money while still taking advantage of solar power. With its easy installation and reliable performance, this panel is a great choice for anyone looking to upgrade their RV's power system.
- RICH SOLAR 100 Watt 12 Volt Solar Panel Kit - The RICH SOLAR 100 Watt 12 Volt Solar Panel Kit is another great option for RV owners who want a comprehensive kit that includes everything they need to get started. This kit includes a 100 watt solar panel, a 20 amp charge controller, mounting hardware, and a 20-foot cable. The panel is built to withstand harsh weather conditions and is perfect for RVs that need a reliable source of power. With this kit, you'll be able to start enjoying the benefits of solar power right away.
- ECO-WORTHY 120 Watt Solar Panel Kit for RV - The ECO-WORTHY 120 Watt Solar Panel Kit for RV is a high-quality and efficient option that's perfect for RV owners who want to generate more power. This kit includes a 120 watt solar panel, a 20 amp charge controller, mounting hardware, and even a pair of 20-foot cables. The panel is made with high-quality materials and is built to withstand extreme weather conditions, making it a great investment for anyone who spends a lot of time on the road.
- Go Power! 130 Watt Portable Solar Panel Kit The Go Power! - 130 Watt Portable Solar Panel Kit is a great option for RV owners who want a portable and versatile option. This kit includes a 130 watt solar panel, a 10 amp charge controller, and a carrying case. The panel is easy to set up and can be used to charge your RV's batteries on the go. Whether you're camping, boondocking, or just need some extra power, this panel is a great choice.
- ACOPOWER 100 Watt Foldable Solar Panel Kit - The ACOPOWER 100 Watt Foldable Solar Panel Kit is a unique and convenient option for RV owners who want a portable and easy-to-store panel. This kit includes a 100 watt solar panel, a 10 amp charge controller, and a carrying case. The panel is foldable and lightweight, making it easy to set up and take down. With its efficient design and reliable performance, this panel is a great choice for anyone who wants to take their solar power on the go.
- SUNGOLDPOWER 100 Watt Flexible Solar Panel - The SUNGOLDPOWER 100 Watt Flexible Solar Panel is a unique and flexible option that's perfect for RV owners who want a panel that can conform to their vehicle's shape. This panel is made with high-quality materials and is designed to withstand extreme weather conditions. With its efficient performance and flexible design, this panel is a great choice for anyone who wants to take advantage of solar power in a new way. With so many great RV solar panels to choose from, it's easier than ever to take advantage of solar power on the road. Whether you're looking for a comprehensive kit or a portable option, these panels will help you stay powered up and ready to go. So why wait? Start harnessing the power of the sun today and take your RV adventures to the next level!

RV Cooking Equipment - Tools that Make RV Cooking Easier
RV Cooking Equipment? Well, you know what they say about cooking in an RV - it's like playing a game of Tetris, but with pots and pans! You have to be strategic and creative with your space, or else you'll end up with a messier kitchen than a five-year-old's playtime. And let's be real, cooking on a tiny stove while trying to balance a cutting board on your lap can be quite the adventure. But with the right tools, you can avoid culinary catastrophes and whip up some delicious meals on the go. So, grab your spatula and get ready to cook up a storm - just make sure you don't accidentally toss your utensils out the window while driving!
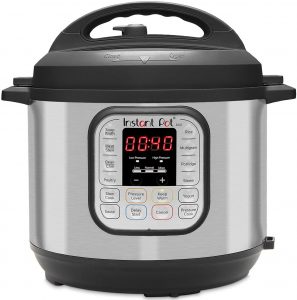
- Instant Pot: Oh, the joys of Instant Pot cooking in an RV, where culinary dreams come true in a space so compact, even a sardine would feel claustrophobic. Picture this: you're miles away from civilization, the stars glittering above like nature's disco ball, and you're whipping up a gourmet feast in a tiny, tin-can kitchen. The harmonious hum of the Instant Pot is the soundtrack to your nomadic existence, as it pressure-cooks, sautés, and slow-cooks its way through your ever-expanding recipe repertoire. Beware, though, of the pot's enchanting aroma, which may lead to impromptu gatherings of woodland creatures eager to share in your culinary creations. And let's not forget the thrill of playing "Instant Pot Roulette," as you carefully balance the pot on the countertop while maneuvering around those pesky potholes, hoping your dinner doesn't become an impromptu art installation on the RV walls. Bon appétit, road warriors!
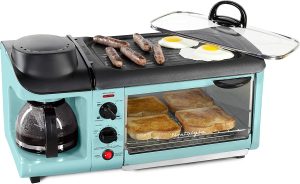
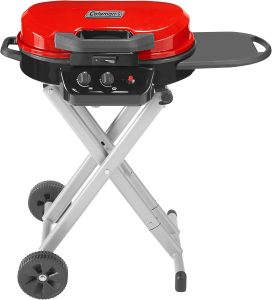
- Coleman Coleman RoadTrip 225 Portable Stand-Up Propane Grill: Ah, the Coleman RoadTrip 225 Portable Grill, the ultimate RV travel companion, and the key to transforming any campsite into a Michelin-starred dining experience (or so you'd like to believe). Picture yourself, clad in your finest "Kiss the Cook" apron, grilling up a storm amidst the breathtaking beauty of the great outdoors. And as you sizzle your way to culinary nirvana, you'll soon become the envy of fellow campers and forest-dwelling creatures alike. But beware of the double-edged sword that is the Coleman Grill: its flame-flickering dance can lull you into a hypnotic trance, causing you to forget that you're actually cooking food and not auditioning for a spot on a competitive grilling show. Moreover, the grill's mobility poses the ever-present risk of it being mistaken for a musical instrument, as you parade through the campground with your trusty spatula-turned-baton. So gather 'round, RV adventurers, and let the Coleman RoadTrip 225 Portable Grill ignite your gastronomic wanderlust, while you conquer the great outdoors one burger at a time.
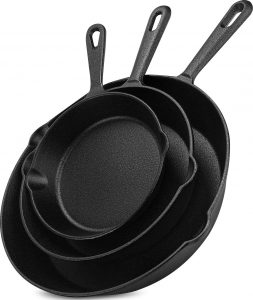
- Cast Iron Skillet: Ah, the trusty cast iron skillet, that heavyweight champ of the cookware world, a must-have on any RV adventure. Because, let's face it, what other kitchen companion can go from stove to oven to campfire, all while doubling as a blunt instrument for warding off pesky critters or settling the occasional disagreement over parking spaces? With your cast iron skillet in tow, you'll soon become the MacGyver of campground cooking, whipping up everything from seared steaks to gooey s'mores in a single pan, as fellow RVers marvel at your culinary prowess. And let's not forget its multi-tasking capabilities: ever in need of an impromptu dumbbell for those on-the-road workouts? Look no further than the cast iron skillet. As you traverse the open road, the skillet will not only leave its seasoned mark on your dishes but also on your biceps. So, buckle up, RV nomads, and make room for the trusty cast iron skillet, your all-in-one kitchen tool, security system, and workout buddy. Happy trails and even happier cooking!
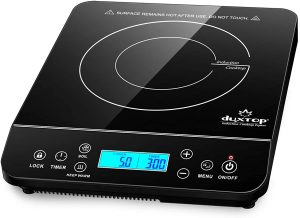
- Portable Induction Cooktop: Oh, the induction cooktop, that magical, heat-conjuring marvel that's become the darling of the RV world for RV cooking equipment. With the flick of a switch, you'll transform your humble camper into a modern-day Hogwarts, as you summon fireless heat to cook up a storm worthy of a wizard's banquet. But beware, dear traveler, for with great power comes great responsibility—and the potential for hilarity. As you hone your induction cooktop skills, you may find yourself inadvertently embarking on a quest to find the Holy Grail of Cookware: the mythical pan that perfectly balances compatibility, even heating, and, most importantly, not becoming so hot it welds itself to the cooktop. And let's not forget the thrilling game of "Induction Cooktop or DJ Turntable," as you skillfully manipulate heat settings with a flick of the wrist, leaving fellow campers wondering if you're sautéing veggies or spinning the hottest tracks of the season. So pack your bags, RV explorers, and embrace the induction cooktop, your ticket to a road trip filled with culinary wizardry, laughter, and perhaps even a spontaneous dance party or two.
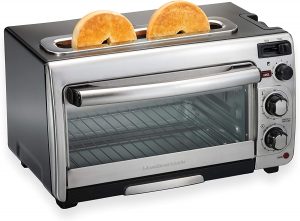
- Hamilton Beach 2-in-1 Countertop Oven and Long Slot Toaster, Stainless Steel, 60 Minute Timer and Auto Toaster Oven: Behold, the Hamilton Beach 2-in-1 Countertop Oven and Long Slot Toaster—a shining stainless steel beacon of multitasking genius, perfect for every RV kitchenette. With this culinary wonder at your fingertips, you'll be the talk of the campground as you effortlessly juggle toasting and baking with the grace of a Cirque du Soleil performer. But be warned, for this power duo may bring its own brand of chaos to your cozy RV life. Prepare to engage in a delicate dance of "Toaster Oven Tetris," as you attempt to squeeze every last morsel of food into your countertop marvel while avoiding a game-ending avalanche of hors d'oeuvres. And let's not forget the mysterious disappearing act that occurs when you perfectly time the toast cycle to coincide with your oven-baked masterpiece—only to find that your toast has seemingly vanished into the ether, leaving you to wonder if you're the next Houdini or simply a sleep-deprived RV traveler. So, hit the road and embrace the Hamilton Beach 2-in-1 Countertop Oven and Long Slot Toaster, your trusty companion on a journey filled with culinary acrobatics, laughter, and perhaps a few moments of awe-struck bewilderment.
- Collapsible Colander and Mixing Bowls: Not really RV cooking equipment but you have store your food! These Collapsible Colander and Mixing Bowls, the astonishing kitchen acrobats of the RV world! With their gravity-defying, space-saving abilities, they’ll not only simplify your life but will also keep you entertained for hours. Watch in amazement as they magically fold into themselves, like a culinary origami masterpiece, or perhaps a circus contortionist defying the laws of physics. These collapsible wonders will quickly become the star attraction of your tiny RV kitchen, transforming mundane meal prep into a thrilling, high-stakes game of "How Many Bowls Can I Squeeze into This Cupboard?" And let's not forget the impromptu boomerang sessions that may ensue when an unsuspecting fellow traveler mistakes your collapsible colander for a fabulous flying disc. So, hit the road, intrepid RV explorers, and prepare to be dazzled by the delightful dance of the Collapsible Colander and Mixing Bowls, your trusty sidekicks in a never-ending comedy of culinary capers!

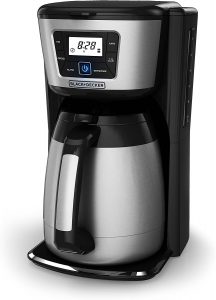
- BLACK+DECKER 12-Cup Thermal Coffeemaker, Black/Silver, CM2035B Coffee Maker: Who doesn't want coffee as part of the RV cooking equipment arsenal? Introducing the BLACK+DECKER 12-Cup Thermal Coffeemaker, that delightful fusion of caffeine engineering and sleek style, ready to fuel your RV adventures with enough coffee to awaken a hibernating bear. Marvel at the heroic capacity of this black and silver beauty, as it brews enough liquid courage to keep you wide-eyed and bushy-tailed through even the most arduous of road trips. But beware, for with great caffeination comes great responsibility, as the sheer volume of java produced by this magnificent machine may lead to impromptu coffee-themed events. Picture yourself as the ringmaster of an RV park "Caffeine Carnival," where you regale campers with the story of how you tamed the wild and fearsome BLACK+DECKER Thermal Coffeemaker, transforming it into the benevolent bringer of bountiful brews. And as you sip from your steaming cup of joe, you'll know that the open road holds no terrors, for you have conquered the mighty beast of sleepiness with your trusty, metallic coffee companion. So, embark on your RV odyssey, and let the BLACK+DECKER Thermal Coffeemaker be your shield against the dreaded drowsiness, guiding you towards a future filled with laughter and highly-caffeinated shenanigans.
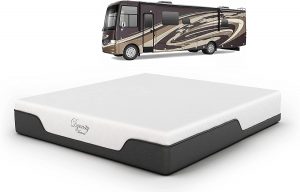
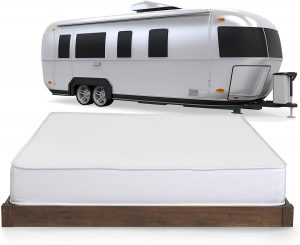
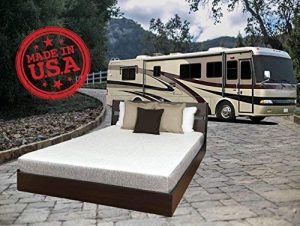
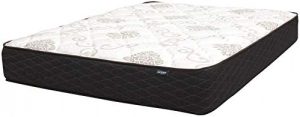
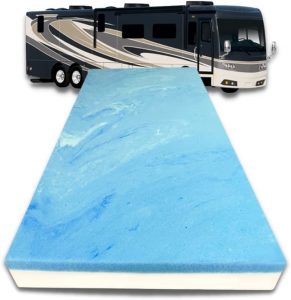
Top 10 RV Mattresses for a Comfortable Adventure: Find Your Perfect Fit Today!
Do you think about RV Mattresses? One of the most important factors in ensuring a good night's sleep on the road is having the right RV mattress. With so many options available, it can be overwhelming to choose the best one for your needs. In this article, we've compiled a list of the top 10 RV mattresses to help you find the perfect fit for a restful and comfortable adventure.
- Zinus 8 Inch Gel-Infused Green Tea Memory Foam Mattress: Get the perfect combination of comfort and support with this Zinus Gel-Infused Memory Foam Mattress, which features green tea-infused foam to help eliminate odors. Plus, it comes with a 10-year warranty for added peace of mind.
- Live & Sleep Classic RV Short Queen Size Memory Foam Mattress: Stay cool and comfortable all night long with this memory foam mattress designed with breathable materials to help regulate temperature. Its pressure-relieving foam also helps reduce aches and pains, making it perfect for long road trips.

- DynastyMattress 10GEL-QUEEN-RV 10-inch CoolBreeze Gel Memory Foam Mattress: Keep cool and comfortable with this gel memory foam mattress that features CoolBreeze technology for optimal temperature regulation. Its medium-firm support keeps your spine aligned, and its soft cover adds an extra layer of comfort.
- Serenia Sleep 6-Inch RV Mattress, Short Queen: Don't let its slim profile fool you – this mattress packs a punch when it comes to comfort. Its high-density foam provides excellent support, and its quilted cover adds an extra layer of plushness.
- Sleep Master Deluxe Memory Foam 8 Inch RV/Camper/Trailer/Truck Mattress, Short Queen: This memory foam mattress is specifically designed for RVs, so it's the perfect fit for your home on wheels. Its memory foam conforms to your body, providing personalized support for a restful night's sleep.
- Parklane Mattresses The Explorer RV Mattress: Enjoy exceptional pressure relief on those long road trips with this mattress featuring a special foam design. Its high-density foam base provides added support, and its plush cover adds an extra layer of softness.
- Denver 326394 Short Queen Size RV Supreme Euro Top Mattress: Find the perfect balance of firmness and softness with this Euro top mattress. Its foam core provides excellent support, and its plush top layer offers a cozy place to rest your head.
- FoamRush 4-Inch Queen (60" x 80") Cooling Gel Memory Foam RV Mattress Replacement, Medium Firm, Comfort, Pressure Relief and Support, Made in USA, Travel Camper Trailer Truck, Cover Not Included: For those seeking a plush and luxurious RV sleeping experience, the is an excellent choice. This 4-inch short queen size mattress features a comfortable pillow top with quilted foam and a high-density foam core that provides excellent support.
- RecPro Charles Collection | 60" RV Hide A Bed Loveseat | RV Sleeper Sofa | Memory Foam Mattress: For a versatile and space-saving RV sleeping solution, the RecPro Charles Collection Hide A Bed Loveseat is a great option. This stylish sofa provides extra seating and easily converts into a memory foam sleeper with a short queen size mattress.
- Brentwood Home Cypress Cooling Gel Memory Foam Mattress: Keep cool and comfortable on your next RV adventure with the Brentwood Home Cypress Cooling Gel Memory Foam Mattress. This gel memory foam mattress is designed to regulate temperature and provide excellent support for a restful night's sleep. Its bamboo-derived rayon cover is soft and breathable, and the mattress comes with a 25-year warranty.

With these top 10 RV mattresses, you can sleep like a king (or queen) while on the road. So, hit the gas and enjoy the ride – you've got a cozy place to rest your head at the end of the day!