
Maximizing Space: Rv Storage Solutions!
Do you wonder how storage will work in your RV? If you've ever felt like a contestant on a game show while trying to find room for all your belongings in your RV, you're not alone! Maximizing space in your RV can sometimes feel like a never-ending challenge. But fear not, fellow travelers! We've compiled a list of the top 10 storage solutions that will transform your RV into an organizational oasis, making you the envy of every campground.
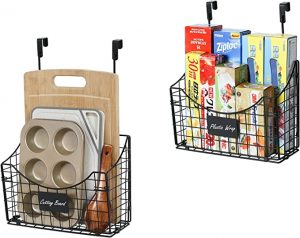
- Over-the-Cabinet Door Organizer Ever opened a cabinet and wished you could just hang something on the door to save space? Your wish has been granted! Over-the-cabinet door organizers, such as the Simple Houseware Over the Cabinet Door Organizer Holder, attach to your cabinet doors without requiring tools or permanent installation. They're perfect for holding cutting boards, plastic wrap, or cleaning supplies, and are a game-changer for maximizing space in your RV kitchen or bathroom.
 Collapsible Storage Bins Collapsible storage bins, like CleverMade Collapsible Fabric Storage Bins, are a traveler's best friend. They offer generous storage capacity for clothes, linens, or other items while being easily folded down when not in use. These space-saving containers not only keep your belongings organized but also save valuable storage space when empty.
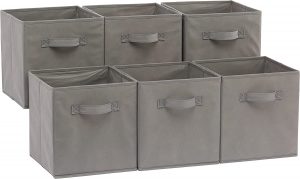
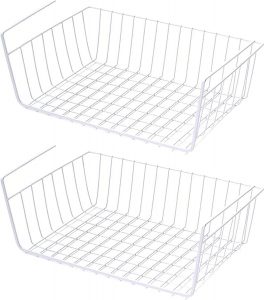
- Under-Shelf Storage Basket Wave goodbye to wasted vertical space with under-shelf storage baskets such as the SimpleTrending Under Cabinet Organizer Shelf. These wire baskets easily slide onto shelves, providing additional storage for plates, cups, or pantry goods. It's a simple and effective way to make the most of every inch in your RV cabinets.
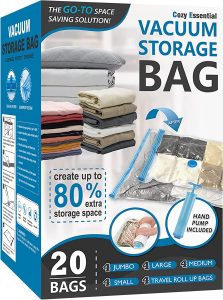
- Vacuum Storage Bags Prepare to be amazed by the magic of vacuum storage bags like Spacesaver Premium Vacuum Storage Bags. These airtight bags compress clothes, bedding, and other soft items, significantly reducing their volume. With a vacuum cleaner or a hand pump, you can shrink these bags to a fraction of their original size, creating more room for other essentials.
- Wall-Mounted Magnetic Knife Holder Clear up counter and drawer space by mounting a Modern Innovations 16 Inch Stainless Steel Magnetic Knife Bar on your RV wall. This sleek and functional holder securely stores knives and other metal tools, keeping them within easy reach while cooking up your favorite campground meals.

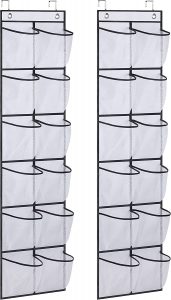
- Over-the-Door Shoe Organizer Who knew shoes could be so orderly? The MISSLO Over The Door Shoe Organizer is a space-saving solution for storing shoes, toiletries, or other small items. Hang it over a door, and you'll instantly have a clever and organized system for keeping your belongings off the floor and out of the way.
- Swivel Store Spice Rack Spice up your RV life with the YouCopia SpiceStack Adjustable Spice Rack Organizer. This compact and convenient storage solution keeps your spices, condiments, or medications neat and tidy. With its adjustable shelves, finding the perfect spot for each container is a breeze.

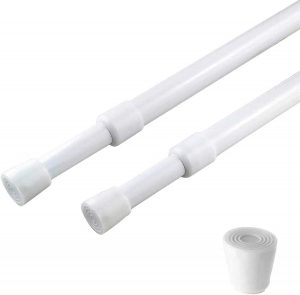
- Adjustable Tension Rods Meet the multitasking marvel of RV storage: AIZESI 4PCS Spring Tension Curtain Rods. These adjustable rods can create additional storage space in cabinets, closets, or be used as dividers in larger areas. With their easy installation and versatility, tension rods are an indispensable addition to your RV organization toolkit.
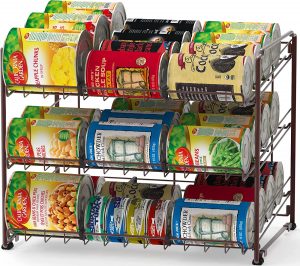
- Stackable Can Organizer Say goodbye to canned chaos with the Simple Houseware Stackable Can Rack Organizer. This handy storage solution keeps your canned goods organized and easily accessible, making meal prep a snap. You'll never have to rummage through your pantry again!
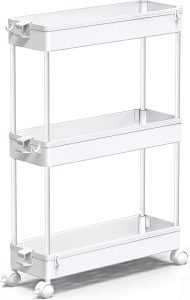
- Slim Slide-Out Storage Tower Introducing the space-saving superhero: the Mobile Shelving Unit Organizer with 3 Large Storage Baskets. This narrow, wheeled storage unit slides effortlessly between appliances or furniture, providing extra storage for cleaning supplies, toiletries.
In conclusion, maximizing space in your RV doesn't have to be a daunting task. With these top storage solutions, you can transform your home-on-wheels into a clutter-free and organized haven, making your RV adventures more enjoyable and stress-free. So go ahead, implement these ingenious ideas and relish the newfound space and order in your beloved traveling abode.
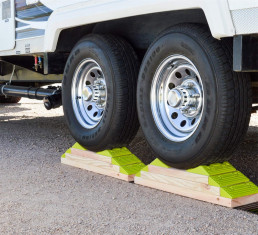
Top 10 RV Leveling Blocks and Leveling Systems
Well, RV leveling blocks might not be the most exciting accessory out there, but they can definitely save you from some awkward situations. Imagine trying to cook dinner in your RV, and your saucepan keeps sliding off the stove because your RV is tilted. Or worse, you're trying to sleep, but your bed feels like a carnival ride because you're parked on a slope. Trust me, it's not fun. That's why RV leveling blocks are a must-have, unless you enjoy eating spaghetti off the ceiling or waking up feeling like you've just survived a rollercoaster ride. So, if you want to keep your RV level and your sanity intact, get yourself some leveling blocks - your inner neat freak and your back will thank you for it!
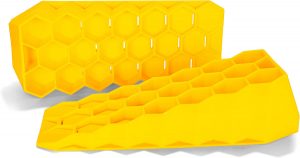
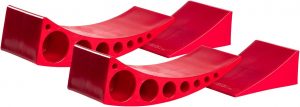
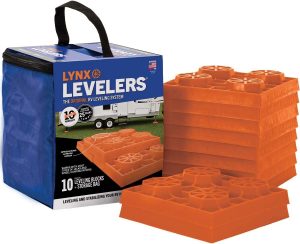
Here are some popular options of leveling blocks that you might consider:
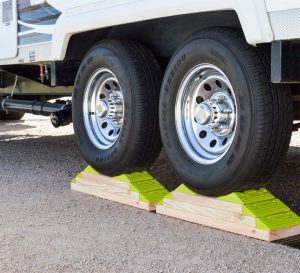
- Camco Yellow Drive On Tri-Leveler - These RV leveling blocks comes with three levels and has a weight capacity of up to 4,000 pounds. It provides a stable and level foundation for your RV.
- Andersen Camper Leveler - These RV leveling blocks are a unique design that allows you to level your RV quickly and easily without driving onto the blocks.
- Tri-Lynx 00015 Lynx Levelers - These interlocking blocks are stackable and can be configured to accommodate a variety of terrain and leveling needs.
- Beech Lane Camper Leveler - This leveling block system includes two ramps and a chock to level your RV on uneven surfaces.
- Hopkins 08200 Endurance RV Leveling System - This heavy-duty block set includes ten blocks that can be used individually or stacked together to create a stable and level base for your RV.
- BAL 28050 Light Trailer Tire Leveler - These RV leveling blocks are specifically designed for single-axle trailers and includes a tire-leveling wedge and chock for added stability.
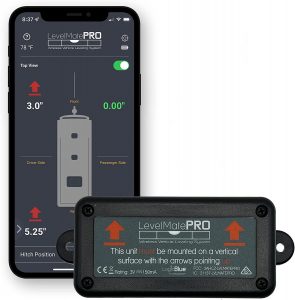
- LevelMatePRO Wireless Vehicle Leveling System - This high-tech leveling system uses Bluetooth technology to connect to your smartphone or tablet for easy and quick leveling of your RV.
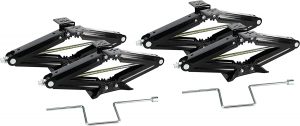
- Quick Products QP-UPJACK5-24P RV Stabilizing and Leveling Scissor Jack - This scissor jack system provides stability and leveling for your RV, with a weight capacity of up to 5,000 pounds.
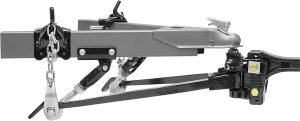
- Reese 94622 Straight Line Hitch with Dual Cam HP - This leveling system includes a hitch and cam system to distribute weight evenly across your RV for a stable and level ride.
Lets Look At These In More Detail!
Camco Yellow Drive On Tri-Leveler:
The Camco Yellow Drive On Tri-Leveler is a popular choice for RV leveling blocks, offering a stable and level foundation for your RV. This block set includes three levels and has a weight capacity of up to 4,000 pounds. The levels are designed to fit most RV wheels, making it easy to drive your RV onto them for leveling. Made from durable, UV-stabilized resin, these blocks are built to last and come with a non-slip surface for added safety. With its easy-to-use design and sturdy construction, the Camco Yellow Drive On Tri-Leveler is a great option for leveling your RV.
Andersen Camper Leveler:
The Andersen Camper Leveler is a unique leveling block system that allows you to level your RV quickly and easily without driving onto the blocks. The system includes two curved ramps that are placed in front of the RV's wheels. To level the RV, you simply drive up onto the ramps until the RV is level. The ramps are made from durable, high-strength polymer and can support up to 30,000 pounds. The Andersen Camper Leveler is easy to use and does not require you to crawl under your RV to place blocks, making it a popular choice among RVers.
Tri-Lynx 00015 Lynx Levelers:
The Tri-Lynx 00015 Lynx Levelers are a set of interlocking leveling blocks that can be configured to accommodate a variety of terrain and leveling needs. Each block measures 10 inches by 10 inches and can be stacked on top of one another to create a level base for your RV. The blocks are made from UV-stabilized resin and are rated to support up to 40,000 pounds. The interlocking design allows you to customize the height of the blocks to suit your needs and the blocks come with a handy carry case for easy transport and storage.
Beech Lane Camper Leveler:
The Beech Lane Camper Leveler is a popular leveling block system that includes two ramps and a chock to level your RV on uneven surfaces. The ramps are adjustable and can accommodate a variety of wheel sizes. The system also comes with a level indicator and a carry bag for easy storage and transport. The ramps are made from durable materials and have a weight capacity of up to 35,000 pounds. The Beech Lane Camper Leveler is easy to use and provides a stable and level base for your RV.
Hopkins 08200 Endurance RV Leveling System:
The Hopkins 08200 Endurance RV Leveling System is a heavy-duty leveling block set that includes ten blocks that can be used individually or stacked together to create a stable and level base for your RV. The blocks are made from durable materials and have a weight capacity of up to 4,000 pounds per block. The interlocking design allows you to customize the height of the blocks to suit your needs and the blocks come with a handy carry case for easy transport and storage. The Hopkins 08200 Endurance RV Leveling System is a versatile and reliable option for leveling your RV.
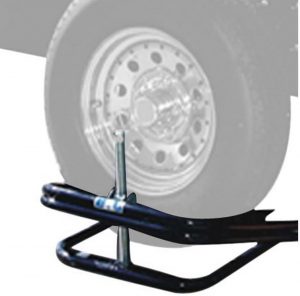
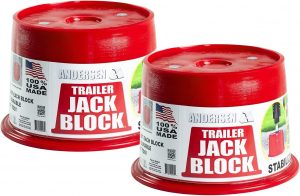
ANDERSEN HITCHES | RV Accessories and Supplies | Trailer Jack Blocks 2-Pack w/ Magnets | Leveling Stabilizers Jackstands Quickjack | 3608
Andersen Hitches Jack Blocks with Magnets are a unique and innovative solution for leveling your RV. These leveling blocks feature a patented design that allows you to easily and quickly level your RV without the need for jacks or cranks. The blocks are made from durable, high-strength polymer and are rated to support up to 30,000 pounds.
The most distinctive feature of the Andersen Hitches Jack Blocks with Magnets is the inclusion of powerful magnets in each block. These magnets attach to the metal frame of your RV, keeping the blocks securely in place while you level your RV. This means you won't have to worry about the blocks shifting or moving around, providing a more stable and secure foundation for your RV.
The Andersen Hitches Jack Blocks with Magnets also come with a handy carrying case for easy transport and storage. The blocks are lightweight and easy to maneuver, making them a great choice for RVers who want an efficient and hassle-free leveling solution. Overall, if you're looking for a reliable and innovative solution for leveling your RV, the Andersen Hitches Jack Blocks with Magnets are definitely worth considering.
Clear Kayak Tour and Fort Desoto
Clear Kayak Tour and Fort Desoto
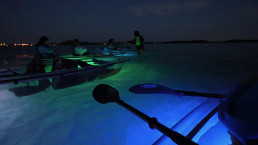
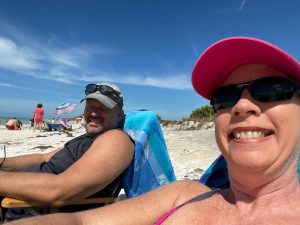
We have never done a clear kayak tour until now! We started our day at Fort Desoto, which is south of Saint Petersburg. After spending the day running around Mullet key, we grabbed dinner at Billy's Stone Crab. Then we did a clear kayak tour at night see-thru glow kayaks - they had multi-color LED's that lit up the water - Come join the adventure! The clear kayak tour at sunset is highly recommended also. And Fort Desoto Camping is a must-do if you are in the area!
https://www.youtube.com/watch?v=4KRZw4DW1C8
Fort Desoto
We started our day at Fort Desoto - not a bad drive from Bay Bayou RV Resort. After paying a couple tolls to get onto the key ($1.75 in total), we then had to pay $5 to enter the park, which is actually a long key with a nice road that gets you from end to end:
The Fort was built to protect the entrance of Tampa Bay Harbor during the Spanish-American war, but I don't think it ever had to fire it's guns in anger, which consisted of eight 12 inch mortars and two 6 inch Armstrong guns. The main area of the fort that houses the mortar batteries is still well-preserved, and a few of the other buildings still stand. Of special note is the museum, which has a ton of interesting artifacts from the era. This brochure has a bunch of facts if you are planning to visit.
Fort Desoto Fishing Pier
We also made it to the Fort Desoto fishing pier - a very large t-shape pier perfect for doing some bay fishing. It is very long and wide, and when we were there the crowds weren't bad at all. Off to the right is even a beach area that you can hang out in.
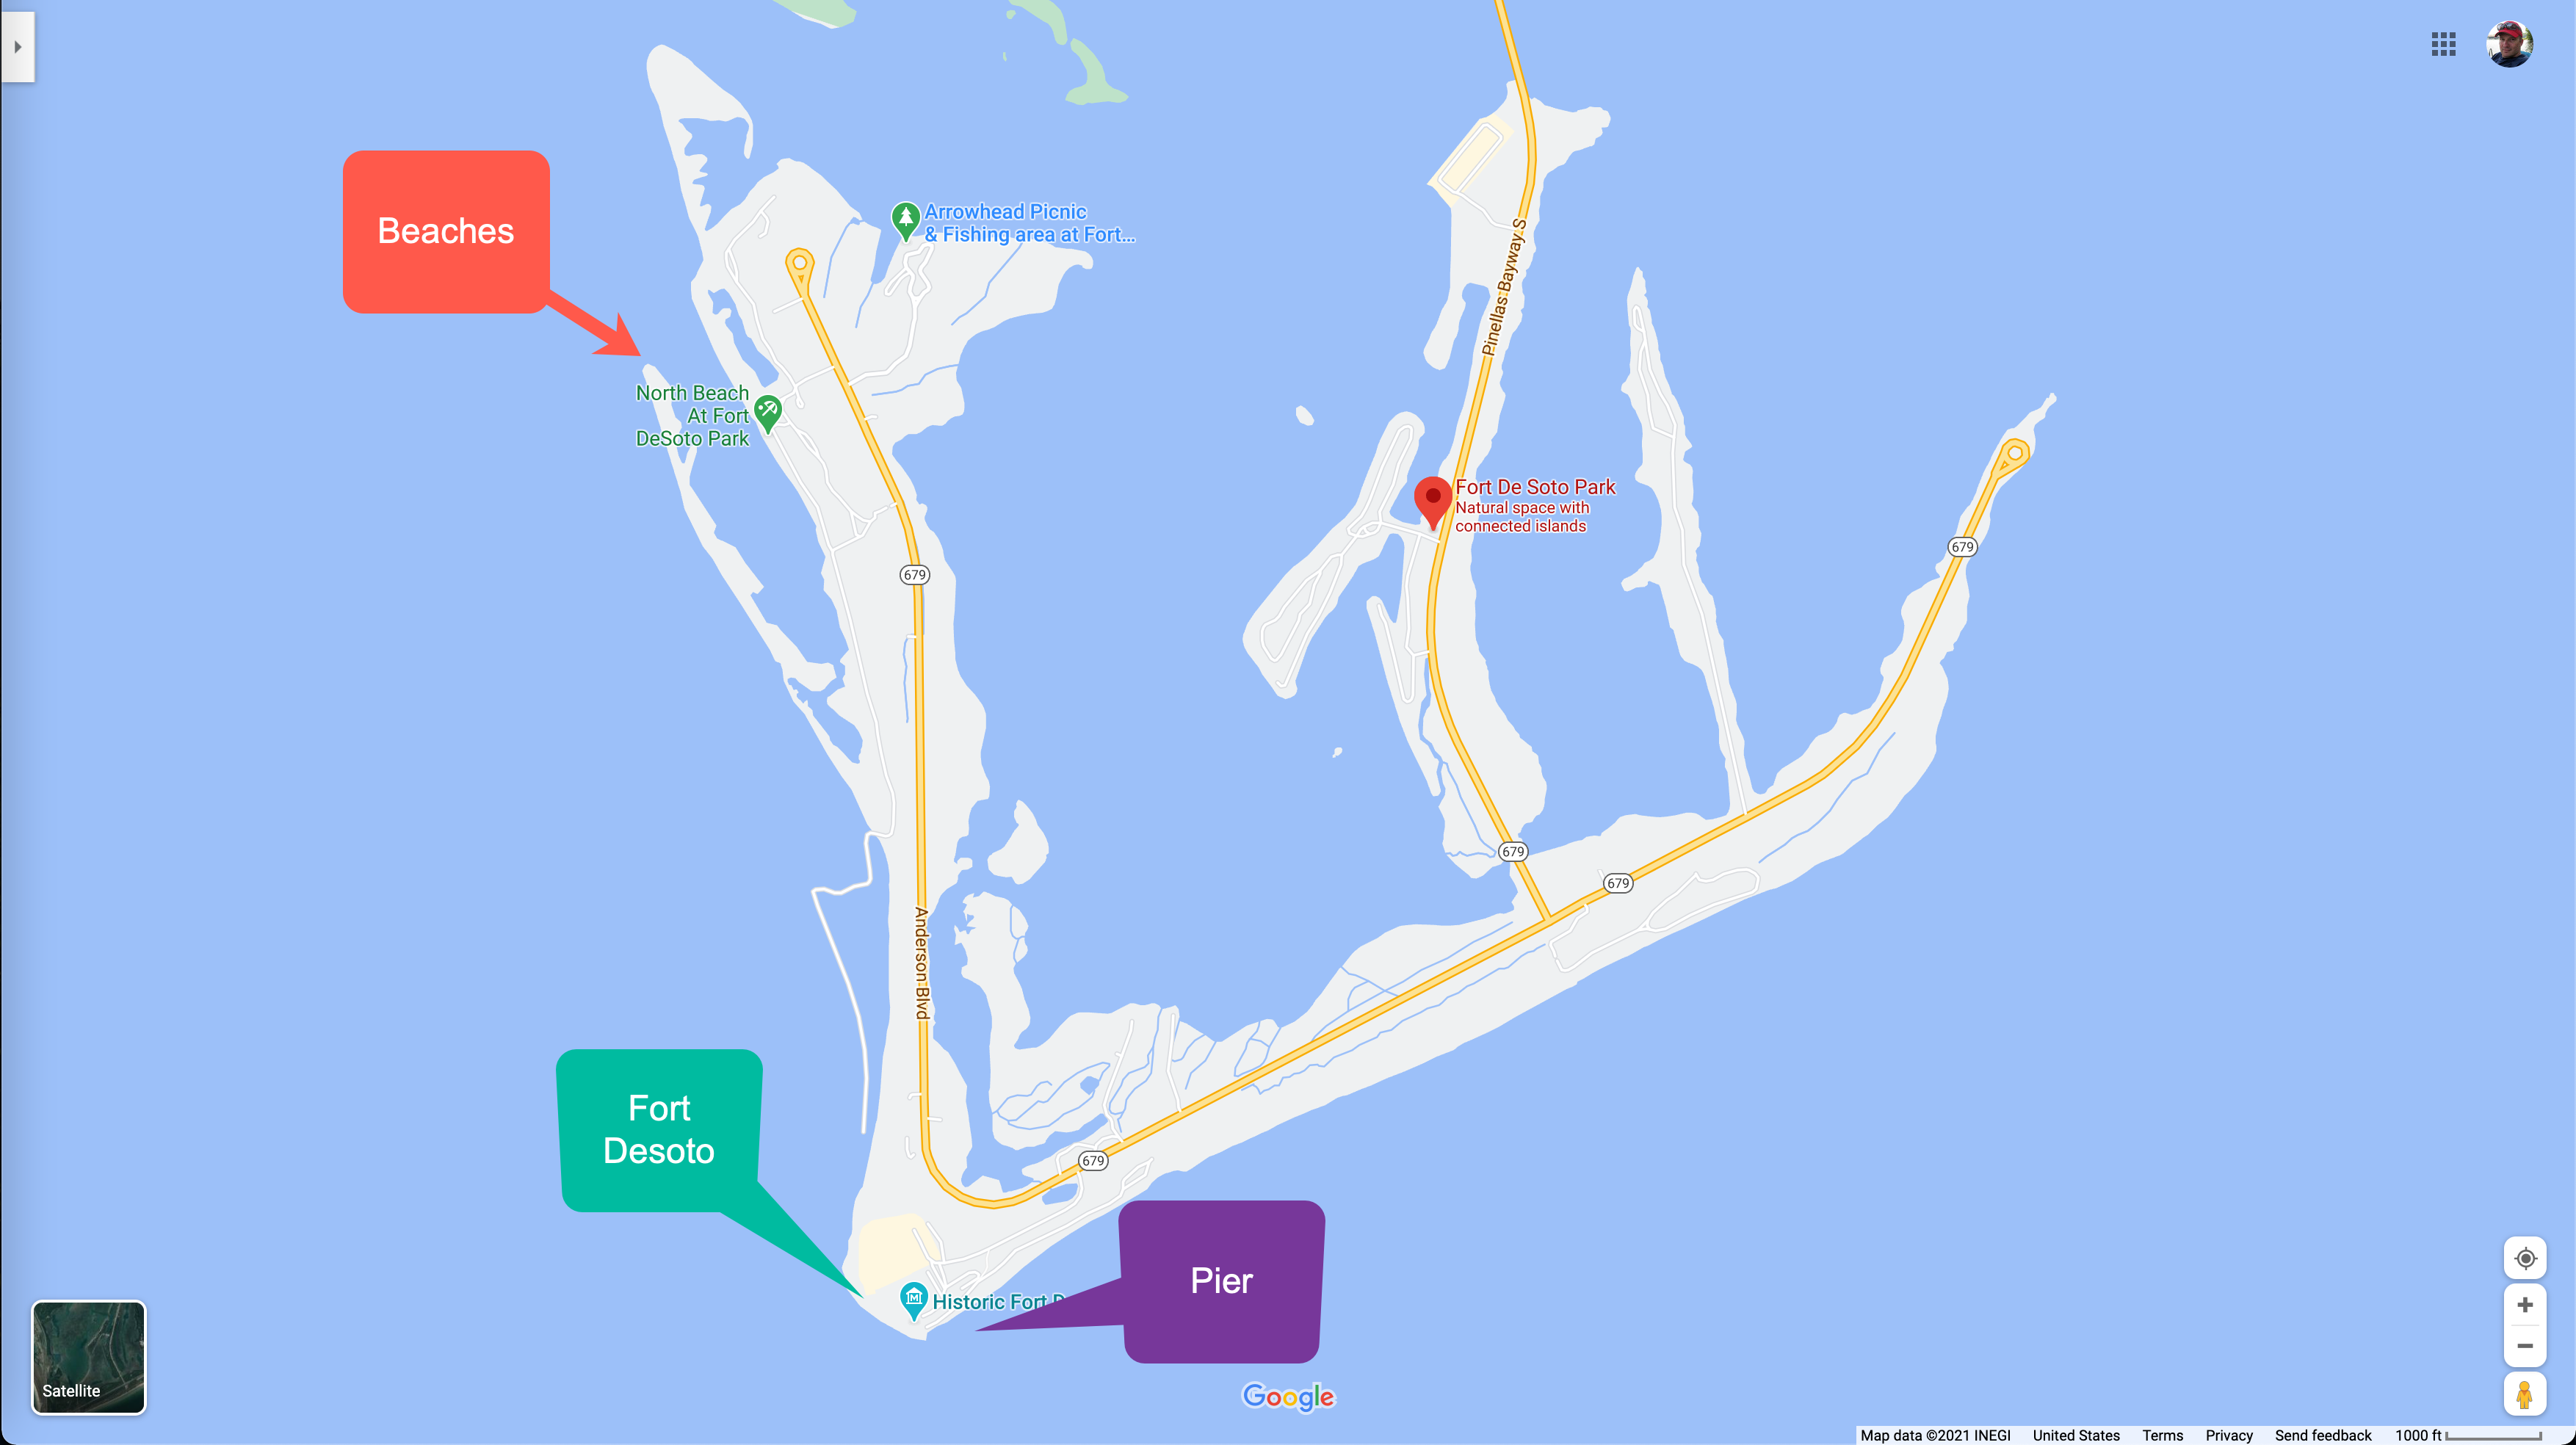
Fort Desoto Beaches
Fort Desoto is rightly known for insanely beautiful beaches - the sand goes for miles and the beach is one of the widest we have seen. Kayaks and SUP's are definitely the way to go to explore the area if you have one (or rent one). The sand is clean and smooth and the breeze coming off the gulf is perfect.
Camping at Fort Desoto
The county maintains a pretty large RV camping area, with 236 sites. Full water and hookup are available. The cost is pretty reasonable (for Florida) and can accommodate large rigs. They allow you to stay up to 14 days in any 30 day period. We would highly recommend staying in this area if you can, especially if you like the beach!
Billy's Stone Crab
We had dinner over at Shell Key, at a place called Billy's Stone Crab - and the food was great! We think we met Billy himself, and had a great time. The restaurant is kind of funky - one side is more outdoorsy, and the other has the main dining room. On top of the main dining room is an open long bar with seating facing the water. They had live music up there and that was fun. The only challenge was the late-day sun coming in off the gulf - tough problems to have!
Clear Kayak Tour
Christy found us a tour to take - a night clear kayak tour! This tour group has see-through kayaks with LED lights mounted in them, so they light up the underneath area of the boat. Get up and Go Kayaking is the company, and they have tours set up all over Florida. The kayaks were fun, but seemed a little less stable than the standard 2-man kayaks we have used in the past.
The tour guide was great and we got to see a horseshoe crab up close! Our only complaint was the tour was only 90 minutes, but advertised as 2 hours. She must have had a date, because she hauled ass back to the launch area - we were kayaking full-speed for the last half of the tour. That wasn't cool!
Upper Tampa Bay Trail
Tampa definitely is an urban area. There is no doubt about that. But the Upper Tampa Bay Trail is actually a decent greenway that is available to residents and visitors alike.
Upper Tampa Bay Trail
This is part 1, the lower part of the Trail:
https://youtu.be/NUZ958DYUOA
This is part 2, the upper part:
https://youtu.be/vUrhy7wWf9E
How to Get There
Being an urban trail, there are a lot of options for getting to the Upper Tampa Bay trail (both paid and free). Unfortunately, they still have not completed the entire trail so as of this writing it is basically two separate trails.
Upper Tampa Bay Trail Main Section
If you want to start at the southernmost point of the trail, make your way to the Memorial trailhead.Ehrlich road is another option if you want to enter in the middle of the trail. The main part of the trail ends at Peterson Road Park.
Upper Tampa Bay Trail North Extension
The northern extension can be picked up at Keystone park just north of Van Dyke Road, the Lutz Lake Fern Trailhead and ends at the Suncoast Trail.
Here is the list of trailheads courtesy the Hillsborough county web site:
Trailheads and Access south to north:
- Memorial Trailhead: 7499 Montague Street
- Cold water and parking
- Directions: Take Hillsborough Ave. west past the airport, Memorial Highway and Sheldon Road. Turn right on Montague Street. Follow Montague to the trailhead a short distance on the right.
- Channel Park Trailhead: 9201 W. Waters Avenue
- Restrooms, parking, water and drink machines
- Directions: Hillsborough Ave. West to Sheldon Road. Turn Right (north) onto Sheldon Road to Waters Ave. Turn left (west) onto Waters Ave. The trailhead is a very short distance on the right.
- Wilsky Boulevard Trailhead: 10314 Wilsky Blvd.
- Parking, cold water and restrooms
- Directions: From Tampa, take Waters Ave west to Hanley Ave. Head north on Hanley Ave, Hanley becomes Wilsky Blvd at Linebaugh. Cross Linebaugh, the trailhead is on the left/west side of Wilsky Blvd., before the on ramp to the Veterans Expressway.
- Ehrlich Road
- Parking, water, map
- Directions: From Tampa, take Ehrlich Road west toward Gunn Highway. The trail parking area is just east of Gunn Highway, south of Ehrlich, and adjacent to an old house. It is not directly on the trail and could be easily missed. The trail is two houses to the west, just before the intersection, next to Bally Hoo Restaurant. The water cooler and map are just south of the parking along the trail.
- Peterson Park: 8203 Peterson Road and Rails Road
- Parking, restrooms
- Directions: From Tampa take Gunn Highway north. Peterson Road is a mile north of the Gunn Highway/Sheldon Rd intersection at Sickles High School. Turn right onto Peterson Road. The park and the northern terminus of the trail are located ½ mile on the left.
- Lutz Lake Fern Trailhead: 7020 Lutz Lake Fern Road
- Parking, restrooms
- Directions: On the south side of Lutz Lake Fern Road east of Gunn Highway and west of the Veterans Expressway.
What to Do at the Upper Tampa Bay Trail
The Upper Tampa Bay trail is definitely oriented to biking and walking. It is completely paved and well-maintained. The asphalt may be a bit too rough for rollerblades, but we did see people doing it!
Biking Campbell Causeway
The Courtney Campbell Causeway in Clearwater/Tampa is definitely one of the unique fun things to do in the area.
https://youtu.be/vNbamZUtuOs
Courtney Campell Causeway
How to Get to It Courtney Campbell Causeway
Courtney Campbell Causeway is one of the main arteries between Tampa and Clearwater. It is pretty close to the Tampa airport, and comes out near Safety Harbor on the Clearwater side. One simple place to park (paid) Ben T. Davis Beach Park - map here. A little further away is a neighborhood park called Cypress Point Park , but will put you further away from the causeway. There is also free parking along most of the causeway, so if you don't mind starting in the middle, that is always a good option! Don't forget - this place can be VERY busy during the weekends. Crowds can be big, and parking can be tough.
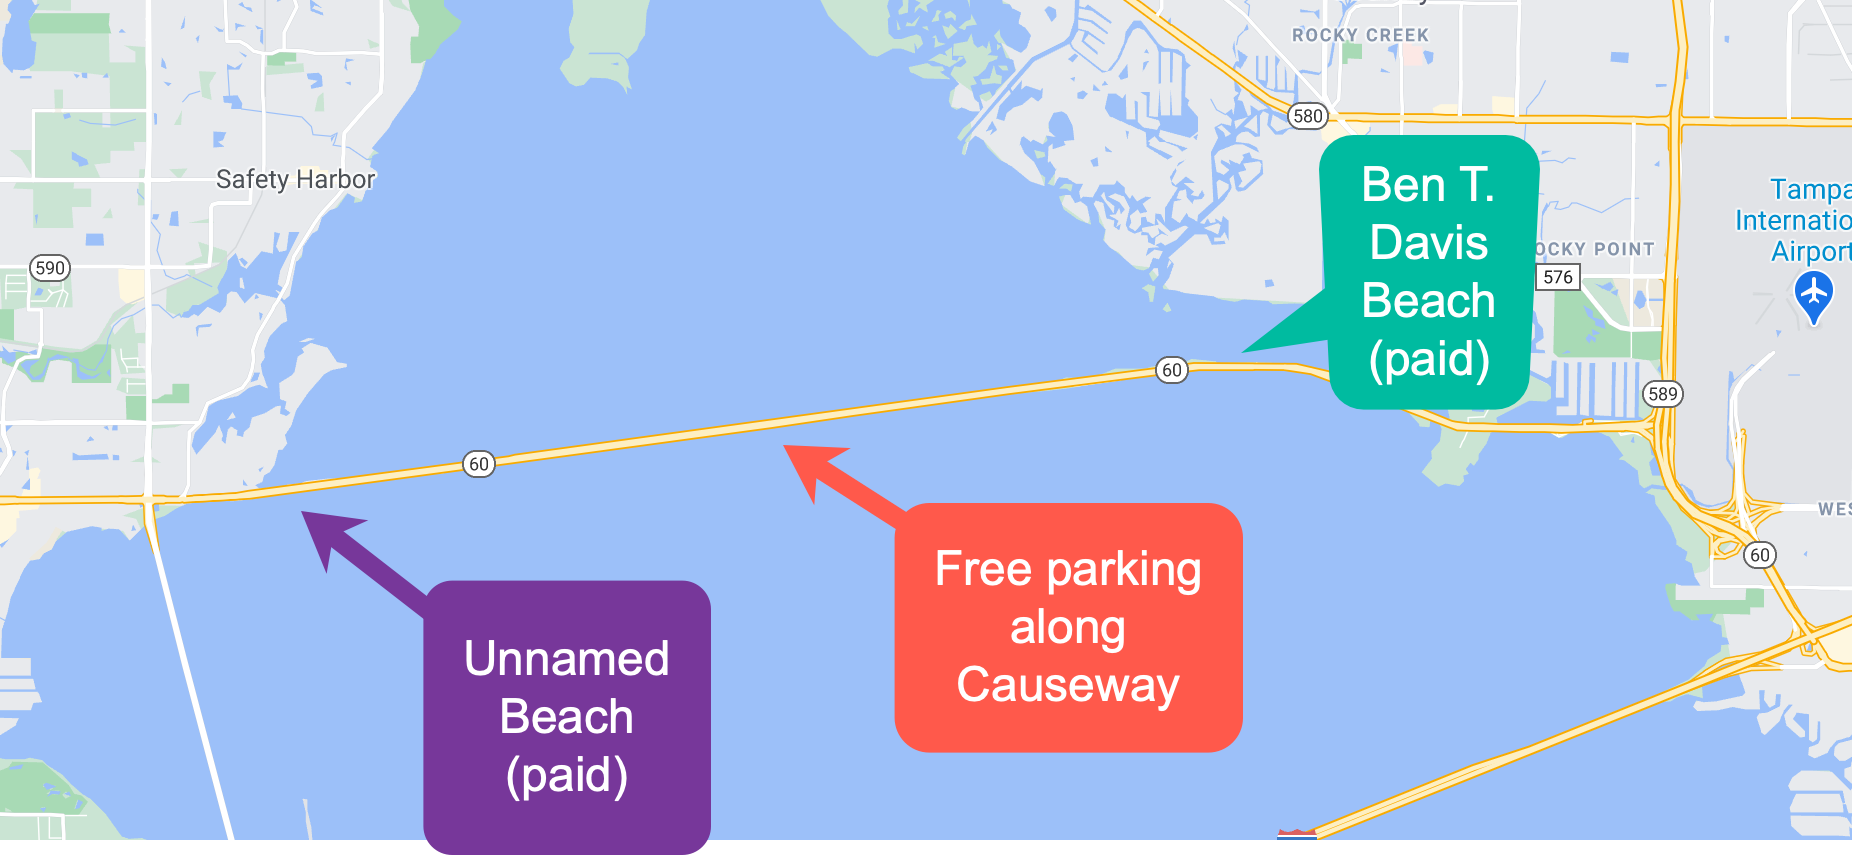
Another option on the south side close to Clearwater is a paid beach lot. The sand is really nice there and it can be a bit quieter than anything on the Tampa side.
Things to Do at Courtney Campbell Causeway
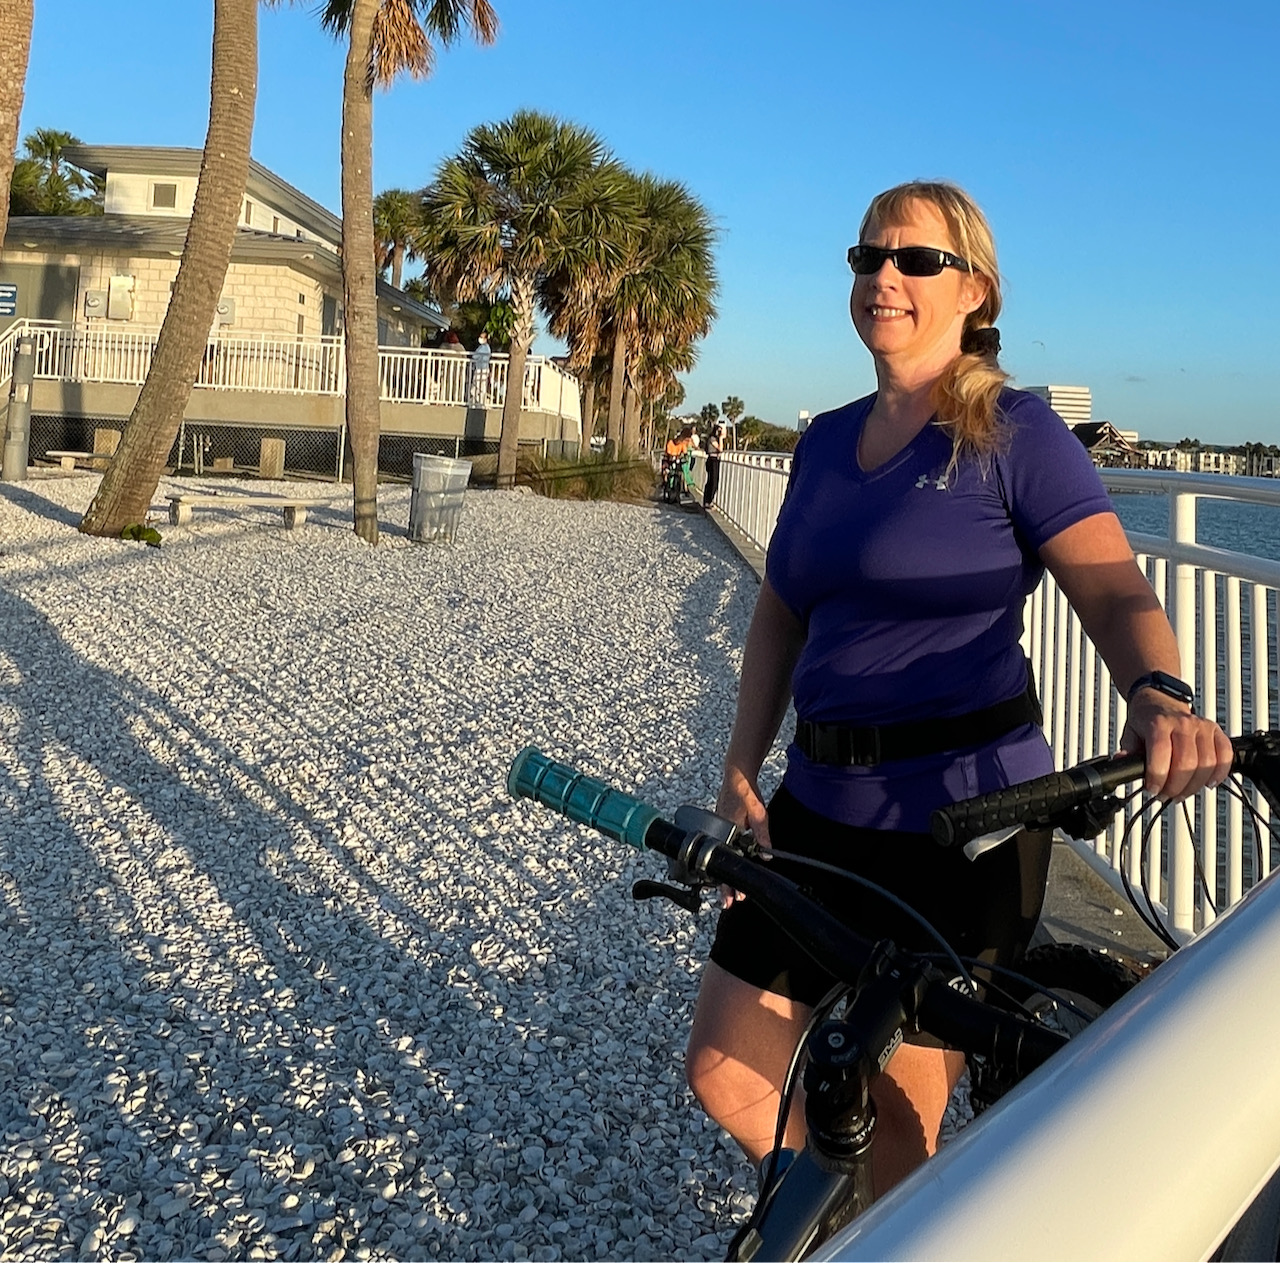
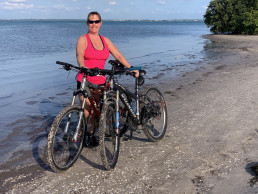
Courtney Campbell Causeway is a great place to hang out when the weather is nice! Especially during the week, when you can avoid the biggest crowds. Biking is always a favorite here, along with walking. Because the path is so well maintained, roller blades or roller skates are also really good options. We mainly biked there because we wanted to cover a lot of ground. Most people use the causeway to hang out, have picnics, or chill with friends. On the Sunday we visited it seemed to be "battle of the car stereos" in may areas, and the volume in a couple cases was excruciating. If that's not your thing, definitely go during the week!
One thing to be aware of - the breeze off the bay can be very strong on many days. When we biked, the headwind was almost unbearable going from the Clearwater side over to Ben T. Davis beach. But we were rewarded with a tailwind that made our mountain bikes feel almost like electric bikes! So it can be a trade-off, but something to be aware of.
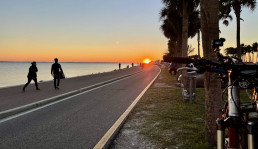
One of the nicest things we enjoyed was the sunsets - you can't beat watching the sun set over Clearwater. Almost anywhere along the causeway has a good view for a sunset!
Bathrooms
The only public bathroom we found was at Ben T. Davis beach. It was small, but we never had to wait very long even when we went on the weekend. If your bladder is small, you may want to plan your trip so you can hit this area if you need to go! Or don't drink a lot of coffee or water before your visit!
Fishing
A lot of people were fishing close to the Campbell Causeway bridge, and also on the north side of the Causeway. Just east of the bridge is the causeway boat launch. As of this writing, parking is $5 and it is a pretty large boat launch. There also usually is porta potties if you really need to go!
Food Options
Not a lot of food options right on Campbell Causeway, but one notable fun place is Whiskey Joes - They can be super busy, but the view is amazing and this is probably the closet you can be to Tampa and feel like you are in the middle of nowhere at a beach! Since they are on the south side of the causeway, they also get that great sunset view.
Because this is really an urban area, once you leave the causeway in either direction you can find a ton of food options. But if you want to save money, pack a picnic and enjoy your food on the causeway!
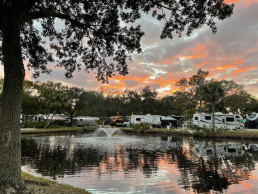
Bay Bayou RV Resort - A Hidden Gem!
We spent the entire 2021 winter at Bay Bayou RV resort in Florida - one of the nicest resorts we found so far! They have 300 full size RV lots. Surrounded by water, there are easy access for Kayaks, canoes, or small fishing boats. You can walk out on the one of the two docks on site to catch a beautiful sunset or just relax. They have a heated pool to enjoy all year round as well as very clean bathrooms, showers and laundry facilities that are some of the amenities. Bay Bayou is conveniently located close to Tampa’s top attractions and the beautiful Gulf of Mexico beaches.
Bay Bayou RV Resort - A Hidden Gem!
How to Get to Bay Bayou RV Resort
One of the biggest advantages to Bay Bayou is the proximity to a major metropolitan area - it is in Hillsborough county (Tampa), but very close to the border of Pinellas county (Clearwater/St. Petersburg). If you're looking for camping in Clearwater, this gives you great access to pretty much any store or activity you would want, but also a quick 30 minute drive to gems like Honeymoon Island State Park or Caladesi Island State Park. And if you drive a little further, you can go to the main Clearwater beaches (we try to avoid, too crowded!) or Fort Desoto beach which is amazing!
One thing to note is do not rely on Google for your directions to Bay Bayou. We came down I-75 and Google routed us some strange way down Countryway Blvd - which is not big-rig friendly! A lot of trees, speed bumps and generally annoying. Your best bet is to stay on 580 to Double Branch Road. Two easy turns to the entrance of Bay Bayou!
Bay Bayou RV Resort Check-in
The check-in process couldn't be easier. Pull into the parking lot and go inside to the desk. One thing to note here - Bay Bayou is gated and the front area isn't super large. With our 45 foot rig we felt a little tight when we pulled in (and unhooked our Jeep). But making loop around the bay bayou driveway turned out to be no big deal (click on image to enlarge)
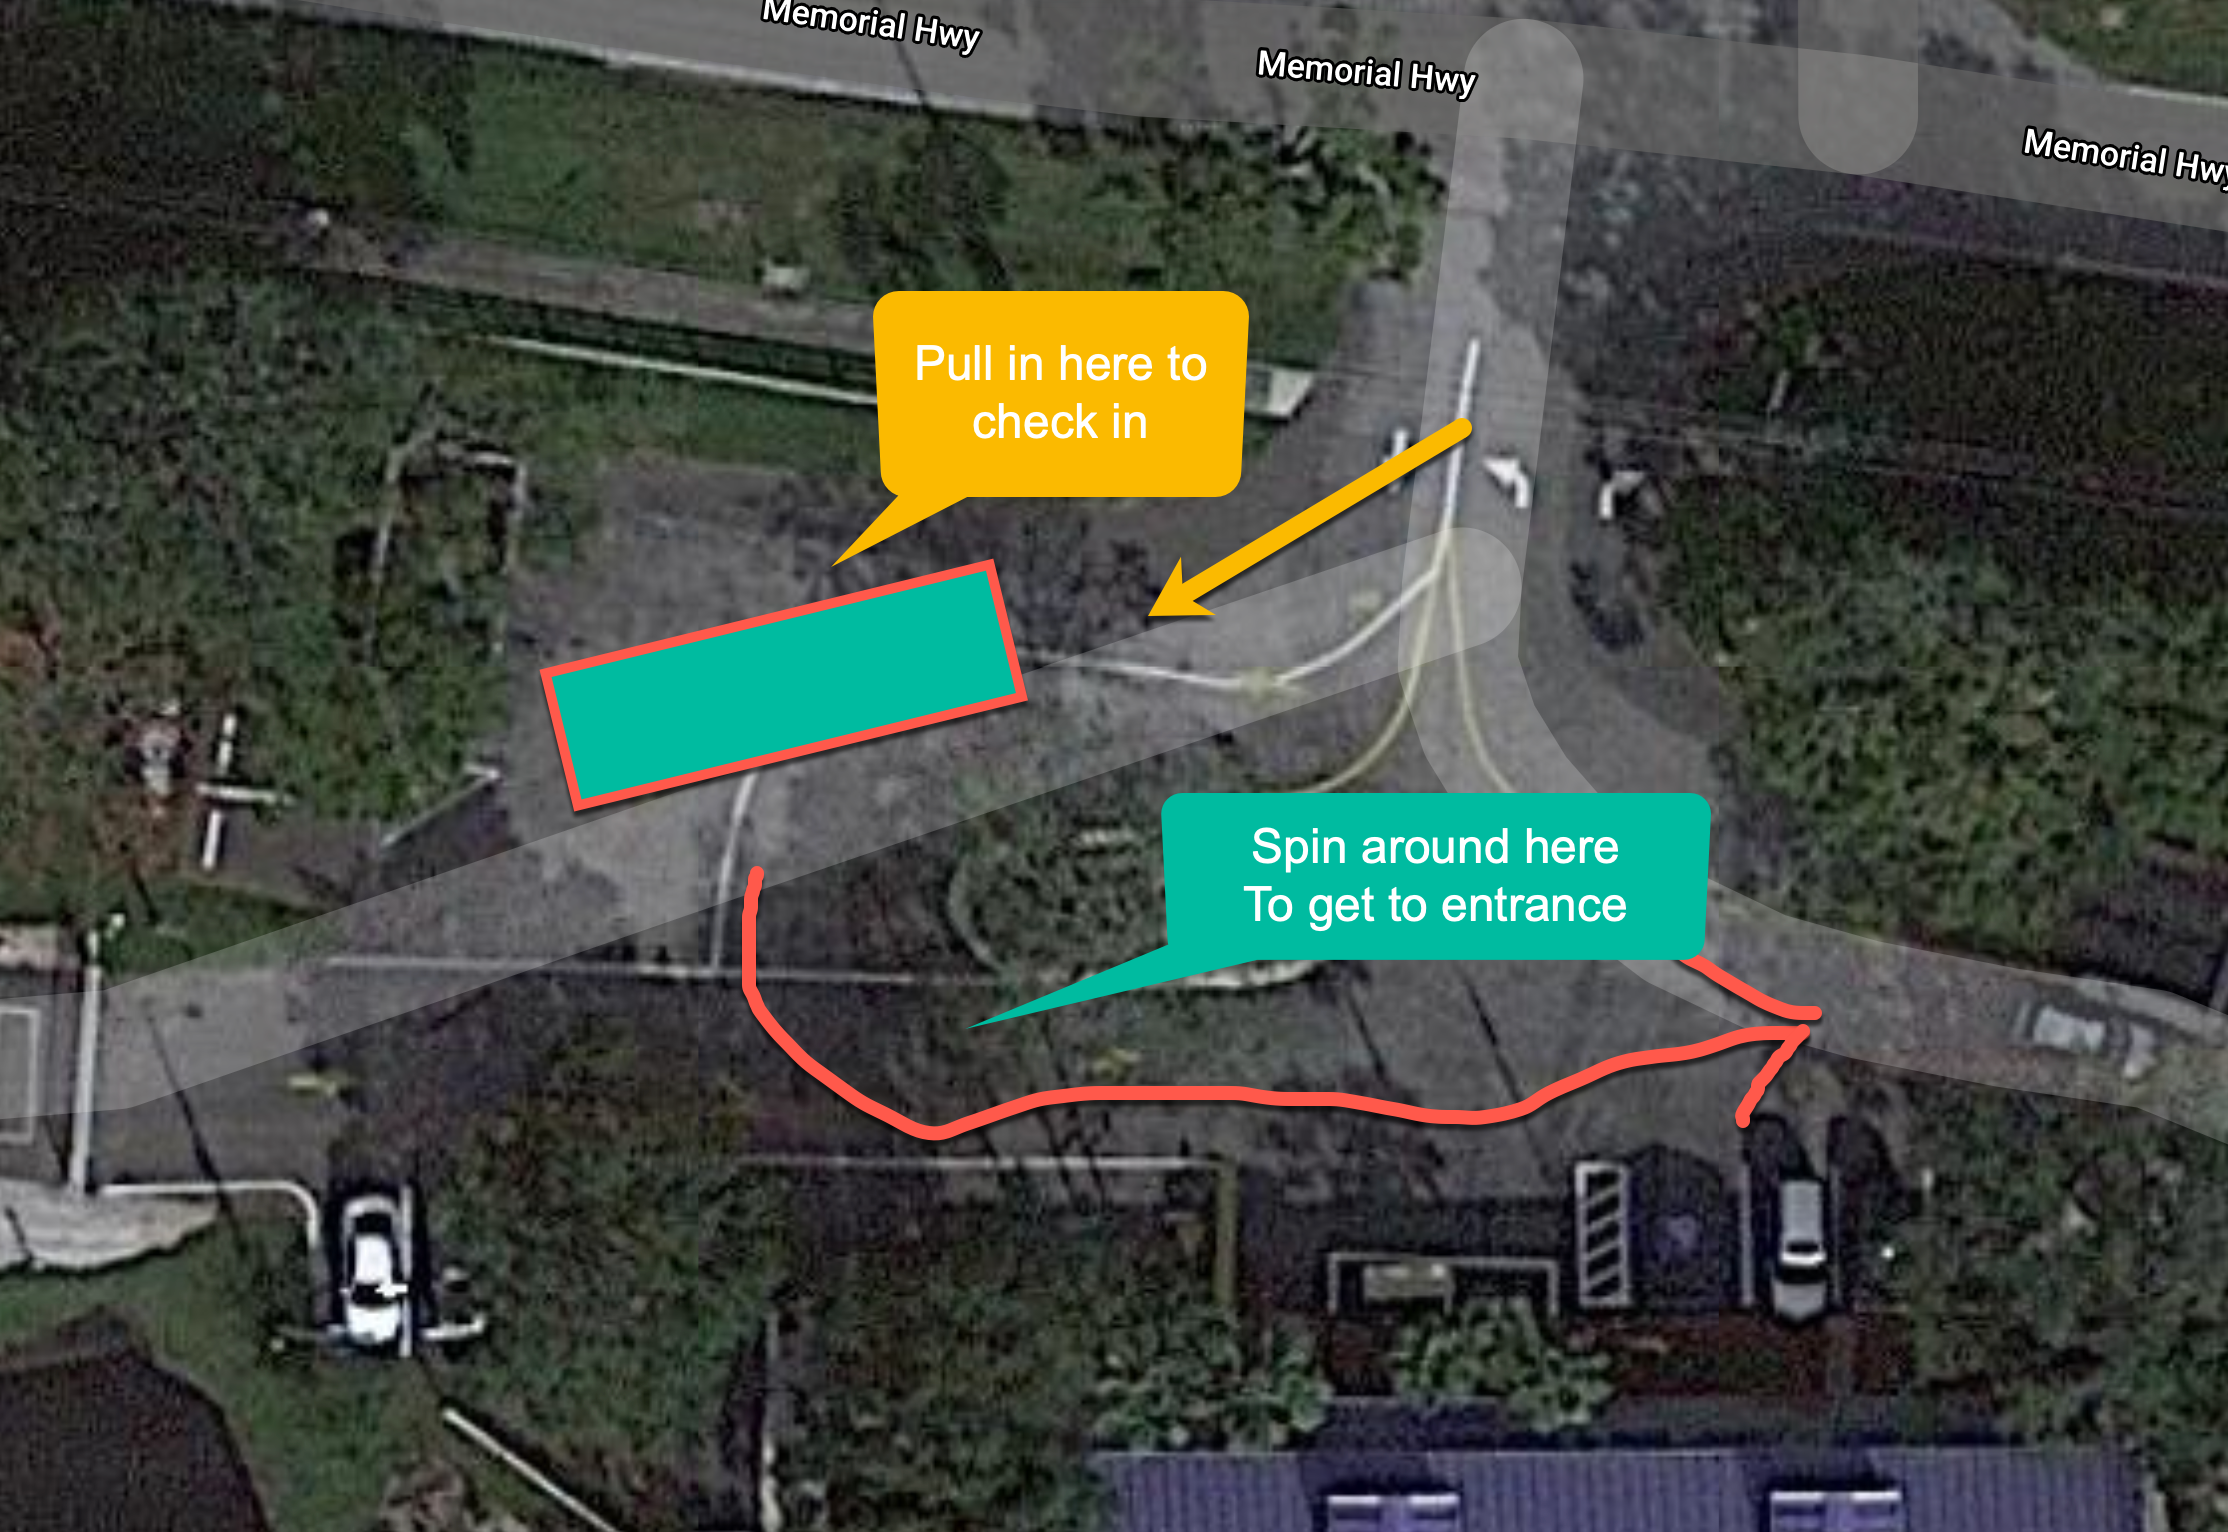
But Don't Do This!
The actual drive for us into the park was another story! You have the option of letting them guide you to your spot, and if you have a big rig it's worth it! Our problem was they told us to take the first right after the gate. Christy was leading the way and she looked right and saw RV's blocking the road (new arrivals also).
So She made the decision to drive further down, which turned out to be a bad idea! We had to navigate through a turn that was next to impossible in our 2015 Entegra Cornerstone. If you have a smaller rig, it would not be an issue, but for us it was the most stressful part of the day!
The reason for this was the bad placement of a concrete sewer port right on the corner of a critical turn (click on the image below). Judging by the marks on it, we weren't the first to make this mistake! The good news is we had a lot of help from neighbors navigating this turn and made it safely to our spot.
The lesson learned is to really study the park map (and the mapped route to your destination every time. Ideally, unhook your toad and drive the route before you pull your rig through. Driving a 50,000 lb. motor home is stressful enough - why add to it?
Park Layout
We loved the layout at Bay Bayou - even though it is pretty much a standard grid layout, the large amount of big trees give it a VERY private feel from almost any campsite. And you have your choice of two distinct sections - The older side (about 3/4's of the park) has gravel lots with a small paved patio, more trees, and is somewhat cheaper. Or you can opt for the newest section which has full paved driveways, more big-rig friendly, and somewhat less trees and less established foliage.
We have stayed at both, and find each to have their charm. On the new side, our lot was huge (it was kind of in the corner by the fire pit and that helped) and we had a ton of room to stretch out. On the older side, we were more packed in, but the trees really kept us feeling less cramped and had a nice nature feel to it. We were also closer to the pool and other amenities, which was a bonus! We thought that the gravel would be a big downside, but that turned out to not be that big of deal.
Amenities
Pool
The pool is heated and opened year-round. They hold water aerobics as long as it isn't freezing out! They don't have a separate hot tub, but a section of the pool does have jets for a hot tub-like experience.

Fishing and Docks
Being on the Bayou has its advantages - there are docks at the back of the property (one that allows fishing). They also have places to launch a kayak if that's your thing. The only downside is the back of the property faces highway 580 - which is a very busy 4-lane that get get noisy.

Laundry and Bathrooms
Large, clean and updated, the facilities are very nice! Since the property is pretty large, there is actually two laundromats on-site.
Mail Delivery
Sadly, mail delivery has now become a big deal at parks - many are charging fees for packages. For people like us that would be horrible! Luckily, Bay Bayou has free mail service, and is excellent. You get your own mailbox and they promptly sort the packages for your retrieval from the clubhouse. They feed our Amazon addiction very well!
Security
We spent 5 months at Bay Bayou RV Resort, and didn't have a single issue here. They are gated with a key code, and have a roving security patrol at night. That was reassuring, but we never saw any activity that warranted the patrols, and that is a good sign! Even though the park is in an urban area, it is tucked into a pretty upper-middle class area of nice homes and shops. That definitely helps keep the riff-raff out of the park :-)
The Area Around Bay Bayou RV Resort
There is so much to do around this area. Check out our other articles for more details:
The People
Since this was the season of Covid, we didn't hang out with people too much (we avoided Covid and are glad we did!). But the people we talked to were super friendly and they have a very welcoming Facebook group for seasonal travelers.
The staff was super nice and helpful also. They worked hard to make sure we got a seasonal spot when we made a last-minute decision to stay for the winter due to Covid. The price was pretty high, but in-line with what you would expect for Florida during the snowbird season! If we were looking for a Tampa RV Resort, we would definitely come back here!


5 Things to do at Caladesi Island State Park
Caladesi Island State Park in Florida in Clearwater is a gem of a state park in Clearwater. If you are in the Clearwater or Tampa area, make sure to visit and enjoy what it has to offer!
To get to Caladesi by ferry, you first need to go to Honeymoon Island State Park. Take 586 through Dunedin - you will cross a beautiful causeway that has free beaches on both sides.
Once you pass a few large condos on the right, you will come to the entrance at Honeymoon Island state park.
It costs $8 per vehicle to enter unless you have a Florida annual state park pass (we have one, and it cost $120).
Once in the park, it's just a short drive to the Ferry launch parking lot. When we went, we had to wait about 90 minutes for the noon ferry (the 11 had just sold out). This was in February - the crowds can vary widely throughout the year.
Once you board the ferry, it's a pretty 15-20 minute ride into the harbor at Caladesi Island. Sit back and enjoy the view!
https://youtu.be/v6Ld_sRxU6A
5 Things to do at Caladesi State Park
Take the Ferry to Caladesi State Park
Caladesi Island state park is a little different than many state parks - you cannot reach it by car. So while it's a little more trouble to get there, this also means it will likely be less crowded than most state parks. The only way to the island is by boat. So your options are:
- Take your own boat - Caladesi has a 108 slip marina that you can use to enjoy the island. When we were there, it was almost empty!
- Rent a Kayak - Multiple places inside and outside the park are good for renting a kayak, which you can then paddle over to the island. Here is one good one.
- Take the ferry - This is what we did! You have to enter Honeymoon Island state park, which will cost you $8 unless you have a Florida annual state park pass. The ferry area has ample parking, and run ferries either every 30 minutes or hour depending on the time of day. When we were there the cost was $16 per person, but there is a coupon for a dollar off.
Kayak the Mangroves
You can rent a kayak at the Marina/Cafe for $25 per person. We didn't get a chance to do this yet, but it sounds amazing! Another option is to rent from Sail Honeymoon and paddle over to the island. As of this writing, you can get a 2-man kayak for $60 for all day! If you do go south of the marina, plan to be sitting in the kayak for awhile - there are no areas to beach (it's all mangroves) and some of the currents and waves can get a bit dicey.
Hiking Caladesi Island
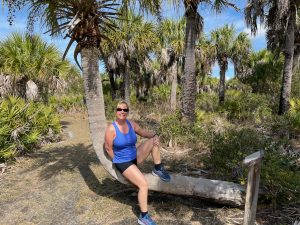
The island has a 3.5 mile loop of trails that have a nice mix of mangroves, virgin pines and other flora and fauna native to Florida. When we went in February the hiking conditions were perfect! The trail has a mix of sandy areas and pine needles, and we would rate as very easy (and flat). The trail has routes that dump you out onto the 4 miles of undeveloped beach.
Hang out on the Beach at Caladesi Island State Park
The beach is one of the few in Florida that is truly unspoiled. There is no development anywhere to be seen - just 4 miles of sand and water. There is plenty of seaweed and other ocean stuff that washes up on shore, so don't expect it to look like a groomed resort beach (which is fine by us!).
Most of the people stay near the marina beach, were you can rent umbrellas and beach chairs. Bathroom facilities are also close by on the main beach.
If you go further south, you will easily find areas that have very few people around. Just the perfect place for a quiet day at the beach!
Currently you can walk from Clearwater beach to Caladesi - but it will take you quite a long time, so plan accordingly.
The only downside is it is relatively pricey day - count on $20 per person (before any discount) in fees to get to this beach using the ferry through Honeymoon Island. A decent amount of restrooms are available close to the beach and the marina.
After a long day on Caladesi Island, we suggest you park on the causeway beach right outside of Honeymoon Island. On the south side of the beach you will face Caladesi, right on the water's edge. From here you can enjoy a beautiful sunset over Caladesi Island - a great way to end a beautiful day.
Hang out at the Caladesi Island State Park Marina
Not as fun as the beach or hiking, but the marina provides amenities like a gift shop, a ranger station and a small restaurant that serves bar food like chicken fingers and hamburgers. If you have lunch here plan to spend at least $50 for a couple! They do have 108 slips in the marina, so plenty of place if you show up in your boat.
10 Things to do at Honeymoon Island State Park
Honeymoon Island State Park should be on the top of your list to visit if you're in the Tampa/Clearwater area. The beaches are beautiful, the crowds aren't nearly as bad as the main Clearwater beaches, and there is plenty to do. Probably the best $8 per carload you can spend (or $120 if you want the one year Florida State Park pass).
https://youtu.be/V60BIKWoAjE
We have spent a lot of time at this park, so without further ado, here is our:
10 Things to do at Honeymoon Island State Park
Sit on the Honeymoon Island State Park Beach
Clearwater beaches are known for their beauty, and Honeymoon Island delivers. You will love the white fine sand and the deep blue waters. Although not the biggest beach, and some parts are a bit rocky (depending on the tide and how bad the storms have beat it up), it is still a pleasure for chilling on.
Of course, like most Florida beaches, the crowds are very dependent on the weather and the time of year. For most of the winter, we enjoyed a lot of quiet time on the beach - very few people come to the state park, especially during the week. But once the weather warms up, it can get VERY crowded and a bit crazy. We went on a Sunday at the end of February (first day in the low 80's) and the park was absolutely packed. I guarantee that the main Clearwater beach was even worse!
Walk the Trails
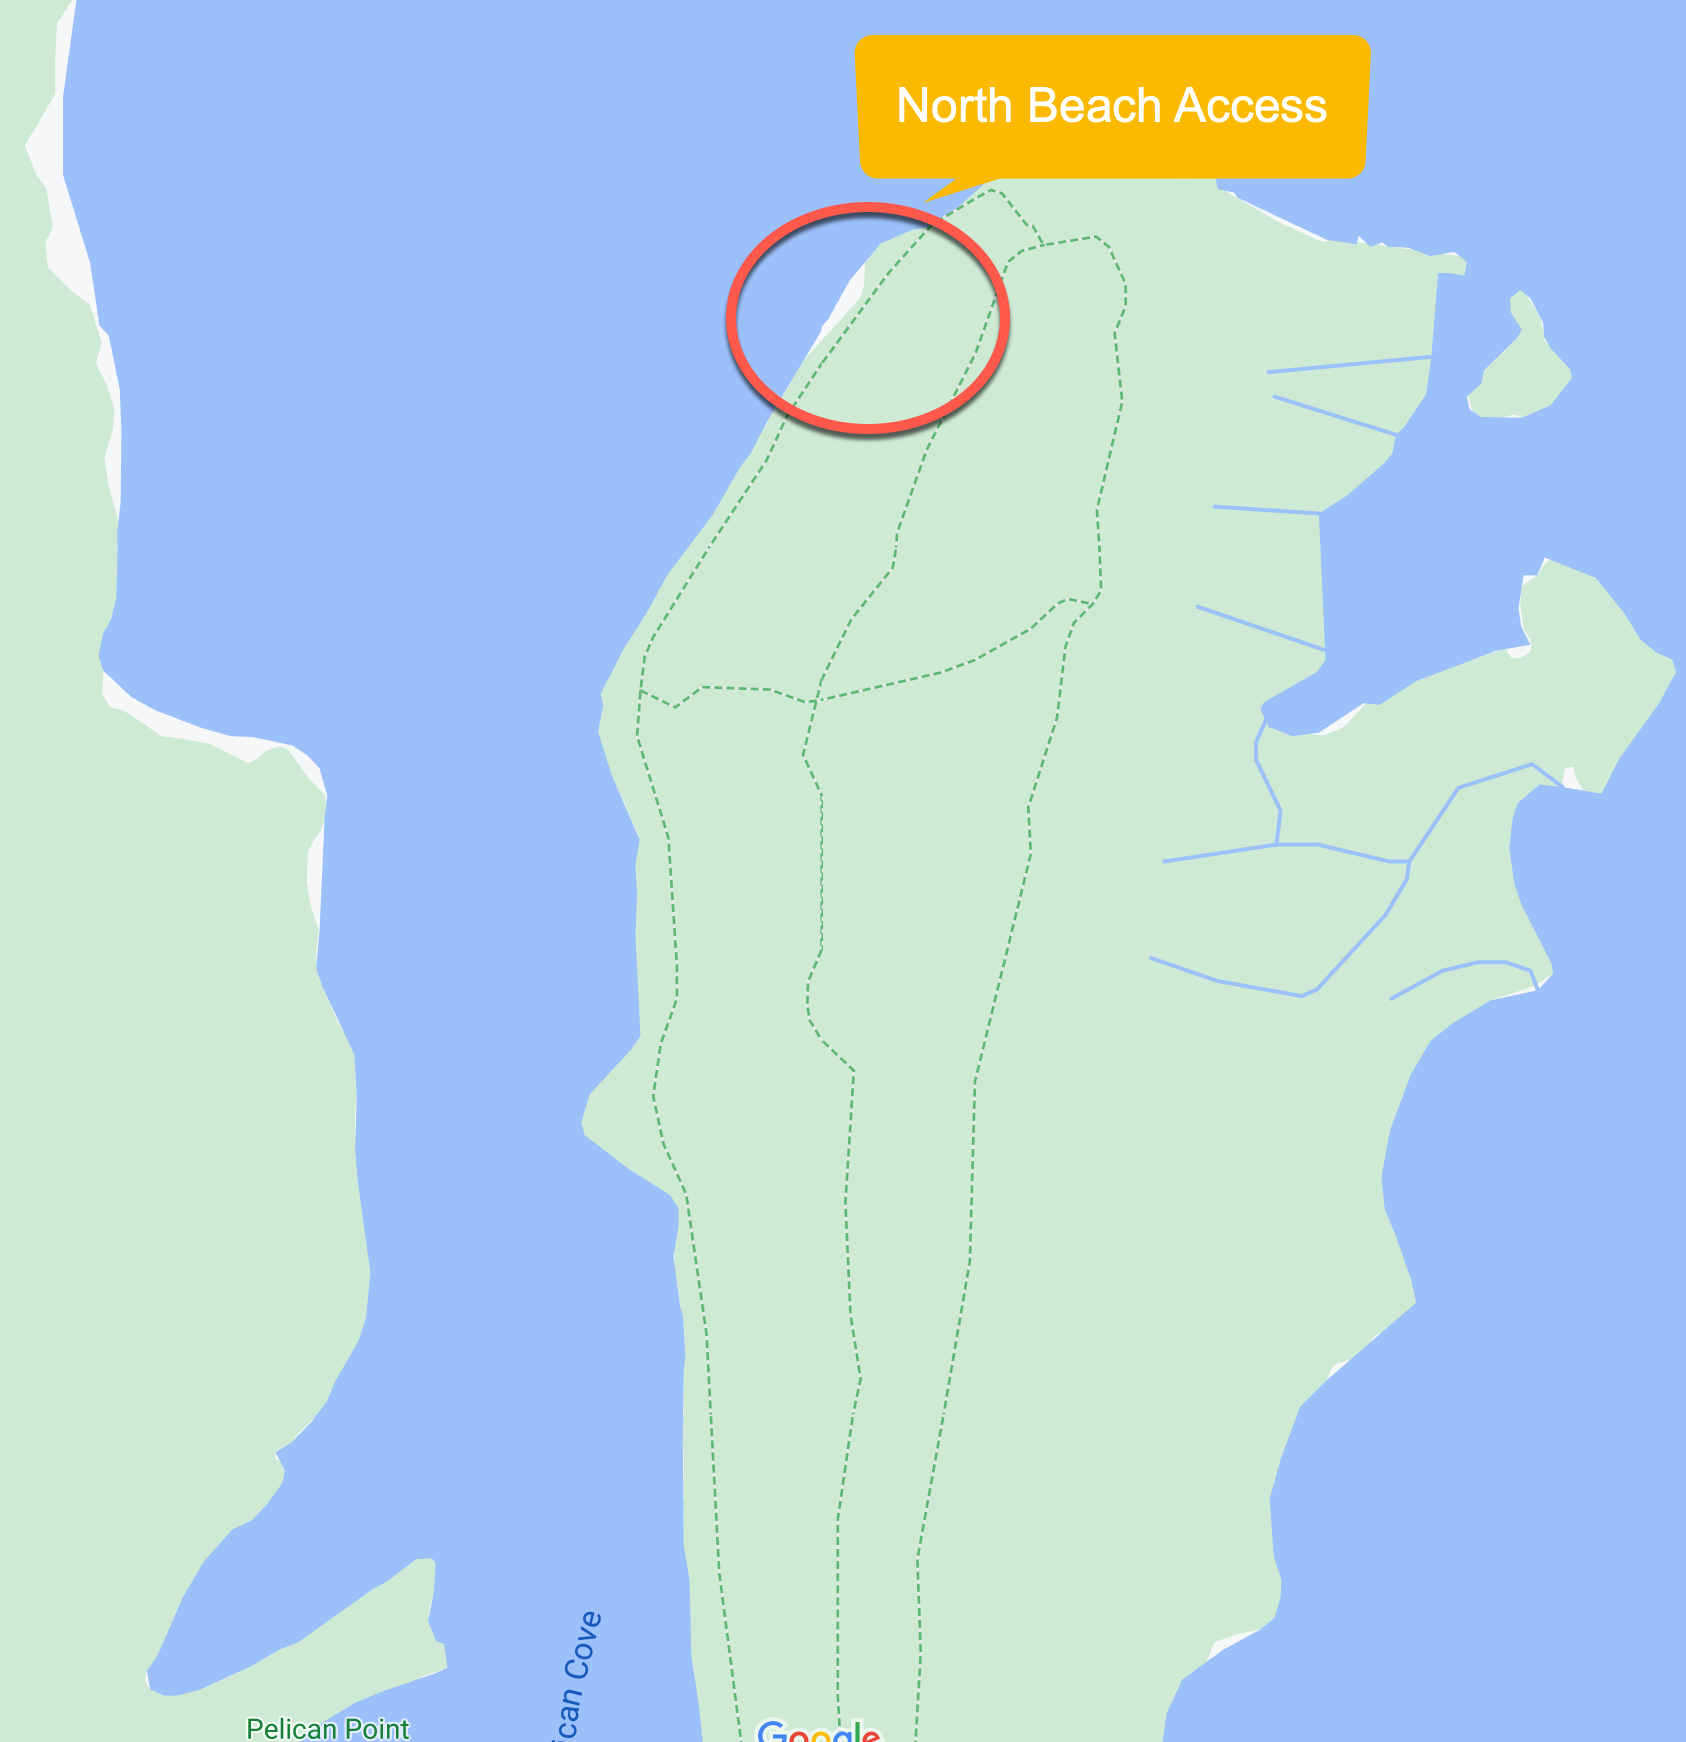
The trails at Honeymoon Island State Park aren't particularly long, but you are rewarded with a tropical environment that is pretty unique. Hitting all the trails on the north side of the island gets you about 3 miles of hiking. One has a loop and goes through the center of the island. The other runs closer to the beach. At the northernmost point of the trail they both dump onto the north side of the beach. The terrain is very flat, and is mostly dirt or sand. It can get pretty muddy if it has been raining, and some areas are tough to pass on a mountain bike due to deep sand.
One thing to absolutely bring is mosquito repellent. We ran into certain areas that were absolutely infested - our legs were covered with more mosquitoes than we ever had seen in our lives!
Eat at the Restaurant
There are actually two small restaurants at Honeymoon Island - pretty basic grills with burgers, hot dogs and chicken fingers. Expect to pay above average prices for this luxury! We would always pack our lunch. Both healthier, and easier on the wallet!
Take the Ferry to Caladesi Island State Park
The only way to Caladesi Island is via the ferry crossing at Honeymoon (unless you have a boat or jet ski!). Check out our article on Caladesi or our video!
Ride a Bike on Honeymoon Island State Park
The park isn't huge, but it has a surprisingly nice paved bike trail throughout. Smooth, wide and well-marked. And if you have a mountain bike, the 3 miles of trails are also accessible by bike. We would rate it as an easy mountain bike trail, with the only challenge being some sandy sections that you might have to walk unless you have fat tires. The trail is smooth enough for rollerblades or roller skates - they did a good job on building it out!
Rent a Kayak
Although not available directly in the state park on the south side of the Island. Also, just outside of the park is a Kayak rental store called Sail Honeymoon. for about $60 per day you can explore the island from the water!
Explore the Visitor/Nature Center
The visitor center has a lot of interesting information and is worth the visit. Make sure you go out back and take in the view of the gulf! They maintain a garden of native plants just outside the visitor center, which is a quick informative tour.
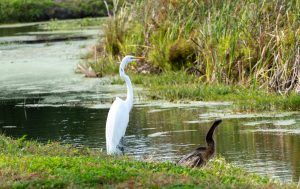
Enjoy the Wildlife
A variety of wildlife exists on the island - plan to see a ton of turtles, armadillos, birds and the occasional rattlesnake. Schools of dolphins are often playing right next to the beach.
Bring Your Pet on the Beach
The first section of the beach actually allows pets, which is great for dog lovers!
Watch the Sunset at Honeymoon Island State Park
Almost the entire beach is west-facing, offering some of the best sunsets in Florida! The best ones are when the sky is partly cloudy. The clouds just really make for an amazing show. In our opinion, one of the best places to hang out for the sunset is actually just outside of Honeymoon Island - you can park on the causeway beach right next to the water and put your chair out. Makes it a lot easier to get out of traffic once the sun sets!
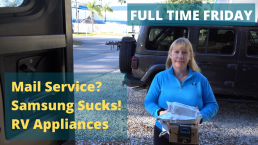
Mail Service, Samsung Sucks! #FTF #FULLTIMEFRIDAY
Episode 2 of FTF! Samsung sucks, do you agree? And we talk about mail service!
Welcome to full time Friday or FTF! What is FTF you ask? Well, it’s our chance to talk about whatever is on our minds - often RV related, but could be about anything! This is our chance to connect with our audience, even more than our normal how-to and travel videos. So make sure you comment if you have any questions you want us to address in a future FTF!
This week we cover:
- Mail service - easy peasy or PITA? Comment below!
- If Amazon delivers every day, where does all of it go??
- Vloggers everywhere!
- This is the way!
- Why Full Time Friday?
- Samsung SUCKS!
- Samsung SUCKS 2!
- Top Pop! Popcorn popper
#FTF #FULLTIMEFRIDAY #RV #RVLIFE
https://youtu.be/Us9zFACJMVM

Oldsmar Trail Hiking
We have spent most of the Winter of 2021 in Tampa, close to the city of Oldsmar. And one thing we discovered is that Oldsmar trail hiking is far more interesting than you would expect. Even though it is very urban in this area, they have done a decent job of making a set of hiking trails, connected by mostly residential streets. They claim there is 11 miles of trails, and that sounds about right!
Oldsmar Trail Hiking
What we ended up doing is starting at the center of the Oldsmar parks (which has the most parking lots) and then breaking our hikes into three distinct sections, each with unique quirks and features - each hike allowing us to get easily up to 8 miles round trip on a bike or a hike.
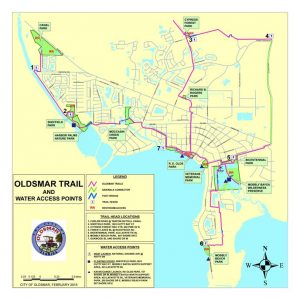
Our Oldsmar Trail Hiking Starting Point
We always start our adventure at the same spot - one of the many parking lots at R.E. Olds Park or the parking lot at Veterans Memorial Park. We could start Sheffield park (they also have free parking) or xxx. Mobely park is another option, but that is paid parking so unless you want to start at that one because of the beach (not that great of a beach) then don't bother.
We found it easiest to go down Lafyette road (off Tampa rd/580 and opposite Race Track Rd) to get to these parks.
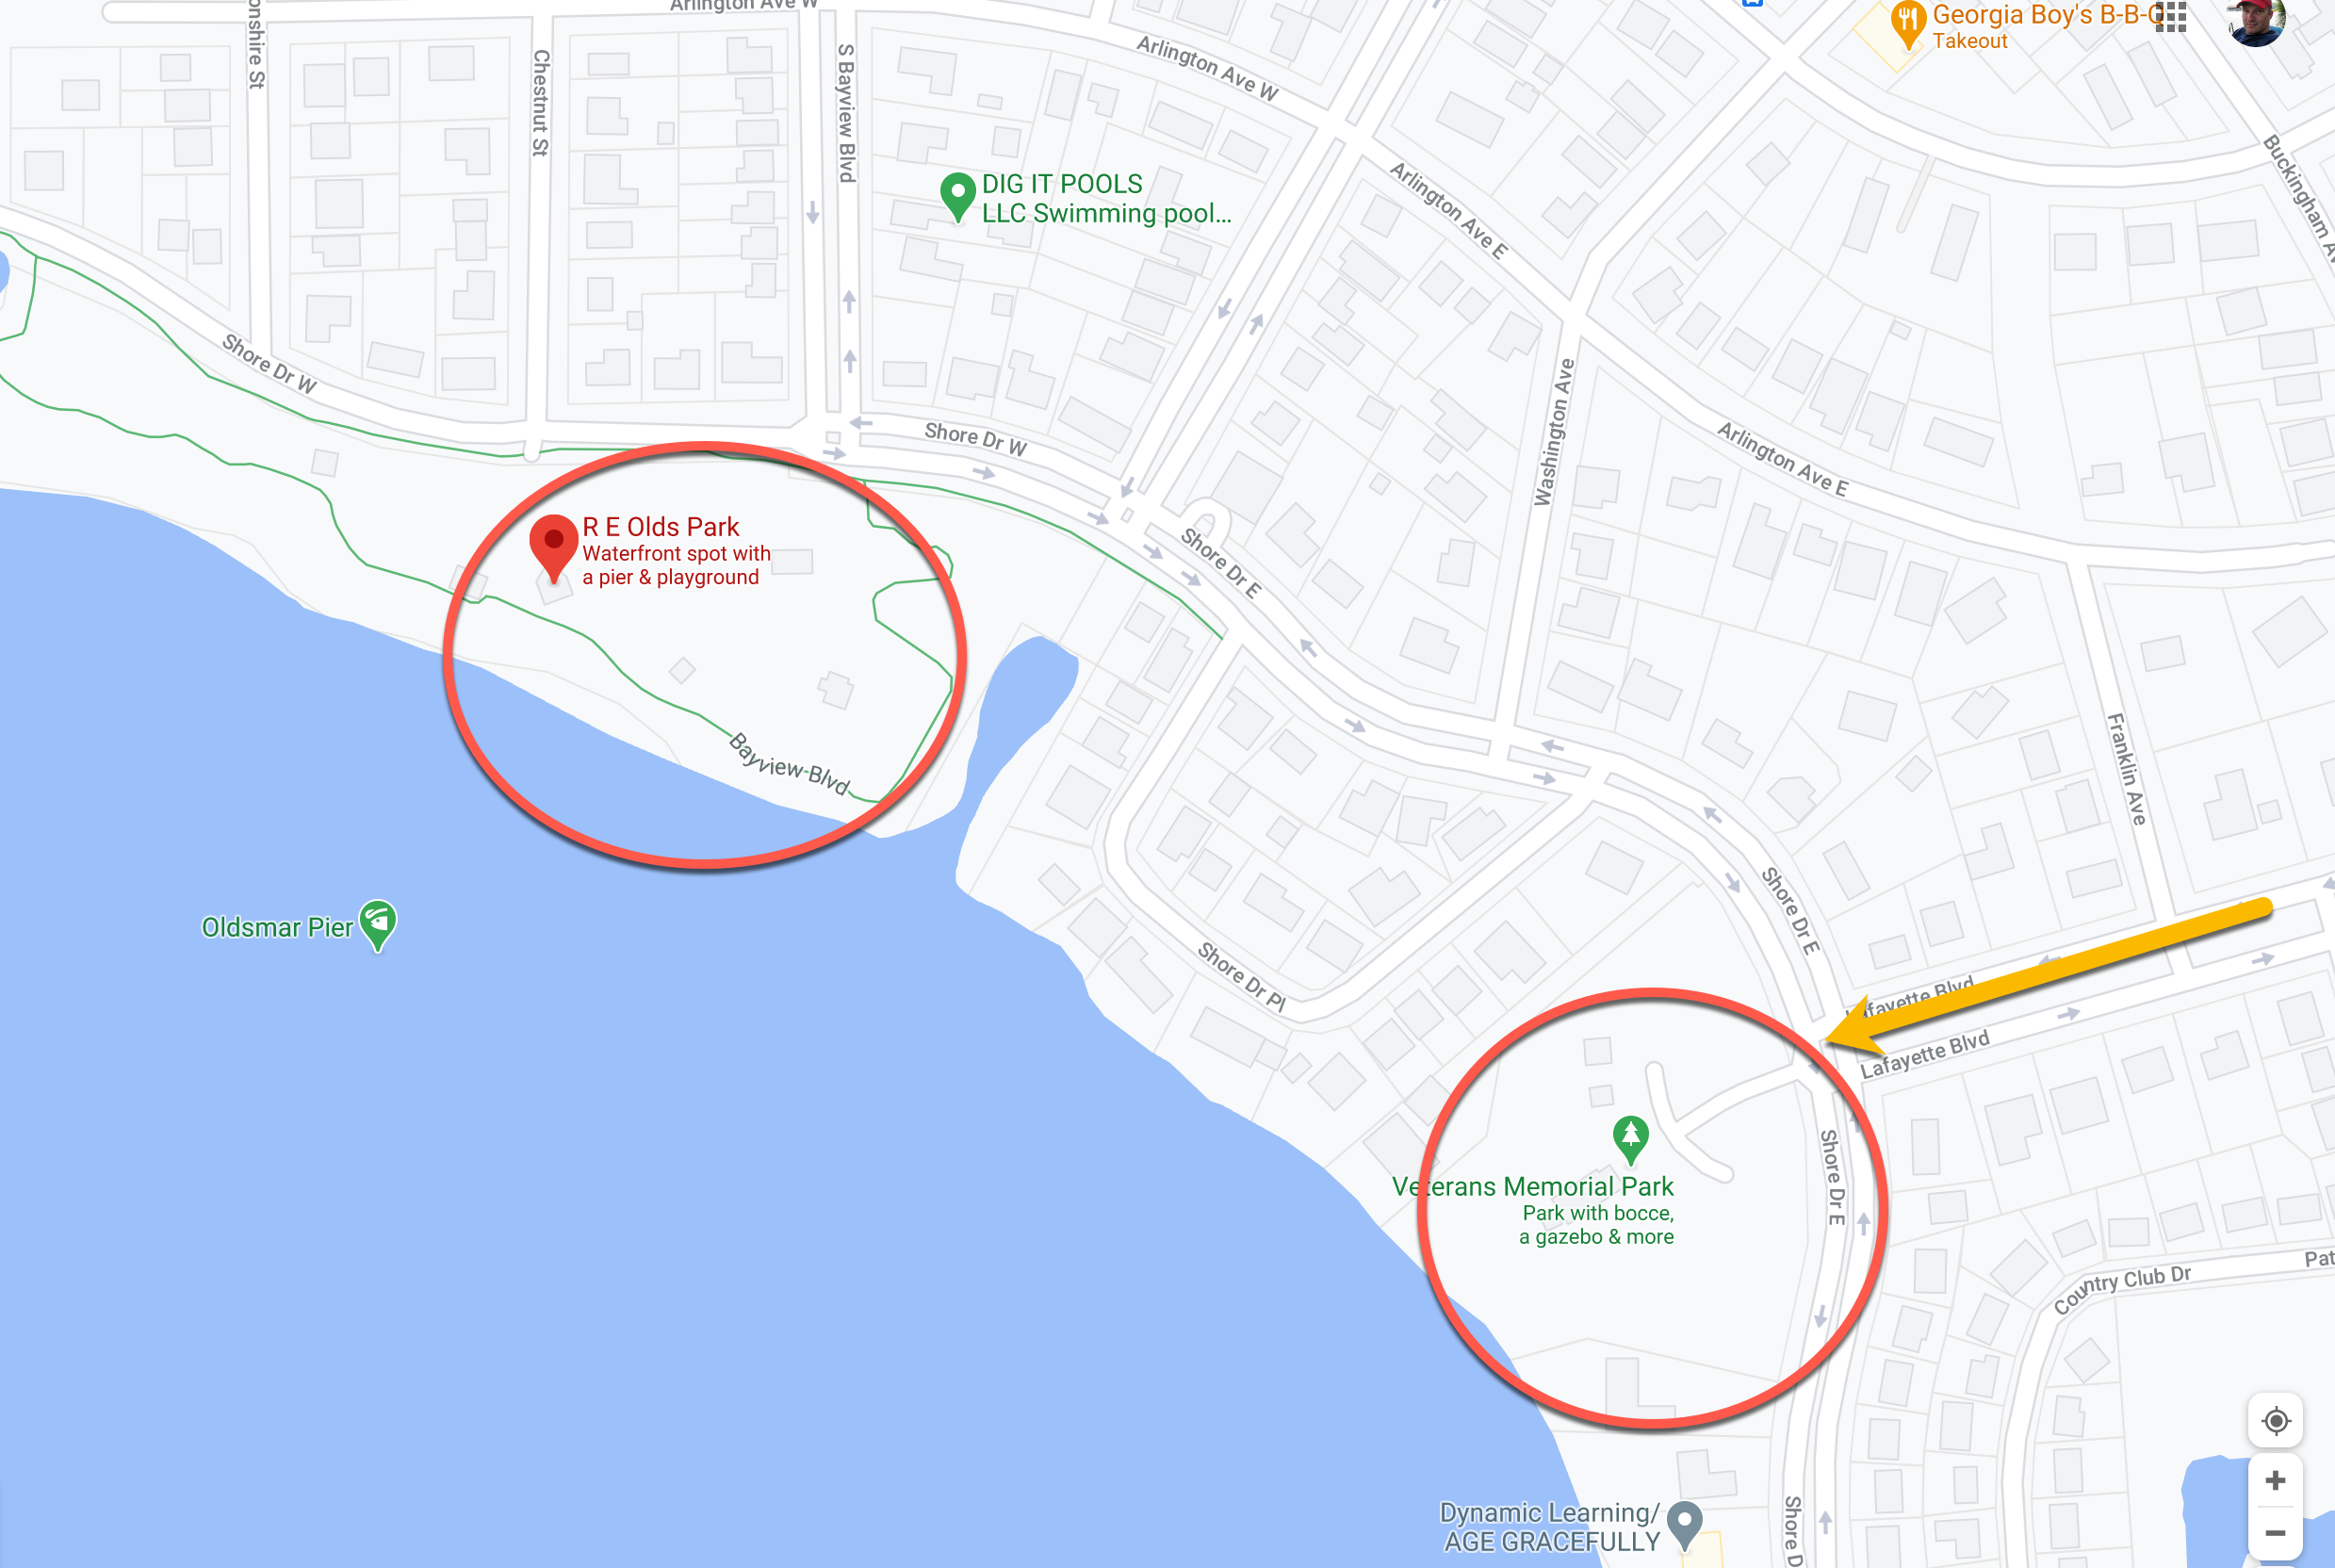
The parks themselves have plenty to offer - a lot of playgrounds for the kids, restrooms, pavilions and decent access to the water. The parking has always been safe, and the crowds have been pretty decent (although this is winter during a pandemic, so your mileage may vary). Once we park, we then have 3 major loops we can take depending on our mood. Each require some surface street walking, but will reward you with some very pleasant trails and access to even more parks and beaches!
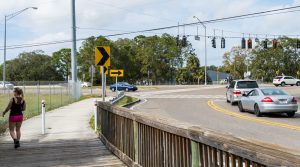
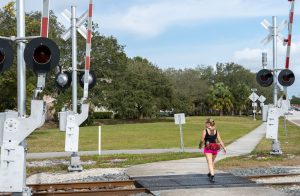
Lake Tarpon Canal Route
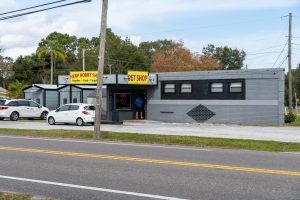
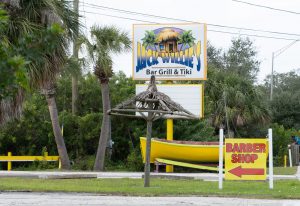
Our first route and probably favorite goes to the Lake Tarpon Canal and ultimately to the Oldsmar Sports complex/BMX park (shown as Canal Park on the map above). If you start at R.E. Olds Park, once you get through the park (which is a nice walk itself) you will then be on surface streets. Not too bad (you will pass the Herp shop, which sells reptiles), and Jack Willie's bar. Once you pass Jack Willies you have to cross 580 - be careful! The drivers here are crazy! Once you have crossed 580, go past the railroad track and look to your left - you will see the trailhead entrance.
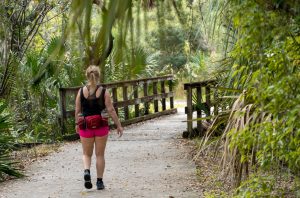
Some of the sights along the way!
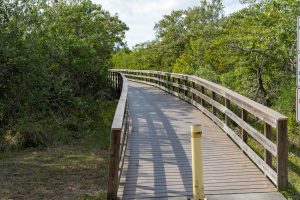
Once you're on the trail it's really nice! This takes you through Moccasin park which has a few dirt trails that you can explore. The main trail through here is paved and has well-maintained wooden bridges. After you walk this part of the trail, you will enter a residential street (3rd photo).
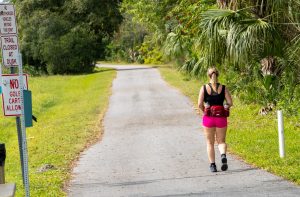

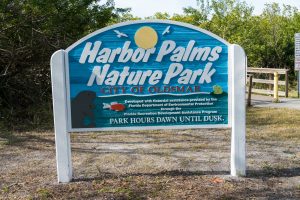
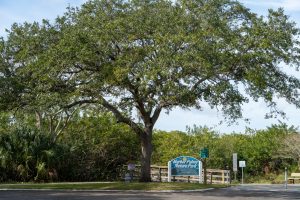
Walk down this street for about 10 minutes and you will make it to the Harbor Palms Nature Park trailhead.
This is the map to Sheffield park (click to expand):
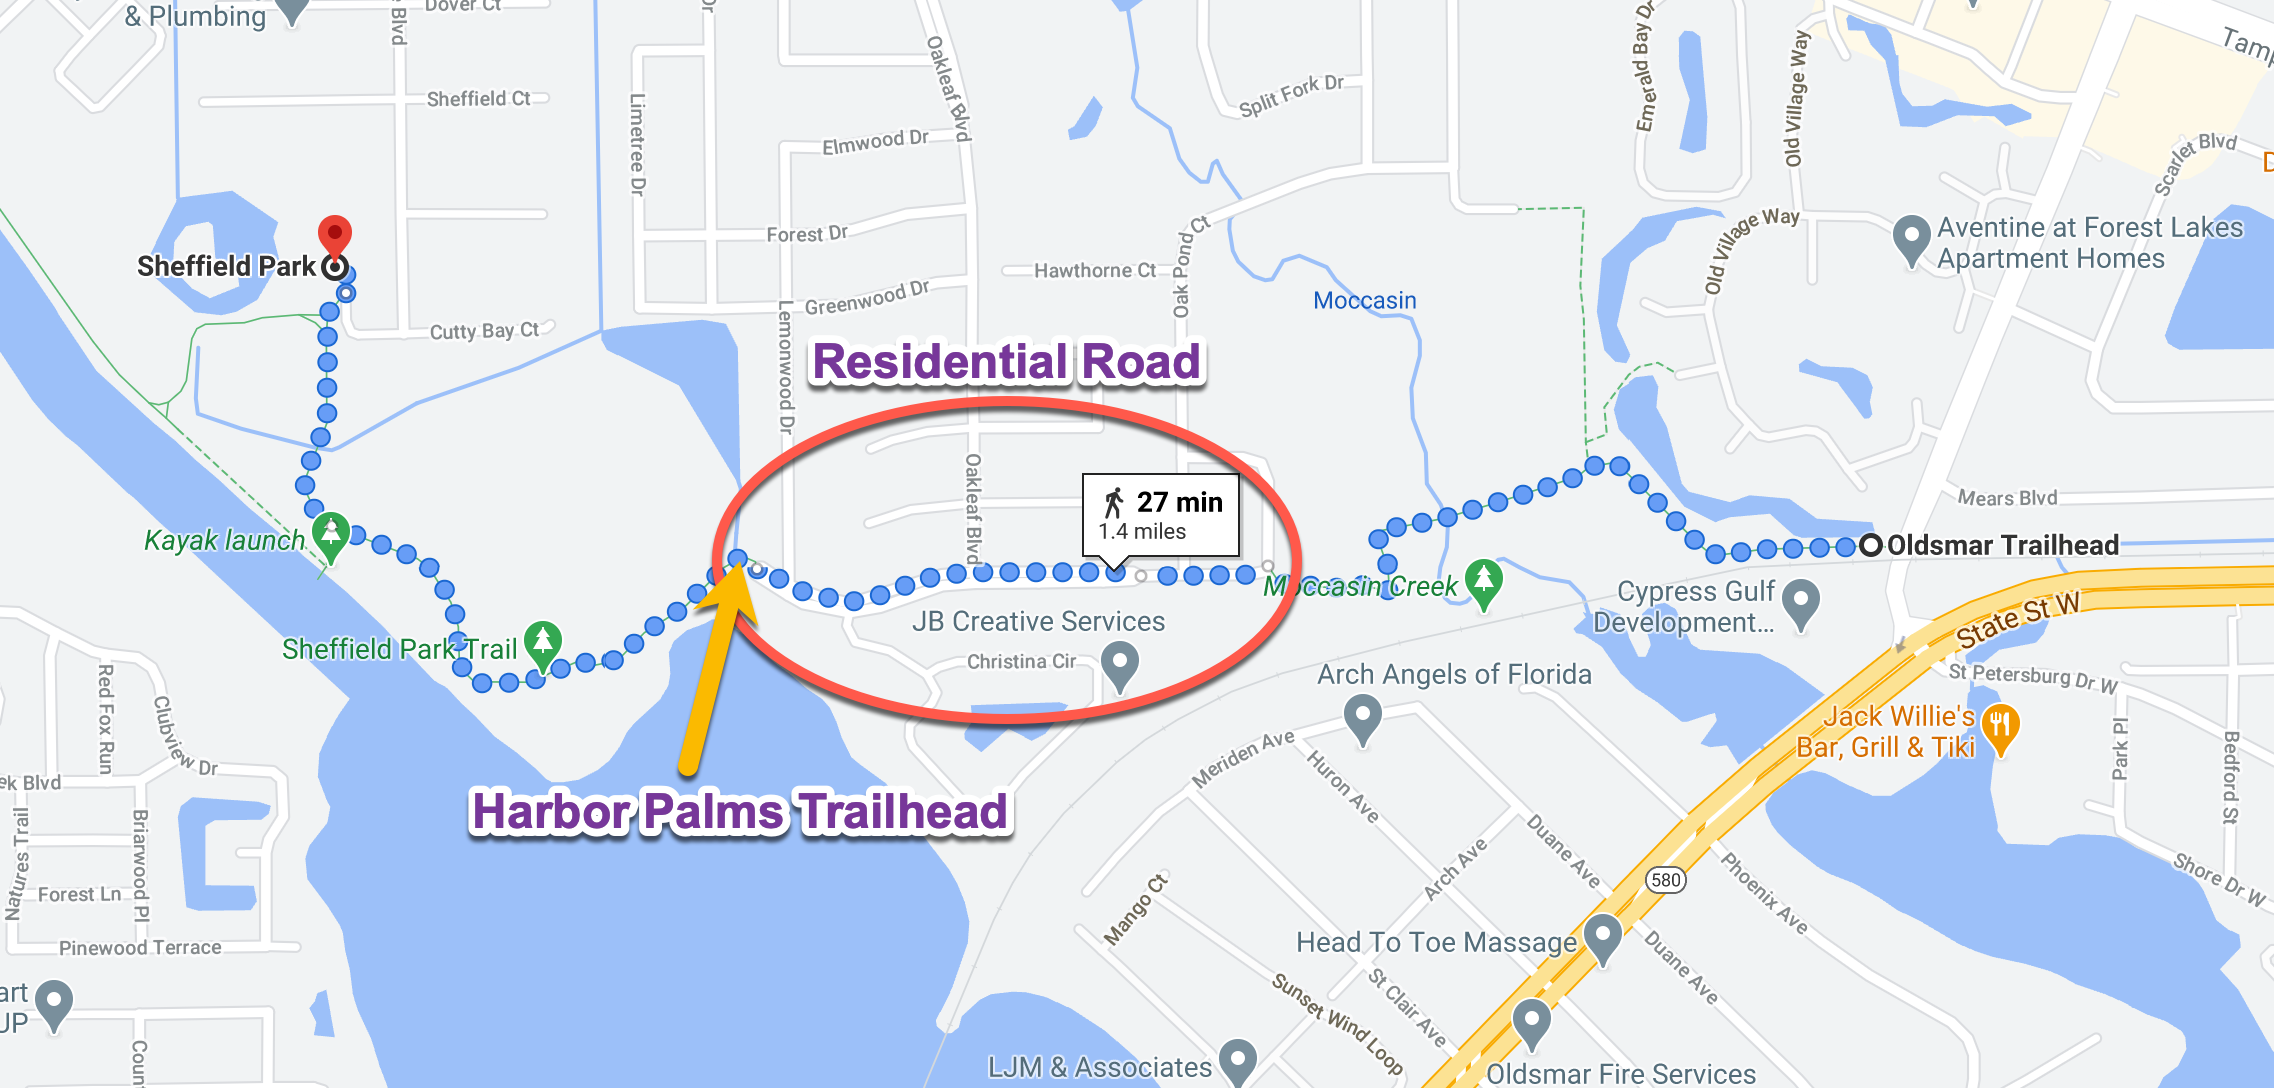
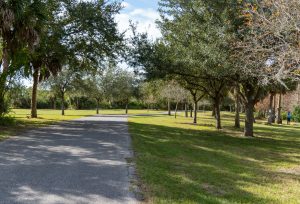
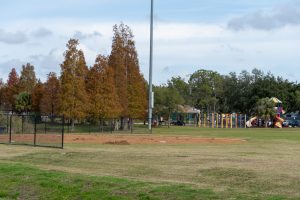
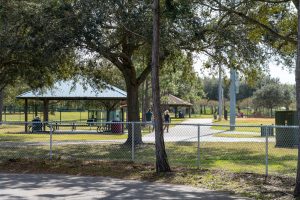
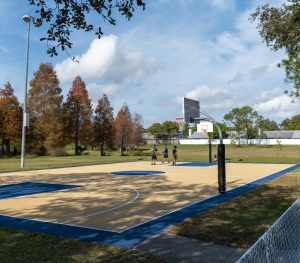
At the end of this section is Sheffield Park. The park has ball fields, basketball court, playground and a nice pavilion. Most importantly it has bathrooms! You are roughly at the 2.5 mile point if you start at R.E. Olds Park. So plan on at least a 5 mile hike if you make it to these bathrooms! There is also free parking available if you want to start from this park.
Mobely Beach Route
Cypress Park Route


